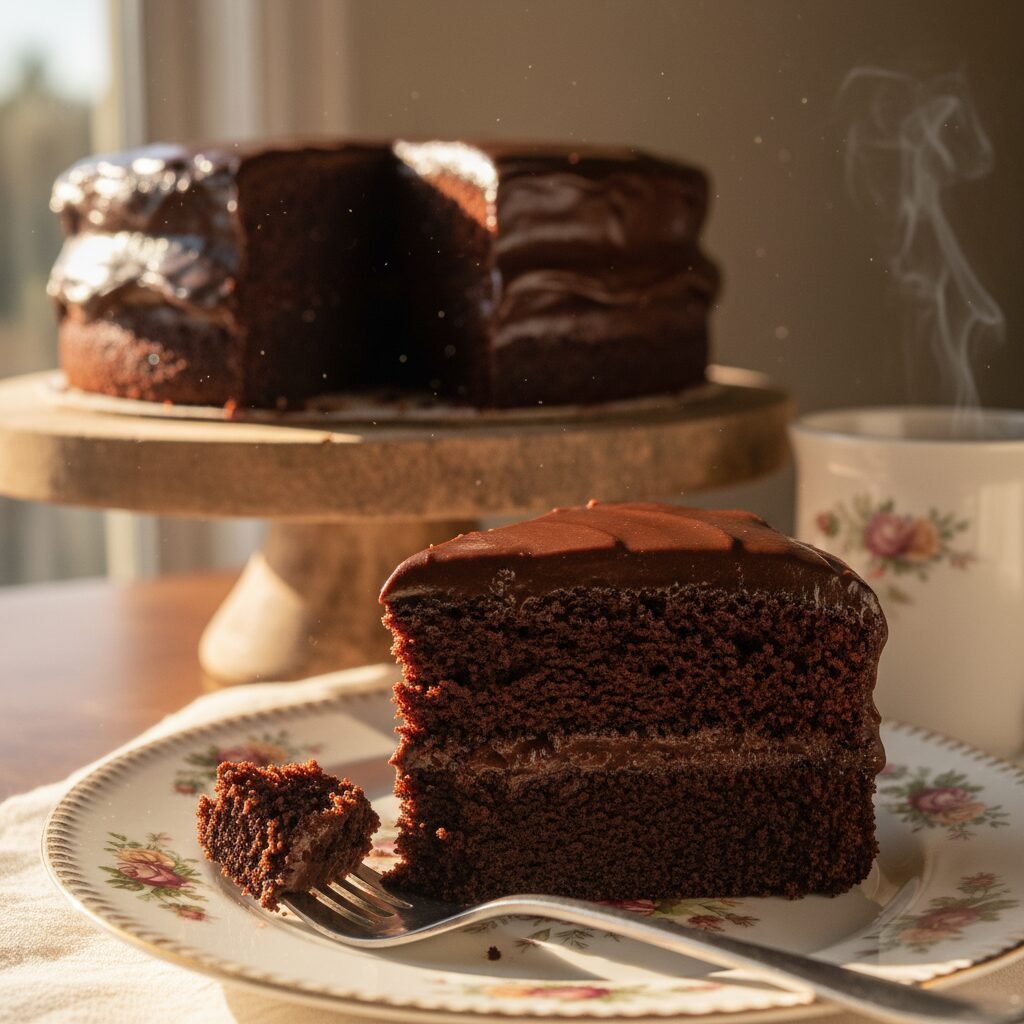
Moist Chocolate Birthday Cake With Coffee Recipe
This is the only chocolate cake recipe you will ever need. Infused with hot brewed coffee to intensify the cocoa flavor, this cake is impossibly moist, deeply rich, and perfect for birthdays. It stays soft for days and pairs perfectly with a creamy chocolate buttercream.
25 minutes
35 minutes
1 hour
12-14 Servings (Two 8-inch round cakes)
Dessert
Baking
American
Vegetarian
There is something undeniably magical about a homemade chocolate birthday cake. It is the centerpiece of celebration, a symbol of joy, and, let’s be honest, the part of the party everyone actually looks forward to. However, we have all been victims of the ‘dry cake’ tragedy—a slice that looks beautiful but crumbles into sawdust the moment your fork hits it. That ends today. This Moist Chocolate Birthday Cake with Coffee is the antidote to dry, flavorless desserts. It is dark, decadent, and possesses a crumb so tender it practically melts on your tongue.
The secret weapon here is coffee. Now, before non-coffee drinkers scroll away, let me clarify: this cake does not taste like a latte. The addition of hot coffee serves a specific chemical purpose. It ‘blooms’ the cocoa powder, releasing the essential oils trapped within the chocolate solids, which amplifies the chocolate flavor to its absolute limit. The result is a cake that tastes more like chocolate than chocolate itself.
Furthermore, this recipe relies on oil rather than butter for the batter. While butter provides a lovely flavor, it contains water which evaporates during baking, often leading to a drier texture if not watched like a hawk. Oil, being 100% fat, keeps the crumb incredibly moist and tender even days after baking. Whether you are a novice baker or a seasoned pro, this recipe is foolproof. It requires no stand mixer, just two bowls and a whisk, making it the perfect accessible luxury for your next special occasion.
History & Origins
The history of chocolate cake is a journey that mirrors the evolution of baking technology itself. While chocolate has been consumed as a beverage for thousands of years, dating back to the Olmecs, Mayans, and Aztecs, eating chocolate in solid form is a relatively modern concept. Until the mid-19th century, ‘chocolate cake’ usually referred to a yellow or white sponge cake covered in chocolate frosting, or served with a chocolate drink on the side.
The game changed in 1828 when Coenraad van Houten invented the cocoa press, which allowed for the extraction of cocoa butter and the creation of a fine cocoa powder. This inexpensive powder made it possible for home cooks to incorporate chocolate directly into the batter. However, the deep, dark chocolate cakes we know today didn’t truly gain popularity until the early 20th century. The term ‘Devil’s Food Cake’ appeared in print around 1902, distinguishing itself from the light and airy ‘Angel Food Cake’ due to its dark color and rich density.
The addition of coffee to chocolate cake became a popular ‘secret’ technique during the Great Depression and World War II. During times of rationing, bakers had to be ingenious. Milk and butter were scarce, so recipes like ‘Wacky Cake’ or ‘Depression Cake’ utilized hot water or coffee, vinegar, and baking soda to create a rise and moisture without dairy. Bakers quickly realized that using hot coffee instead of plain hot water added a complexity and depth to the cocoa that was unmatched. This technique survived long after rationing ended because the flavor profile was simply superior. Today, the marriage of coffee and chocolate is a cornerstone of high-end pastry, bridging the gap between historical necessity and modern indulgence.
Why This Recipe Works
This recipe succeeds where others fail due to three primary scientific principles: cocoa blooming, fat selection, and acidity balance.
First, the **blooming of the cocoa**. Cocoa powder is essentially dried vegetable matter containing starch and cocoa butter. By pouring boiling hot coffee over the cocoa powder (and the rest of the mixture), you dissolve the cocoa particles instantly. This heat releases the flavor compounds trapped in the starch, resulting in a more robust, three-dimensional chocolate taste. The hot liquid also helps to start dissolving the sugar before the cake even hits the oven, ensuring a uniform texture.
Second, the **fat selection**. As mentioned in the introduction, this recipe uses vegetable oil instead of butter. Butter is about 80% fat and 20% water. In the oven, that water creates steam and leaves the cake. Oil is 100% fat and remains liquid at room temperature. This means that when the cake cools, the fat stays fluid, coating the flour proteins and preventing the cake from feeling dry or starchy. This is why oil-based cakes are invariably moister than butter-based ones.
Third, the **acidity**. We use buttermilk and brown sugar. The acidity in the buttermilk reacts with the baking soda to create carbon dioxide gas, which gives the cake a glorious lift and a tender, airy crumb. The brown sugar adds moisture (due to molasses content) and a slight acidity that white sugar lacks, further tenderizing the gluten network.
Why You’ll Love This Recipe
- ✓Uses hot coffee to intensify chocolate flavor without adding coffee taste.
- ✓Oil-based batter ensures the cake stays moist for up to 5 days.
- ✓One-bowl method (mostly) that requires no electric mixer.
- ✓Perfect balance of sweetness and dark cocoa bitterness.
- ✓Sturdy enough for layering but tender enough to melt in your mouth.
- ✓Versatile batter that works for cupcakes, bundt cakes, or sheet cakes.
Equipment You’ll Need
- ✓Two 8-inch round cake pans
- ✓Parchment paper
- ✓Large mixing bowl
- ✓Medium mixing bowl
- ✓Wire whisk
- ✓Rubber spatula
- ✓Measuring cups and spoons
- ✓Wire cooling rack
Ingredients
- ✓2 cups granulated sugar
- ✓1 3/4 cups all-purpose flour
- ✓3/4 cup unsweetened cocoa powder (high quality preferred)
- ✓1 1/2 teaspoons baking powder
- ✓1 1/2 teaspoons baking soda
- ✓1 teaspoon salt
- ✓2 large eggs, room temperature
- ✓1 cup whole milk or buttermilk, room temperature
- ✓1/2 cup vegetable oil or canola oil
- ✓2 teaspoons pure vanilla extract
- ✓1 cup boiling hot strong brewed coffee
Instructions
- Preheat your oven to 350°F (175°C). Grease two 8-inch round cake pans with butter or cooking spray. Dust with cocoa powder (instead of flour to avoid white streaks) and line the bottoms with parchment paper.
- In a large mixing bowl, whisk together the sugar, flour, cocoa powder, baking powder, baking soda, and salt. Ensure there are no large lumps of cocoa powder.
- In a separate medium bowl, whisk together the eggs, buttermilk (or milk), vegetable oil, and vanilla extract until fully combined.
- Pour the wet ingredients into the dry ingredients. Using a whisk or a spatula, mix until just combined. Do not overmix at this stage.
- Carefully pour the boiling hot coffee into the batter. Whisk gently and steadily until combined. The batter will be very thin and liquidy—this is completely normal and exactly what you want.
- Divide the batter evenly between the two prepared cake pans. Tap the pans gently on the counter once or twice to release any large air bubbles.
- Bake for 30 to 35 minutes, or until a wooden toothpick inserted into the center comes out clean or with just a few moist crumbs attached.
- Remove the cakes from the oven and let them cool in the pans for about 10-15 minutes. This allows them to set up.
- Run a knife around the edges to loosen, then invert the cakes onto a wire cooling rack to cool completely before frosting.
- Once fully cooled, frost with your favorite chocolate buttercream, ganache, or cream cheese frosting.
Expert Cooking Tips
- ✓Do not skip the parchment paper. This cake is very moist and can stick to the bottom of the pan without it.
- ✓Use fresh baking soda and baking powder. If they are expired, the cake will not rise properly and will be dense.
- ✓Room temperature ingredients (eggs and buttermilk) emulsify better, creating a more uniform crumb.
- ✓Don’t worry about the thin batter. It will look like chocolate soup when you pour it in, but it bakes up perfectly.
- ✓If you don’t have buttermilk, make a substitute by adding 1 tablespoon of lemon juice or white vinegar to 1 cup of whole milk and letting it sit for 5 minutes.
- ✓For an even darker color, use ‘Dutch-processed’ cocoa powder, though standard natural cocoa works just fine.
- ✓Weigh your flour if possible. Too much flour is the main culprit for dry cake.
Substitutions and Variations
This recipe is quite forgiving with substitutions. If you are avoiding caffeine, decaf coffee works perfectly fine—the goal is the hot liquid and the roasted flavor profile, not the caffeine buzz. If you absolutely dislike coffee, you can substitute it with boiling water, though the chocolate flavor will be slightly less intense. For a dairy-free version, swap the buttermilk for almond milk mixed with a teaspoon of vinegar, or use a dairy-free yogurt thinned with a little water. You can replace the vegetable oil with melted coconut oil, but ensure all other ingredients are room temperature so the oil doesn’t solidify instantly. For a gluten-free version, use a high-quality 1-to-1 gluten-free all-purpose flour blend that contains xanthan gum.
Common Mistakes to Avoid
The most common mistake is overbaking. Because the cake is dark, you can’t rely on visual browning cues. Start checking at the 30-minute mark. If you bake it until it feels firm like a sponge cake, it is likely overdone. Another mistake is overmixing after adding the flour. Once the wet and dry ingredients meet, gluten starts to form. If you whisk too vigorously, you’ll end up with a tough, rubbery cake rather than a tender one. Finally, do not try to frost the cake while it is even slightly warm. The heat will melt the butter in your frosting, causing the layers to slide off each other in a delicious but disastrous mess.
Serving Suggestions
This cake is rich, so it pairs beautifully with something that cuts through the sweetness. A scoop of vanilla bean ice cream is classic. For a sophisticated twist, serve it with a dollop of unsweetened whipped cream and fresh raspberries or strawberries. The tartness of the berries balances the deep chocolate notes. If you are serving this for a birthday, a classic Chocolate Buttercream is the standard, but a Swiss Meringue Buttercream offers a lighter, silkier texture that makes the cake feel lighter to eat. A glass of cold milk or a hot espresso is the perfect beverage accompaniment.
Storage and Reheating Tips
Because this cake uses oil, it has excellent shelf life. It can be stored at room temperature in an airtight cake carrier for up to 4 days without drying out. If you have cut the cake, press a piece of plastic wrap directly against the exposed crumb to keep it moist. For longer storage, you can freeze the cake layers (unfrosted) for up to 3 months. Wrap each layer tightly in plastic wrap, then in aluminum foil. Thaw overnight in the refrigerator before frosting. If the cake is already frosted, you can freeze individual slices in airtight containers for a quick treat later.
Nutrition Facts (Estimated)
| Serving Size | 1 Slice |
| Calories | 580 |
| Fat | 32g |
| Saturated Fat | 9g |
| Unsaturated Fat | 21g |
| Trans Fat | 0g |
| Cholesterol | 65mg |
| Sodium | 320mg |
| Carbohydrates | 72g |
| Fiber | 4g |
| Sugar | 45g |
| Protein | 6g |
Frequently Asked Questions
Can I taste the coffee in the finished cake?
No, you cannot taste a distinct coffee flavor. The coffee enhances the chocolate, making it taste richer and ‘darker’. If you want a mocha flavor, you would need to add espresso powder to the frosting.
Can I make this recipe as cupcakes?
Absolutely. This batter makes excellent cupcakes. Line a muffin tin with papers and fill them about 2/3 full. Bake at 350°F for 18-22 minutes. It should yield about 24-28 cupcakes.
Why is my batter so runny?
This is intentional! The high liquid content (milk + oil + coffee) ensures the cake stays moist during the baking process. The flour will hydrate and the eggs will set the structure as it bakes.
Can I use instant coffee?
Yes. Mix 1 to 2 teaspoons of instant coffee granules into 1 cup of boiling water. This works just as well as brewed coffee.
My cake sank in the middle. What happened?
This usually happens if the oven door was opened too early, causing a temperature drop before the structure set. It can also happen if there was too much leavening (baking soda/powder) or if the batter sat out too long before going into the oven.
Can I use olive oil instead of vegetable oil?
You can, but olive oil has a strong flavor that might clash with the chocolate unless you use a ‘light’ or ‘mild’ olive oil. Stick to neutral oils like canola, vegetable, or grapeseed for the best results.
Do I have to use boiling liquid?
Yes, the heat is crucial for ‘blooming’ the cocoa powder. It helps dissolve the cocoa butter and eliminates any gritty texture, ensuring a smooth, velvety crumb.
How do I prevent the cake from sticking to the pan?
Parchment paper is the only 100% guarantee. While greasing and dusting with cocoa powder helps the sides, a circle of parchment at the bottom is essential for a clean release.
Can I use this recipe for a bundt cake?
Yes, but grease the bundt pan extremely well. Bake at 350°F for 45-55 minutes. Check with a long skewer to ensure the center is cooked through.
Conclusion
In the world of baking, finding the ‘perfect’ recipe can feel like a never-ending quest, but this Moist Chocolate Birthday Cake with Coffee truly deserves the title. It balances scientific precision with home-baked comfort, delivering a result that feels professional yet requires minimal effort. Whether you are celebrating a milestone birthday, a holiday, or just a Tuesday that needs a little extra joy, this cake delivers. The depth of flavor provided by the coffee, combined with the stay-fresh texture from the oil, makes it a recipe you will pass down for generations. So boil that kettle, grab your whisk, and prepare to bake the best chocolate cake of your life.

