Moist Chocolate Fudge Cake With Buttermilk Recipe
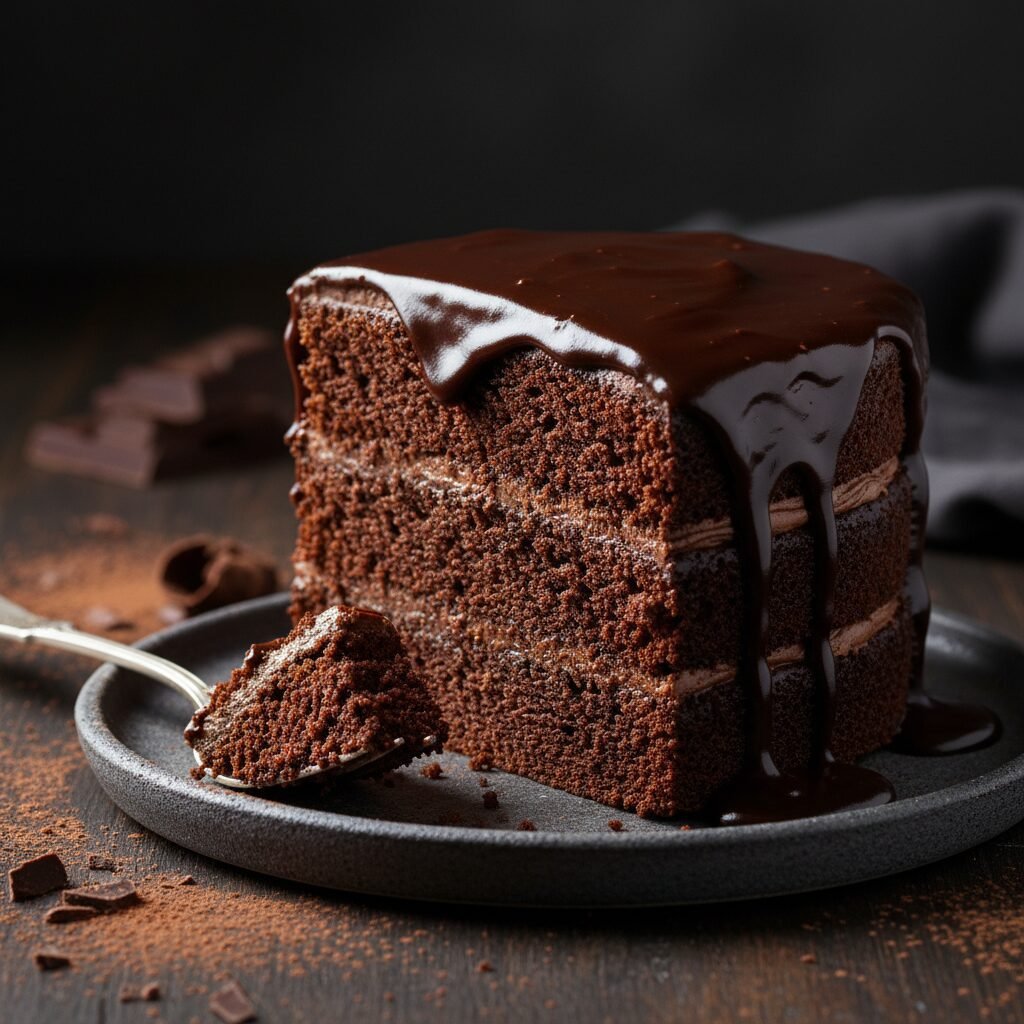
Experience the deepest, darkest, and most decadent dessert with this Moist Chocolate Fudge Cake. Using buttermilk for an impossibly tender crumb and hot coffee to bloom the cocoa, this recipe delivers a melt-in-your-mouth texture that is surprisingly easy to make.
20 minutes
35 minutes
55 minutes
12-14 servings
Dessert
Baking
American
Vegetarian
There are few things in the culinary world as universally comforting and celebrated as a slice of perfect chocolate cake. However, finding that ‘perfect’ recipe—one that balances intense chocolate flavor with a texture that is neither too dense nor too airy—can be a lifelong quest for many home bakers. This Moist Chocolate Fudge Cake with Buttermilk is the end of that search. It is a cake that defies the dry, crumbly stereotypes of lesser recipes, offering instead a luscious, velvety crumb that stays moist for days. The magic of this cake lies not just in its rich flavor profile, which manages to be sweet without being cloying, but in its luxurious mouthfeel. It bridges the gap between a classic Devil’s Food cake and a dense fudge brownie, creating a hybrid experience that satisfies every craving. Whether you are celebrating a milestone birthday, hosting a sophisticated dinner party, or simply treating yourself after a long week, this cake commands attention. The inclusion of buttermilk brings a subtle tang that cuts through the richness of the cocoa, while the use of oil instead of butter ensures the crumb remains soft even straight from the refrigerator. This is not just a recipe; it is a reliable companion for all of life’s celebrations, promising consistent, bakery-quality results from your own kitchen. Prepare to fall in love with baking all over again as the aroma of blooming cocoa fills your home.
History & Origins
The history of chocolate cake is a fascinating evolution of ingredients and technology. In the early American colonies, chocolate was primarily consumed as a beverage. It wasn’t until 1764, when Dr. James Baker discovered how to grind cocoa beans between massive circular millstones, that chocolate became more accessible for cooking. However, the ‘chocolate cake’ of the early 19th century was vastly different from what we know today; it was typically a yellow or white cake served with chocolate frosting, or a beverage served alongside cake. The turning point came in the late 1800s with the widespread availability of cocoa powder and the refinement of chemical leaveners like baking soda and baking powder. This era gave birth to the ‘Devil’s Food Cake,’ named for its reddish hue caused by the reaction between non-alkalized cocoa powder and baking soda, and its richness, which was considered ‘sinful’ compared to the virtuous Angel Food Cake. The addition of buttermilk or sour milk was a practical necessity in early American farm kitchens, utilized to activate the baking soda before consistent baking powders were available. Over the decades, as vegetable oils became a pantry staple in the mid-20th century, bakers realized that oil-based cakes retained moisture far better than their butter-based counterparts, leading to the ultra-moist fudge cakes we adore today. This specific recipe honors that lineage, combining the traditional tang of Southern buttermilk baking with modern techniques to maximize moisture and flavor depth.
Why This Recipe Works
This recipe succeeds where others fail due to a precise balance of acidity, fat, and temperature. First and foremost, the use of buttermilk is non-negotiable. Buttermilk is acidic, and when it interacts with the baking soda, it creates carbon dioxide gas, which gives the cake its lift. But beyond the rise, that acid breaks down long strands of gluten in the flour, resulting in a significantly more tender crumb than regular milk could achieve. Secondly, we use vegetable oil instead of butter. While butter provides flavor, it is 80% fat and 20% water, and it solidifies at room temperature. Oil is 100% fat and remains liquid at room temperature (and in the fridge), meaning your cake feels moist and soft on the palate rather than dry or waxy. Third, the addition of boiling hot coffee is a game-changer. The heat ‘blooms’ the cocoa powder, dissolving the particles completely and releasing the essential oils trapped within the cocoa solids. This amplifies the chocolate flavor intensity without adding bitterness. The coffee itself doesn’t make the cake taste like a mocha latte; rather, it deepens the cocoa profile, making the chocolate taste more like itself. Finally, the batter is intentionally thin, allowing the flour to fully hydrate before it hits the oven, ensuring a uniform, fudgy texture.
Why You’ll Love This Recipe
- ✓Uses hot coffee to bloom cocoa for intense chocolate flavor.
- ✓Oil-based batter ensures the cake stays moist for days.
- ✓Buttermilk tenderizes the gluten for a soft, velvety crumb.
- ✓One-bowl mixing method reduces cleanup time.
- ✓Versatile enough for layer cakes, sheet cakes, or cupcakes.
- ✓Pairs perfectly with ganache, buttercream, or cream cheese frosting.
Equipment You’ll Need
- ✓Two 9-inch round cake pans
- ✓Large mixing bowl
- ✓Whisk or electric hand mixer
- ✓Sifter or fine-mesh sieve
- ✓Measuring cups and spoons
- ✓Parchment paper
- ✓Wire cooling rack
Ingredients
- ✓2 cups all-purpose flour
- ✓2 cups granulated sugar
- ✓3/4 cup unsweetened cocoa powder (Dutch-processed preferred)
- ✓2 teaspoons baking soda
- ✓1 teaspoon baking powder
- ✓1 teaspoon salt
- ✓1 cup buttermilk, room temperature
- ✓1/2 cup vegetable oil (or canola oil)
- ✓2 large eggs, room temperature
- ✓2 teaspoons pure vanilla extract
- ✓1 cup freshly brewed hot coffee (or boiling water)
Instructions
- Preheat your oven to 350°F (175°C). Grease two 9-inch round cake pans with butter or cooking spray and line the bottoms with parchment paper. Dust the sides with a little cocoa powder to prevent sticking.
- In a large mixing bowl, sift together the flour, sugar, cocoa powder, baking soda, baking powder, and salt. Whisk gently to ensure the dry ingredients are evenly combined.
- In a separate medium bowl, whisk together the buttermilk, vegetable oil, eggs, and vanilla extract until well blended.
- Pour the wet ingredient mixture into the dry ingredients. Using a mixer on low speed or a sturdy whisk, mix until just combined. Do not overmix at this stage.
- Slowly pour in the hot coffee (or boiling water) while whisking gently. The batter will be very thin and liquid; this is completely normal and essential for the moist texture.
- Divide the batter evenly between the two prepared cake pans. Tap the pans gently on the counter to release any large air bubbles.
- Bake in the center of the preheated oven for 30 to 35 minutes. Test for doneness by inserting a wooden toothpick into the center of the cake; it should come out clean or with just a few moist crumbs attached.
- Remove the cakes from the oven and let them cool in the pans for about 10-15 minutes. This allows the structure to set.
- Run a knife around the edges to loosen, then invert the cakes onto a wire rack to cool completely before frosting. Do not attempt to frost while warm, or the frosting will melt.
Expert Cooking Tips
- ✓Use Room Temperature Ingredients: Ensure your eggs and buttermilk are at room temperature to allow for better emulsification of the batter.
- ✓Don’t Skip the Sifting: Cocoa powder is notorious for clumping. Sifting ensures a smooth batter without pockets of bitter dry powder.
- ✓Quality Matters: Since chocolate is the main flavor, use the highest quality cocoa powder you can find. Dutch-processed cocoa yields a darker, fudgier cake.
- ✓Weigh Your Flour: If possible, use a kitchen scale. If using cups, spoon the flour into the cup and level it off to avoid packing it down, which leads to a dry cake.
- ✓Don’t Overbake: Start checking the cake at the 30-minute mark. Overbaking is the number one cause of dry cake.
- ✓The Toothpick Test: For a fudge cake, the toothpick shouldn’t be bone dry; a few moist crumbs indicate perfection.
- ✓Cool Completely: This cake is very tender when warm. Cooling it completely makes it easier to handle and frost.
Substitutions and Variations
This recipe is quite resilient, but substitutions should be made carefully to maintain the texture. If you do not have buttermilk, you can make a DIY sour milk by adding one tablespoon of white vinegar or lemon juice to a cup of regular whole milk and letting it sit for 5 minutes until it curdles. For the oil, melted coconut oil or melted butter can be used, though melted butter may result in a slightly drier texture once the cake is refrigerated. If you want to avoid caffeine, you can substitute the hot coffee with boiling water; you will lose a bit of the depth of flavor, but the texture will remain the same. For a gluten-free version, substitute the all-purpose flour with a high-quality 1:1 gluten-free baking flour blend that includes xanthan gum. If you only have natural cocoa powder instead of Dutch-processed, the cake will still work but will be lighter in color and slightly more acidic.
Common Mistakes to Avoid
The most common mistake with this cake is over-baking. Because the batter is dark, it is hard to see visual cues of browning. Rely on the toothpick test and trust the timing. Another frequent error is using cold ingredients. Cold eggs and buttermilk can shock the batter and prevent proper emulsification, leading to an uneven rise. Many bakers also panic when they see how thin the batter is after adding the coffee—do not add more flour! The thin batter is necessary for the steam generation that keeps the cake moist. Lastly, attempting to remove the cake from the pan too soon can cause it to break apart; the crumb is very delicate when hot, so patience during the cooling phase is critical.
Serving Suggestions
This rich cake pairs beautifully with a variety of toppings. A classic chocolate ganache or a fluffy chocolate buttercream are the standard choices. For a contrast in flavor, try a tangy cream cheese frosting or a Swiss meringue buttercream. Serve slices with a side of fresh raspberries or strawberries to cut through the richness. A scoop of high-quality vanilla bean ice cream or a dollop of lightly sweetened whipped cream is also excellent. If serving at a dinner party, a dusting of powdered sugar and a drizzle of salted caramel sauce can elevate the presentation.
Storage and Reheating Tips
This cake stores exceptionally well due to its oil content. An unfrosted cake can be wrapped tightly in plastic wrap and kept at room temperature for up to 2 days. Once frosted, it should be stored in an airtight container; it can stay at room temperature for 2 days (depending on the frosting type) or in the refrigerator for up to 5 days. If refrigerating, let the cake come to room temperature before serving for the best texture. For long-term storage, wrap individual layers or slices in plastic wrap followed by aluminum foil and freeze for up to 3 months. Thaw in the refrigerator overnight before serving.
Nutrition Facts (Estimated)
| Serving Size | 1 slice |
| Calories | 480 |
| Fat | 24g |
| Saturated Fat | 6g |
| Unsaturated Fat | 16g |
| Trans Fat | 0g |
| Cholesterol | 45mg |
| Sodium | 320mg |
| Carbohydrates | 62g |
| Fiber | 4g |
| Sugar | 35g |
| Protein | 6g |
Frequently Asked Questions
Can I make this cake ahead of time?
Yes, absolutely. In fact, the flavor and moisture often improve the next day. You can bake the layers, wrap them tightly in plastic wrap once cool, and frost them the following day.
Why did my cake sink in the middle?
Sinking usually happens if the oven door was opened too early, causing a sudden temperature drop, or if the leavening agents (baking soda/powder) were expired. It can also happen if the cake was underbaked.
Can I use this recipe for cupcakes?
Yes! This recipe makes wonderful cupcakes. Fill liners about 2/3 full and bake for 18-22 minutes at 350°F. It should yield about 24 standard cupcakes.
Do I really need to use coffee?
You don’t strictly have to, but it is highly recommended. The coffee enhances the chocolate flavor without making the cake taste like coffee. Boiling water is the best substitute if you must avoid it.
Can I use cake flour instead of all-purpose flour?
It is not recommended for this specific recipe. Cake flour is very light and, combined with the tenderizing buttermilk and oil, might make the structure too weak to hold up, causing it to collapse.
Is it necessary to use both baking powder and baking soda?
Yes. The baking soda reacts with the acidic buttermilk and cocoa to provide lift and neutralize acidity, while the baking powder provides additional leavening to ensure a fluffy texture.
My batter seems too runny, should I add flour?
No! Resist the urge to add flour. The batter is supposed to be very thin and liquid. This hydration is what creates the super moist, fudgy texture after baking.
Can I bake this in a 9×13 pan?
Yes, this recipe fits perfectly in a 9×13 inch rectangular pan. You will likely need to increase the baking time to 35-45 minutes.
Why is my cake reddish in color?
This is a chemical reaction between the cocoa powder and the baking soda. It is actually the origin of the name ‘Devil’s Food Cake’ and is completely normal and desirable.
Conclusion
Mastering this Moist Chocolate Fudge Cake with Buttermilk is a milestone for any home baker. It proves that you do not need complicated techniques or obscure ingredients to produce a dessert that rivals high-end bakeries. The combination of simple science—acidic buttermilk, blooming hot coffee, and moisture-retaining oil—results in a cake that is consistently praised as ‘the best ever’ by anyone who tastes it. Whether you cover it in sprinkles for a child’s birthday or coat it in glossy ganache for an elegant finish, this cake provides the perfect canvas for your culinary creativity. We hope this recipe becomes a cherished staple in your recipe box, bringing joy and chocolatey comfort to your kitchen for years to come. Don’t forget to pin this recipe to your favorite dessert board!

