Moist Chocolate Fudge Cake For Three Layers Recipe
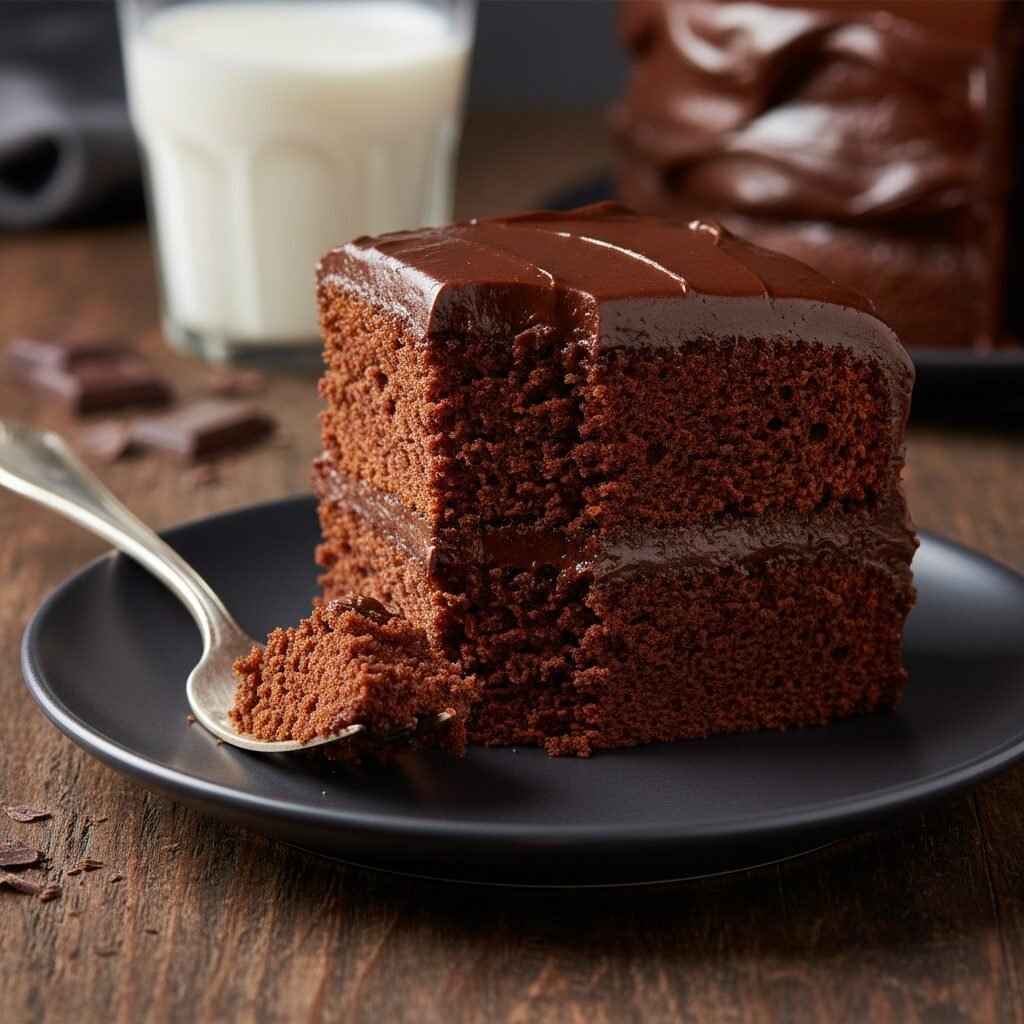
This is the definitive recipe for a show-stopping, three-layer chocolate fudge cake that stays incredibly moist for days. Featuring a deep, dark chocolate crumb and a luxurious fudge frosting, it is the perfect centerpiece for birthdays, holidays, and serious chocolate cravings.
35 minutes
35 minutes
1 hour 40 minutes
12-16 servings
Dessert
Baking
American
Vegetarian
There are chocolate cakes, and then there are chocolate experiences. This Moist Chocolate Fudge Cake for Three Layers falls squarely into the latter category. If you have ever been disappointed by dry, crumbly sponges or frosting that tastes more like sugar than cocoa, this recipe is your redemption. We have engineered this cake to be the absolute pinnacle of texture and flavor, combining the tenderness of a high-ratio oil cake with the structural integrity needed to stack three glorious layers high. The secret lies in the balance of ingredients: the acidity of buttermilk, the richness of high-quality cocoa powder, and a specific mixing method that ensures a tender crumb every single time. As you bake this, your kitchen will fill with the intoxicating aroma of warm chocolate, reminiscent of the best bakery windows in Paris or New York. But unlike bakery cakes that often sit out too long, this homemade masterpiece delivers a freshness and moisture level that is simply unmatched. Whether you are celebrating a milestone birthday, hosting a festive dinner party, or simply believe that Tuesday night deserves a slice of heaven, this cake delivers. It is dark, it is decadent, and it demands a tall glass of cold milk. Prepare to ruin yourself for all other chocolate cakes, because once you have tasted a slice of this triple-layered fudge perfection, there is no going back.
History & Origins
The history of chocolate cake is a fascinating journey that mirrors the evolution of chocolate processing itself. While chocolate has been consumed as a beverage by Mesoamerican civilizations for thousands of years, the concept of a solid chocolate cake is a relatively modern invention. Up until the mid-19th century, chocolate was primarily a drink for the wealthy. It wasn’t until 1828, when Coenraad van Houten of the Netherlands invented the cocoa press, that fat could be separated from the roasted cacao beans to create a dry cocoa powder. This invention was pivotal, making chocolate affordable and accessible for baking. However, early ‘chocolate cakes’ were actually yellow or white cakes served with chocolate frosting. It wasn’t until 1886 that cooks began adding chocolate directly into the batter. The famous ‘Devil’s Food Cake’ emerged in the early 20th century, named for its reddish hue caused by the chemical reaction between natural cocoa powder and baking soda, as well as its ‘sinfully’ rich taste compared to the angelic white sponge cakes of the era. As the 20th century progressed, the introduction of dutch-processed cocoa and the availability of baking chocolate led to darker, fudgier iterations. The ‘Fudge Cake’ specifically gained popularity in the post-war era of the 1950s and 60s, where convenience and decadence merged. American home bakers sought recipes that mimicked the dense, candy-like texture of fudge, leading to the incorporation of oil and boiling water—techniques still used in this recipe today to achieve that signature moisture. This three-layer version is a tribute to that history, combining the height and elegance of a Victorian layer cake with the dense, moist texture that modern palates crave.
Why This Recipe Works
This recipe succeeds where many others fail due to the precise chemistry of its ingredients. First and foremost, we use oil instead of butter for the cake batter. While butter adds flavor, it is roughly 20% water and solidifies at room temperature, which can lead to a dry or dense texture once the cake cools. Oil, being 100% fat and liquid at room temperature, coats the flour proteins more thoroughly, inhibiting gluten formation and ensuring the cake remains soft and moist for days. Secondly, the inclusion of boiling hot coffee is a game-changer. The heat ‘blooms’ the cocoa powder, breaking down its exterior shell to release a more intense chocolate flavor while simultaneously dissolving the sugar completely before baking. The coffee itself enhances the chocolate notes without making the cake taste like a latte. Thirdly, we use both baking powder and baking soda. The baking soda reacts immediately with the acidity of the buttermilk and brown sugar to create tenderizing bubbles, while the baking powder provides a second lift in the oven, ensuring your three layers rise tall and flat rather than doming excessively. Finally, the combination of white and brown sugar provides not just sweetness, but moisture; the molasses in the brown sugar is hygroscopic, meaning it attracts and holds water, further guaranteeing a fudge-like consistency.
Why You’ll Love This Recipe
- ✓Stays moist for up to 4 days without drying out.
- ✓Deep, intense chocolate flavor enhanced by hot coffee.
- ✓Sturdy enough for three layers but tender to the bite.
- ✓Uses oil for superior texture compared to butter-based sponges.
- ✓Frosting is a glossy, rich fudge buttercream that is easy to spread.
Equipment You’ll Need
- ✓Three 8-inch round cake pans
- ✓Electric Stand Mixer or Hand Mixer
- ✓Large mixing bowls
- ✓Wire cooling rack
- ✓Parchment paper
- ✓Offset spatula
- ✓Kitchen scale
- ✓Sifter
Ingredients
- ✓3 cups (375g) All-purpose flour
- ✓3 cups (600g) Granulated sugar
- ✓1 1/2 cups (135g) Unsweetened cocoa powder (Dutch-processed preferred)
- ✓1 tablespoon Baking soda
- ✓1 1/2 teaspoons Baking powder
- ✓1 1/2 teaspoons Salt
- ✓4 large Eggs, room temperature
- ✓1 1/2 cups (360ml) Buttermilk, room temperature
- ✓1 1/2 cups (360ml) Warm water or hot strong coffee
- ✓1/2 cup (120ml) Vegetable oil or Canola oil
- ✓2 teaspoons Vanilla extract
- ✓1 1/2 cups (340g) Unsalted butter, softened (for frosting)
- ✓1 cup (90g) Cocoa powder (for frosting)
- ✓5 cups (600g) Powdered sugar (for frosting)
- ✓1/2 cup (120ml) Heavy cream (for frosting)
- ✓1 teaspoon Vanilla extract (for frosting)
- ✓Pinch of salt (for frosting)
Instructions
- Preheat oven to 350°F (175°C). Grease three 8-inch round cake pans with butter or cooking spray. Line the bottoms with parchment paper and dust the sides with cocoa powder to prevent sticking.
- In the bowl of a large stand mixer or a large bowl, sift together the flour, sugar, cocoa powder, baking soda, baking powder, and salt. Whisk by hand briefly to ensure the dry ingredients are evenly combined.
- Add the eggs, buttermilk, oil, and vanilla extract to the dry ingredients. Beat on medium speed for about 2 minutes until the batter is smooth and well combined. Scrape down the sides of the bowl as needed.
- Reduce the mixer speed to the lowest setting. Carefully pour in the hot coffee (or hot water) in a slow, steady stream. The batter will be very thin and liquid; this is normal. Mix only until combined.
- Divide the batter evenly among the three prepared cake pans. Using a kitchen scale ensures perfectly even layers (approx. 550g-600g of batter per pan).
- Bake for 30-35 minutes, or until a wooden toothpick inserted into the center comes out clean or with just a few moist crumbs attached. Avoid overbaking.
- Remove from the oven and let the cakes cool in the pans for 20 minutes. Then, run a knife around the edges and invert them onto a wire rack to cool completely before frosting.
- To make the frosting: In a large bowl, beat the softened butter until creamy. Add the cocoa powder and beat until well combined.
- Gradually add the powdered sugar, alternating with the heavy cream, beating on low speed initially and then increasing to high speed. Add vanilla and salt.
- Whip the frosting for 3-4 minutes until it is fluffy, glossy, and spreadable. If it is too stiff, add a tablespoon more cream; if too runny, add more sugar.
- To assemble: Place one cake layer on your serving plate. Spread a generous layer of frosting over the top. Repeat with the second layer. Top with the third layer and frost the top and sides of the entire cake.
- Garnish with chocolate shavings or sprinkles if desired. Let the cake set for 30 minutes before slicing.
Expert Cooking Tips
- ✓Use room temperature ingredients (eggs, buttermilk) to ensure the batter emulsifies properly without curdling.
- ✓Do not skip the parchment paper lining; these cakes are moist and can stick to the bottom of the pan easily.
- ✓Weigh your flour using a kitchen scale for accuracy; scooping with a cup often leads to packing too much flour, resulting in a dry cake.
- ✓The batter will be extremely runny compared to standard cakes. Do not be alarmed and do not add more flour.
- ✓Bloom the cocoa powder with hot liquid to unlock the full depth of chocolate flavor.
- ✓Cool the cakes completely before frosting, otherwise, the butter in the frosting will melt and the layers will slide.
- ✓For a flat top, you can use cake strips dampened with water around the outside of the pans during baking.
Substitutions and Variations
This recipe is quite versatile regarding substitutions, though the original ingredients yield the best results. If you do not have buttermilk, you can make a sour milk substitute by adding 1 tablespoon of white vinegar or lemon juice to 1 1/2 cups of whole milk and letting it sit for 5 minutes. For the oil, melted coconut oil or grapeseed oil works well, though coconut oil may impart a slight flavor. If you want to make this gluten-free, use a high-quality 1:1 gluten-free baking flour blend that contains xanthan gum; the texture will change slightly but remains delicious. For the hot liquid, if you are sensitive to caffeine or serving to children, boiling water works perfectly fine, though the chocolate flavor may be slightly less intense than with coffee. In the frosting, you can substitute salted butter for unsalted butter, but omit the additional pinch of salt. If you prefer a cream cheese frosting, you can swap half the butter for full-fat block cream cheese.
Common Mistakes to Avoid
The most common mistake is overbaking the cake. Because the batter is dark, it is hard to see visual cues like browning. Rely on the toothpick test and start checking at the 30-minute mark. Another frequent error is opening the oven door too early. This causes a sudden drop in temperature which can make the cakes collapse in the center. Wait until at least 25 minutes have passed before peeking. Using cold ingredients is another pitfall; cold eggs or buttermilk can shock the batter and prevent smooth emulsification. Finally, do not try to frost a warm cake. Patience is key—if the cake is even slightly warm, the frosting will slide off, and the layers will lose their structural integrity.
Serving Suggestions
This rich cake pairs beautifully with contrasting flavors or textures. A classic scoop of vanilla bean ice cream cuts through the richness of the chocolate. Fresh raspberries or strawberries add a tart brightness and a pop of color that looks elegant on the plate. For a sophisticated twist, serve with a dollop of unsweetened whipped cream and a dusting of espresso powder. If serving at a party, a glass of cold milk or a hot cup of coffee is the traditional beverage of choice. You can also garnish the cake with chocolate curls, edible gold leaf, or chopped toasted hazelnuts for added crunch.
Storage and Reheating Tips
This cake stores exceptionally well due to its oil base. It can be kept at room temperature in an airtight cake carrier or under a glass dome for up to 3 days. In fact, the flavor often improves on the second day. If you live in a very hot or humid climate, it is safer to store it in the refrigerator for up to 5 days, but be sure to let slices come to room temperature before eating for the best texture and flavor release. The baked, unfrosted cake layers can be wrapped tightly in plastic wrap and aluminum foil and frozen for up to 3 months. Thaw them in the refrigerator overnight before frosting.
Nutrition Facts (Estimated)
| Serving Size | 1 slice |
| Calories | 680 |
| Fat | 38g |
| Saturated Fat | 14g |
| Unsaturated Fat | 22g |
| Trans Fat | 0g |
| Cholesterol | 85mg |
| Sodium | 340mg |
| Carbohydrates | 85g |
| Fiber | 4g |
| Sugar | 55g |
| Protein | 8g |
Frequently Asked Questions
Why do I need to use hot coffee?
The hot liquid serves two purposes: it blooms the cocoa powder to release more flavor and helps dissolve the sugar and cocoa clumps. The acidity in coffee also enhances the depth of the chocolate.
Can I use 9-inch pans instead of 8-inch?
Yes, you can use two 9-inch pans for thicker layers, or three 9-inch pans for thinner layers. If using three 9-inch pans, reduce the baking time by about 5-8 minutes.
My cake sank in the middle. What happened?
This usually happens if the oven door was opened too early, the oven temperature was too low, or there was too much leavening (baking soda/powder). Ensure your oven is fully preheated.
Can I make this recipe as cupcakes?
Absolutely. This batter makes excellent cupcakes. Fill liners 2/3 full and bake for approximately 18-22 minutes. It yields about 30-36 cupcakes.
Is Dutch-process or natural cocoa powder better?
For this specific recipe, you can use either, but Dutch-process cocoa yields a darker color and a smoother, less acidic flavor profile that many prefer for fudge cakes.
Can I use melted butter instead of oil?
You can, but the texture will be different. Butter cakes tend to dry out faster. Oil ensures the cake stays moist for days. A 50/50 split is a good compromise if you want the butter flavor.
How do I get the frosting so smooth?
Sift your powdered sugar and cocoa powder before mixing to avoid lumps. Also, beat the butter thoroughly before adding dry ingredients, and use room temperature cream.
Can I freeze the frosted cake?
Yes, you can freeze the whole cake or slices. Flash freeze it uncovered for an hour to harden the frosting, then wrap tightly in plastic wrap and foil. Thaw in the fridge.
Conclusion
Mastering this Moist Chocolate Fudge Cake for Three Layers is a milestone for any home baker. It is a recipe that delivers professional-quality results with standard pantry ingredients, proving that you don’t need a culinary degree to create magic in the kitchen. The satisfaction of slicing into that tall, dark, handsome cake and seeing the perfect crumb structure is only beaten by the silence that falls over the room when everyone takes their first bite. It is comfort food elevated to an art form. Keep this recipe in your back pocket for celebrations, or for those days when only chocolate will do. Happy baking!

