Moist Dark Chocolate Cake With Chocolate Buttercream Recipe
This is the only chocolate cake recipe you will ever need—decadent, intensely chocolatey, and impossibly moist. Paired with a velvety, rich chocolate buttercream that melts in your mouth, this masterpiece is the perfect centerpiece for birthdays, anniversaries, or any time you need a serious chocolate fix.
30 minutes
35 minutes
1 hour 30 minutes
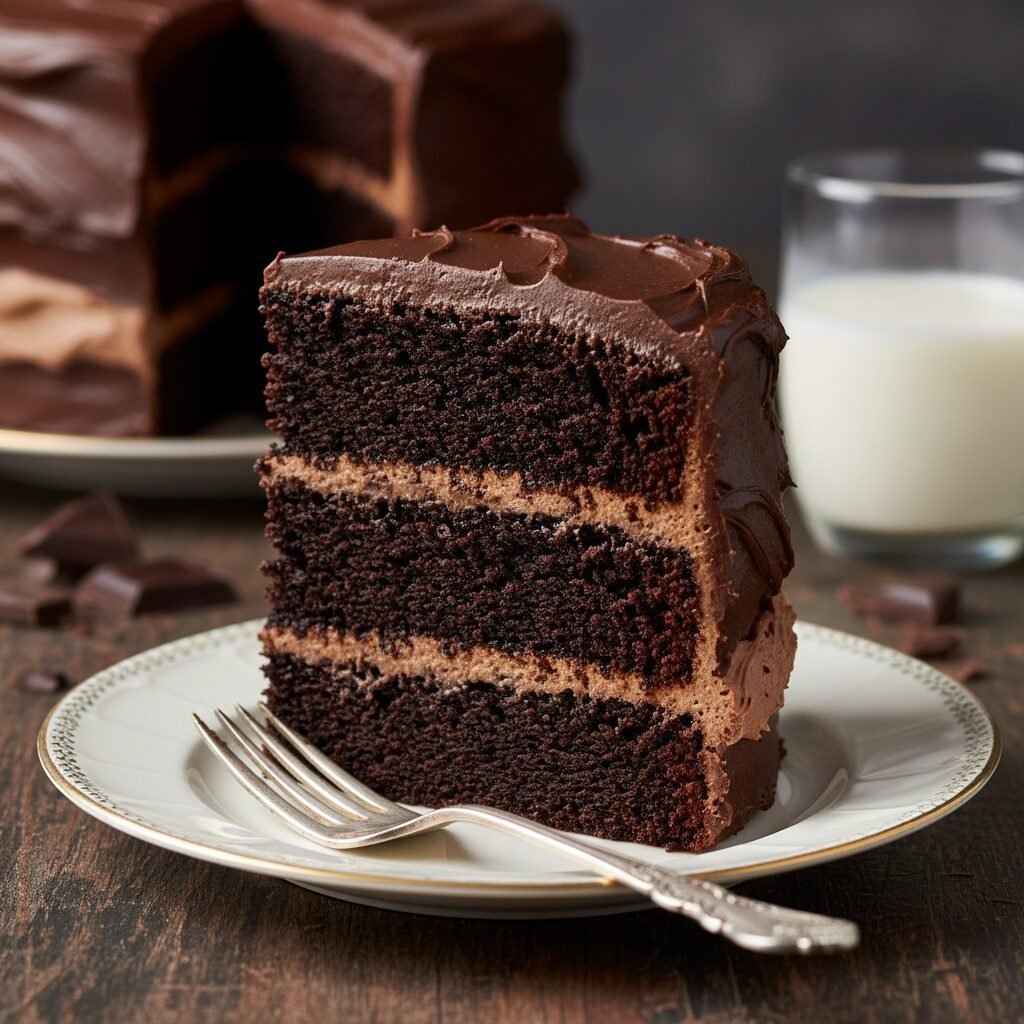
12-14 servings (Two 9-inch rounds)
Dessert
Baking
American
Vegetarian
There are chocolate cakes, and then there is *this* chocolate cake. If you have been on an endless quest for a recipe that delivers a crumb that is tender without being crumbly, moist without being dense, and intensely chocolatey without being bitter, your search ends here. This Moist Dark Chocolate Cake is the stuff of legends in my kitchen. It is the kind of dessert that causes the room to go silent after the first bite, followed only by the sounds of forks scraping plates clean.
What sets this cake apart is its depth of flavor and its incredible texture. We aren’t making a dry, airy sponge here; we are aiming for a fudgy, substantial crumb that holds up beautifully to layers of frosting. The secret lies in the balance of ingredients—specifically the use of hot coffee to bloom the cocoa powder, which wakes up the chocolate notes and creates a complexity that water or milk alone simply cannot achieve. Don’t worry, it doesn’t taste like a mocha latte; the coffee simply amplifies the chocolate, making it taste more like itself.
Paired with a chocolate buttercream that whips up light as air but tastes like a truffle, this cake is a celebration of all things cocoa. Whether you are a novice baker looking for a foolproof win or a seasoned pro wanting to add a classic staple to your repertoire, this recipe is designed to impress. It is sturdy enough to stack, elegant enough to pipe, and delicious enough to eat straight from the mixing bowl (though we recommend waiting for the finished product!). Get your milk ready, because this is the chocolate experience you have been dreaming of.
History & Origins
The history of chocolate cake is a fascinating journey that mirrors the evolution of chocolate processing itself. For centuries, chocolate was primarily consumed as a beverage by the Maya and Aztecs, and later by European aristocracy. It wasn’t until the mid-19th century, specifically around 1828 when Coenraad van Houten discovered how to treat cocoa beans with alkaline salts (Dutch processing) and mechanically extract cocoa butter, that cocoa powder became accessible and affordable.
Initially, ‘chocolate cake’ referred to a yellow or white cake served with chocolate frosting. It wasn’t until the late 1800s and early 1900s that bakers began incorporating the chocolate directly into the batter. The famous ‘Devil’s Food Cake’ emerged during this era, named specifically to contrast the light and airy ‘Angel Food Cake.’ The dark color of the cake was originally the result of a chemical reaction between natural cocoa powder and the high amount of baking soda used in the recipe, which gave the crumb a reddish-black hue.
During the Great Depression, baking became a science of necessity, leading to the popularity of ‘Crazy Cake’ or ‘Wacky Cake’ which relied on vinegar and baking soda for lift in the absence of eggs and butter. However, the post-war era brought a return to richness, with butter, eggs, and milk returning to the forefront. Today’s version of the dark chocolate cake combines the best of modern food science—using oil for moisture and Dutch-process cocoa for smoothness—while paying homage to the decadent, multi-layered traditions of American home baking that became a staple at church potlucks and birthday parties throughout the 20th century.
Why This Recipe Works
This recipe succeeds where many others fail due to a few key chemical interactions and ingredient choices. First and foremost is the use of oil instead of butter in the cake batter. While butter provides great flavor, it consists of about 20% water and milk solids. Oil is 100% fat and remains liquid at room temperature. This means that while a butter-based cake might firm up and feel dry when cool, an oil-based cake stays incredibly soft and moist for days.
Secondly, we use the ‘blooming’ technique. By pouring hot coffee over the cocoa powder, we dissolve the cocoa solids more effectively than cold liquid could. This releases flavor compounds trapped in the cocoa butter and creates a smooth, lump-free chocolate slurry that distributes evenly throughout the batter.
Third, the inclusion of buttermilk is crucial. The acidity in buttermilk reacts with the baking soda, creating carbon dioxide bubbles that give the cake its lift and airy structure. Furthermore, acid tenderizes gluten, preventing the cake from becoming tough or chewy. Finally, the ratio of sugar to flour is high, which not only sweetens the cake but also locks in moisture (sugar is hygroscopic), ensuring that the cake doesn’t stale quickly.
Why You’ll Love This Recipe
- ✓Stays moist for days thanks to the oil-based batter.
- ✓Deep, complex chocolate flavor enhanced by hot coffee.
- ✓Foolproof ‘mix-by-hand’ method for the batter—no mixer needed for the cake!
- ✓Perfectly balanced sweetness in the buttercream.
- ✓Sturdy enough for tiered cakes but tender enough to melt in your mouth.
- ✓Uses standard pantry ingredients found in most kitchens.
Equipment You’ll Need
- ✓Two 9-inch round cake pans
- ✓Large mixing bowl
- ✓Medium mixing bowl
- ✓Whisk
- ✓Rubber spatula
- ✓Stand mixer or electric hand mixer (for the frosting)
- ✓Wire cooling rack
- ✓Parchment paper
- ✓Measuring cups and spoons
- ✓Kitchen scale (optional but recommended)
Ingredients
- ✓2 cups (400g) granulated sugar
- ✓1 3/4 cups (220g) all-purpose flour
- ✓3/4 cup (65g) unsweetened cocoa powder (Dutch-process preferred)
- ✓1 1/2 teaspoons baking powder
- ✓1 1/2 teaspoons baking soda
- ✓1 teaspoon salt
- ✓2 large eggs, room temperature
- ✓1 cup (240ml) whole milk or buttermilk, room temperature
- ✓1/2 cup (120ml) vegetable oil or canola oil
- ✓2 teaspoons vanilla extract
- ✓1 cup (240ml) boiling hot coffee (or boiling water)
- ✓FOR THE BUTTERCREAM:
- ✓1 1/2 cups (340g) unsalted butter, softened to room temperature
- ✓1 cup (85g) unsweetened cocoa powder
- ✓5 cups (600g) powdered sugar, sifted
- ✓1/2 cup (120ml) heavy cream or whole milk
- ✓2 teaspoons vanilla extract
- ✓1/4 teaspoon salt
Instructions
- Preheat oven to 350°F (175°C). Grease two 9-inch round cake pans with butter or cooking spray. Line the bottoms with parchment paper and grease the paper as well. Dust with a little cocoa powder and tap out the excess.
- In a large bowl, whisk together the sugar, flour, cocoa, baking powder, baking soda, and salt until combined and no lumps remain.
- Add the eggs, buttermilk, oil, and vanilla. Beat with a hand mixer on medium speed for about 2 minutes, or whisk vigorously by hand. The batter should be smooth and well-combined.
- Stir in the boiling hot coffee by hand with a spatula or whisk. The batter will be very thin and liquidy; this is completely normal and ensures a moist cake.
- Pour the batter evenly into the prepared pans. Tap the pans gently on the counter twice to release any large air bubbles.
- Bake for 30-35 minutes. Test for doneness by inserting a wooden toothpick into the center of the cake; it should come out clean or with just a few moist crumbs attached.
- Cool the cakes in the pans for 10 minutes. Then, run a knife around the edges to loosen them and invert them onto a wire rack to cool completely before frosting.
- While the cakes cool, make the buttercream. In the bowl of a stand mixer fitted with the paddle attachment, beat the softened butter on medium-high speed for about 3-4 minutes until it is pale and creamy.
- Add the cocoa powder and mix on low speed until incorporated.
- Gradually add the powdered sugar, alternating with the heavy cream. Start on low speed to avoid a sugar cloud, then increase to high speed.
- Add the vanilla extract and salt. Whip on high speed for another 2-3 minutes until the frosting is fluffy, glossy, and spreadable. If it is too stiff, add a tablespoon more cream; if too runny, add more powdered sugar.
- To assemble, place one cake layer on your serving plate. Spread a generous layer of buttercream over the top. Place the second cake layer on top, bottom side up (for a flat top).
- Frost the top and sides of the cake with the remaining buttercream. Use an offset spatula to create swirls or smooth the sides.
- Garnish with chocolate shavings, sprinkles, or fresh berries if desired. Slice and serve.
Expert Cooking Tips
- ✓Use room temperature ingredients (eggs, buttermilk, butter) to ensure the batter emulsifies properly.
- ✓Do not skip the parchment paper; this guarantees your cakes won’t stick to the bottom of the pan.
- ✓Weigh your flour if possible; scooping directly with a cup often packs too much flour, leading to a dry cake.
- ✓Use high-quality cocoa powder. Since chocolate is the main flavor, a higher fat content cocoa powder (like Valrhona or Ghirardelli) makes a huge difference.
- ✓Don’t overbake. Check the cake 5 minutes before the timer goes off. Chocolate cake is hard to judge by color, so rely on the toothpick test.
- ✓Let the cake cool completely before frosting. Even a slightly warm cake will melt the butter in the frosting, causing the layers to slide.
- ✓If your cake tops dome significantly, use a serrated knife to level them off before stacking for a professional look.
Substitutions and Variations
This recipe is quite versatile, but be careful with structural changes. If you don’t have buttermilk, you can make a ‘sour milk’ substitute by adding 1 tablespoon of white vinegar or lemon juice to a cup of whole milk and letting it sit for 5 minutes. For the oil, any neutral oil works (vegetable, canola, grapeseed), or you can use melted coconut oil, though it may impart a slight coconut flavor. If you cannot use coffee due to caffeine sensitivity, you can use boiling water or decaf coffee; the chocolate flavor will be slightly less intense but still delicious. For a gluten-free version, substitute the all-purpose flour with a high-quality 1:1 gluten-free baking flour blend that contains xanthan gum. Note that almond flour or coconut flour cannot be substituted 1:1 here. In the frosting, you can swap heavy cream for whole milk, though the texture will be slightly less rich.
Common Mistakes to Avoid
The most common mistake is over-measuring the flour. If you scoop the measuring cup into the flour bag, you compress the flour and can end up with 20-30% more than the recipe calls for, resulting in a dry, hard cake. Always spoon the flour into the cup and level it off, or use a scale. Another mistake is using cold ingredients. Cold eggs and cold buttermilk shock the batter and prevent proper emulsification. A third pitfall is overmixing after adding the flour; this develops gluten and makes the cake tough. Mix until just combined. Lastly, rushing the cooling process is a disaster waiting to happen. If you frost a warm cake, your beautiful buttercream will turn into a greasy puddle.
Serving Suggestions
This rich cake pairs beautifully with something to cut the intensity. A cold glass of milk is the classic choice. For a more sophisticated dessert, serve slices with a dollop of lightly sweetened whipped cream and fresh raspberries or strawberries. The tartness of the berries balances the deep chocolate and sugar. A scoop of vanilla bean ice cream is also excellent, especially if you warm the slice slightly in the microwave for 10 seconds. For coffee lovers, a shot of espresso on the side makes for a perfect afternoon treat.
Storage and Reheating Tips
Because this cake is oil-based, it stays moist at room temperature for quite a while. You can store the frosted cake at room temperature in a cake keeper or under a glass dome for up to 3 days. If your kitchen is very hot, or if you want to keep it longer, store it in the refrigerator for up to 1 week. Be sure to bring it back to room temperature before serving, as cold buttercream is hard and waxy. To freeze, you can freeze the unfrosted layers wrapped tightly in plastic wrap for up to 3 months. You can also freeze individual slices of the finished cake; wrap them in plastic wrap and then foil to prevent freezer burn.
Nutrition Facts (Estimated)
| Serving Size | 1 slice |
| Calories | 680 |
| Fat | 38g |
| Saturated Fat | 14g |
| Unsaturated Fat | 22g |
| Trans Fat | 0g |
| Cholesterol | 85mg |
| Sodium | 380mg |
| Carbohydrates | 85g |
| Fiber | 4g |
| Sugar | 55g |
| Protein | 6g |
Frequently Asked Questions
Can I make this recipe into cupcakes?
Yes! This recipe makes approximately 24-30 standard cupcakes. Bake them at 350°F for 18-22 minutes. Check for doneness early.
Why is the batter so runny?
The batter is intentionally thin because of the hot liquid and oil. This high liquid content is what steams out during baking to create an ultra-moist crumb. Do not add more flour!
Can I use melted butter instead of oil?
You can, but the texture will change. Butter-based cakes are denser and tend to dry out faster. Oil creates a loftier, softer crumb that stays moist longer.
Do I have to use coffee?
No, you can use boiling water. However, the coffee enhances the chocolate flavor significantly without making the cake taste like coffee. It’s highly recommended.
Can I use natural cocoa instead of Dutch-process?
Yes, this recipe uses both baking soda and baking powder, so it has enough leavening power to handle natural cocoa. However, Dutch-process cocoa will yield a darker color and a fudgier flavor.
My cake sank in the middle. What happened?
This usually happens if the oven door was opened too early, causing the temperature to drop, or if the cake was underbaked. It can also happen if your baking powder/soda is expired.
How do I get smooth frosting?
Make sure your butter is truly soft (but not melted) before whipping. Sift your powdered sugar and cocoa to remove lumps. Dip your spatula in hot water and wipe it dry for a final smoothing pass on the cake.
Can I reduce the sugar?
Reducing sugar affects not just sweetness but also moisture and texture. You can reduce it slightly (maybe by 1/4 cup), but reducing it too much will result in a rubbery, dry cake.
Can I bake this in a 9×13 pan?
Absolutely. A 9×13 inch rectangular pan will take roughly 35-45 minutes to bake. Keep an eye on it and use the toothpick test.
Is this cake suitable for stacking?
Yes, despite being moist, the crumb is tight enough to support stacking. Just ensure the layers are completely cool and leveled before assembly.
Conclusion
There is something profoundly comforting about a homemade chocolate cake. It is a gesture of love, a symbol of celebration, and a remedy for a bad day. This Moist Dark Chocolate Cake with Chocolate Buttercream is more than just a recipe; it is a reliable friend you can turn to whenever you need to impress or simply indulge. The combination of the easy, one-bowl batter and the luxurious, whipped frosting makes it a winner in every category. We hope this becomes your go-to birthday cake for years to come. Happy baking!

