Moist Red Velvet Layer Cake With Cream Cheese Frosting Recipe
This isn’t just another cake; it is the velvety, crimson queen of desserts! With a perfect balance of acidity and chocolate, topped with the silkiest cream cheese frosting, this recipe guarantees a moist crumb every single time.
45 minutes
35 minutes
1 hour 20 minutes
12-16 servings
Dessert
Baking
American
Vegetarian
Hey there, lovely mamas and baking enthusiasts! Welcome back to my kitchen. Today, we are tackling the absolute diva of the cake world: Red Velvet Layer Cake. Now, I know what you might be thinking—is red velvet just chocolate cake with food coloring? Oh, honey, absolutely not! A true red velvet cake has a flavor profile all its own. It is a subtle dance between vanilla, a hint of cocoa, and a distinct tanginess from buttermilk and vinegar that makes your tastebuds sing.
I spent years—yes, literal years—trying to find the perfect balance. Some recipes were too dry (the worst!), some lacked that signature flavor, and others just fell flat. But this recipe? This is the holy grail. It uses a combination of butter and oil to ensure it stays incredibly moist for days, while the cake flour keeps the crumb tender and light as air. And let’s talk about the frosting. We aren’t skimping here! We are making a thick, tangy, sweet cream cheese frosting that is sturdy enough to pipe but soft enough to melt in your mouth.
Whether you are baking for a birthday party, a holiday gathering, or just because you survived a chaotic week of carpools and laundry, this cake is your new best friend. Put on your apron, pour yourself a coffee (or wine!), and let’s bake something beautiful together!
History & Origins
The history of Red Velvet cake is as rich and dramatic as its color! While many people associate it with Southern cooking, its roots actually trace back to the Victorian era. Back then, the term “velvet” was used to describe cakes with a soft, fine crumb, usually achieved by using almond flour or cornstarch. The “red” part of the equation originally wasn’t from food coloring at all.
In the early 20th century, cocoa powder wasn’t “Dutch-processed” (alkalized) like much of it is today. When raw cocoa powder mixed with acidic ingredients like buttermilk and vinegar, a chemical reaction occurred that turned the batter a reddish-brown hue. It was nature’s magic trick! During the Great Depression and WWII, when foods were rationed, bakers used boiled beet juices to enhance the color and keep the cakes moist.
The modern, vibrant red version we know and love today really took off thanks to the Adams Extract company in Texas, which sold red food dye with tear-off recipe cards for Red Velvet Cake during the Depression era to boost sales. Since then, it has become an iconic American dessert, often claiming fame as the signature cake of the Waldorf-Astoria Hotel in New York, though the South has lovingly adopted it as their own.
Why This Recipe Works
There is some serious kitchen science happening in this bowl, ladies! The secret to that signature texture lies in the interaction between the acidic ingredients (buttermilk and vinegar) and the baking soda. This reaction creates carbon dioxide bubbles that expand the batter, giving the cake an incredible, airy lift. But the acid does double duty; it also tenderizes the gluten in the flour, resulting in that “velvety” mouthfeel.
Why use both butter and oil? Great question! Butter provides that rich, creamy flavor that we all crave, while vegetable oil is purely there for texture. Oil remains liquid at room temperature, which guarantees that your cake stays moist far longer than an all-butter cake would. Finally, we use cake flour instead of all-purpose flour. Cake flour has a lower protein content, which means less gluten formation and a softer, more delicate crumb that practically dissolves on your tongue.
Why You’ll Love This Recipe
- ✓Incredibly moist texture thanks to the oil-butter blend
- ✓Authentic tangy flavor profile
- ✓Sturdy enough for stacking layers
- ✓Silky, pipeable cream cheese frosting
- ✓Vibrant red color without affecting the taste
- ✓Perfect for make-ahead baking
Equipment You’ll Need
- ✓Three 8-inch round cake pans (or two 9-inch)
- ✓Stand mixer with paddle attachment
- ✓Sifter or fine-mesh sieve
- ✓Rubber spatula
- ✓Offset spatula for frosting
- ✓Wire cooling racks
- ✓Parchment paper
- ✓Measuring cups and spoons
Ingredients
- ✓2 1/2 cups cake flour (sifted, do not use all-purpose)
- ✓2 tablespoons natural cocoa powder (unsweetened)
- ✓1 teaspoon baking soda
- ✓1 teaspoon salt
- ✓1/2 cup unsalted butter (room temperature)
- ✓2 cups granulated sugar
- ✓1 cup vegetable oil (or canola oil)
- ✓4 large eggs (room temperature, separated)
- ✓1 tablespoon pure vanilla extract
- ✓1 teaspoon distilled white vinegar
- ✓1 bottle (1 oz) liquid red food coloring (or 2 tbsp gel)
- ✓1 cup buttermilk (room temperature)
- ✓FOR THE FROSTING:
- ✓16 oz full-fat cream cheese (brick style, cool room temperature)
- ✓1 cup unsalted butter (room temperature)
- ✓4-5 cups powdered sugar (sifted)
- ✓1 tablespoon vanilla extract
- ✓Pinch of salt
Instructions
- Prep the Pans: Preheat your oven to 350°F (175°C). Grease three 8-inch cake pans generously. Line the bottoms with parchment paper rounds, then grease the parchment and dust with a little flour or cocoa powder. Tap out the excess. This ensures your cakes pop right out!
- Whisk Dry Ingredients: In a medium bowl, sift together the cake flour, cocoa powder, baking soda, and salt. Whisk them to ensure everything is evenly distributed. Set aside.
- Cream Butter and Sugar: In the bowl of a stand mixer fitted with the paddle attachment, beat the softened butter and granulated sugar on medium-high speed for about 5 minutes. You want it light, fluffy, and pale yellow.
- Add Oil and Yolks: Pour in the vegetable oil and beat until combined. Add the egg yolks one at a time (reserve the whites!), beating well after each addition. Scrape down the sides of the bowl. Stir in the vanilla extract and the white vinegar.
- Color it Red: With the mixer on low, add the red food coloring. Mix until the batter is a vibrant, consistent red color. Be careful not to splash!
- Alternate Wet and Dry: With the mixer on low speed, add the flour mixture in three parts, alternating with the buttermilk in two parts (Flour, Buttermilk, Flour, Buttermilk, Flour). Mix just until combined. Do not overmix, or the cake will be tough!
- Whip the Whites: In a separate clean, glass bowl, whisk the egg whites until fluffy soft peaks form. Gently fold these egg whites into the red batter using a rubber spatula. This step adds extra airiness to the cake.
- Bake: Divide the batter evenly among the prepared pans. Bake for 30-35 minutes, or until a toothpick inserted into the center comes out clean or with just a few moist crumbs. Avoid opening the oven door too early!
- Cool: Let the cakes cool in the pans for 10 minutes, then carefully invert them onto a wire rack to cool completely before frosting. They must be 100% cool, or the frosting will melt.
- Make the Frosting: In a large bowl, beat the cream cheese and butter together until smooth and creamy (about 3 minutes). Gradually add the powdered sugar, one cup at a time, beating on low speed. Add vanilla and a pinch of salt. Whip on high for 2 minutes until fluffy.
- Assemble: Place one cake layer on your stand. Spread a thick layer of frosting on top. Repeat with the second and third layers. Use an offset spatula to frost the outside and top. Decorate with sprinkles or cake crumbs!
Expert Cooking Tips
- ✓Room Temperature is Key: Ensure your butter, eggs, buttermilk, and cream cheese are all at room temperature. This allows them to emulsify properly, creating a smooth batter and preventing the frosting from being lumpy.
- ✓Don’t Skimp on the Beating: When creaming the butter and sugar, really let it go for 5 minutes. This incorporates air, which acts as a mechanical leavening agent.
- ✓Weigh Your Flour: If you can, use a kitchen scale. If not, spoon the flour into the measuring cup and level it off. Scooping directly packs the flour and leads to a dry cake.
- ✓Brick Cream Cheese Only: Never use the tub variety of cream cheese for frosting; it has too much water content and will result in a runny mess.
Substitutions and Variations
If you find yourself missing an ingredient, don’t panic! Here are some easy swaps:
- Buttermilk: Add 1 tablespoon of lemon juice or white vinegar to a measuring cup, then fill to the 1-cup line with whole milk. Let it sit for 5 minutes until curdled.
- Cake Flour: For every cup of all-purpose flour, remove 2 tablespoons of flour and replace them with 2 tablespoons of cornstarch. Sift twice to combine.
- Red Dye: If you prefer a natural option, you can use beet powder or reduced beet juice, though the color will be more of a rusty brown than vibrant red.
Common Mistakes to Avoid
The biggest mistake people make with Red Velvet is overbaking. Because the cake is dark, it’s hard to see it browning. Trust your timer and the toothpick test. If you bake it until it looks dry, it will taste dry! Another common error is overmixing the flour. Once that flour hits the liquid, gluten starts to form. Mix gently and stop as soon as the white streaks disappear to keep that tender crumb.
Serving Suggestions
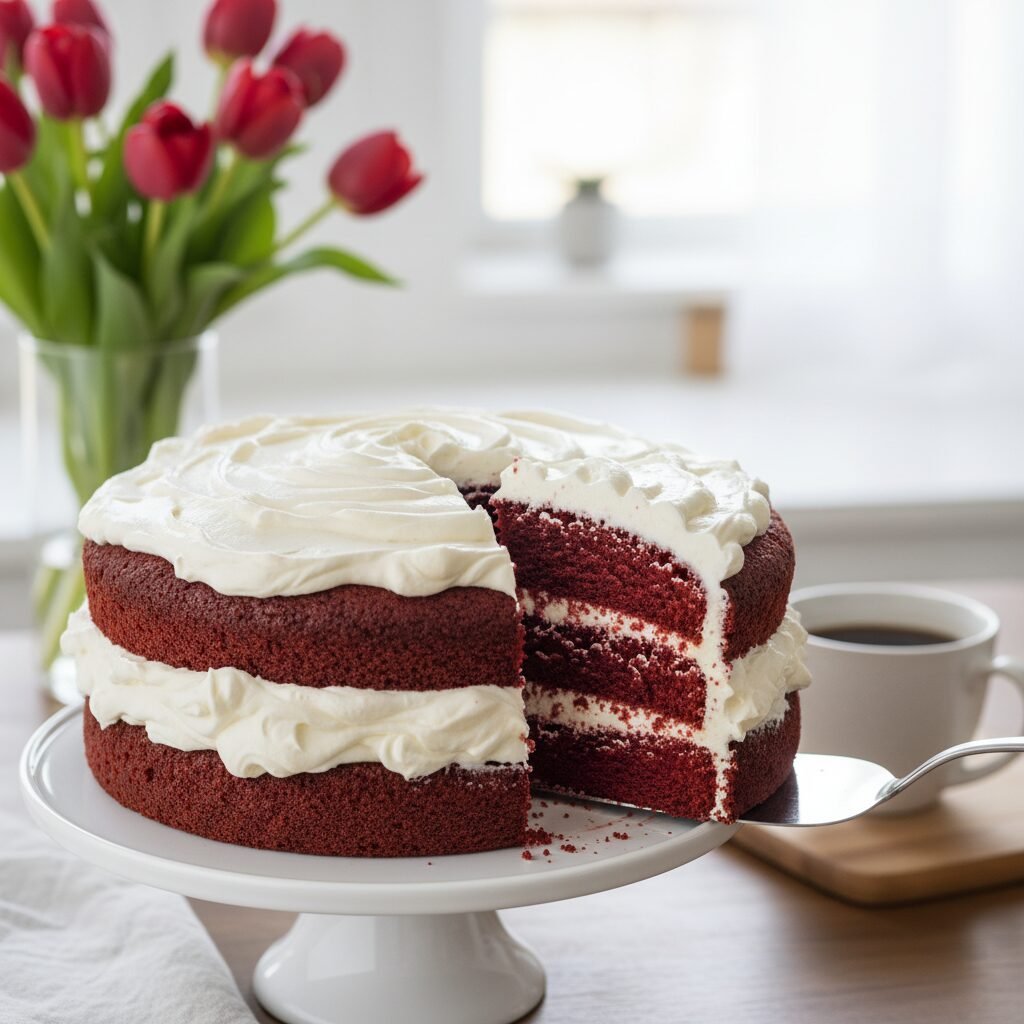
This cake is a stunner on its own, but I love serving it on a white ceramic cake stand to make that red color pop! Slice it generously and serve with a cold glass of milk or a hot cup of coffee. For a festive touch, garnish with fresh raspberries, white chocolate shavings, or crumble the top of the cake dome (if you leveled the cakes) and sprinkle the red crumbs over the white frosting for that classic bakery look.
Storage and Reheating Tips
Because of the cream cheese frosting, this cake must be refrigerated. However, cold cake can taste dry and the butter solidifies. The trick is to store it in an airtight cake keeper in the fridge for up to 5 days, but let slices sit at room temperature for 20-30 minutes before eating. This returns the frosting to its creamy glory and softens the crumb. You can also freeze the unfrosted layers wrapped in plastic wrap for up to 3 months.
Nutrition Facts (Estimated)
| Serving Size | 1 slice |
| Calories | 650 kcal |
| Fat | 34g |
| Saturated Fat | 18g |
| Unsaturated Fat | 14g |
| Trans Fat | 0.5g |
| Cholesterol | 95mg |
| Sodium | 320mg |
| Carbohydrates | 78g |
| Fiber | 1g |
| Sugar | 45g |
| Protein | 6g |
Frequently Asked Questions
Can I make this into cupcakes?
Absolutely! This recipe makes about 24-30 standard cupcakes. Bake them at 350°F for 18-22 minutes. Watch them closely as they bake faster than layers.
Why did my cake turn out brown instead of red?
This usually happens if you use Dutch-processed cocoa powder, which neutralizes the acidity, or if you didn’t use enough food coloring. Stick to natural cocoa powder and don’t be shy with the dye!
Can I use gel food coloring instead of liquid?
Yes, gel is actually more concentrated. If using gel, start with 1-2 tablespoons and adjust until you reach your desired shade. It adds less liquid to the batter, which is fine.
My frosting is runny, how do I fix it?
This happens if the butter or cream cheese was too warm or if you used tub cream cheese. Put the bowl in the fridge for 20 minutes to firm up, then rewhip. You can also add more powdered sugar to stiffen it.
Do I really need vinegar?
Yes! The vinegar is crucial for the chemical reaction with the baking soda to help the cake rise and to preserve the red color. You won’t taste the pickle flavor, I promise!
Can I prepare the cake layers in advance?
Yes, this is a great make-ahead recipe. Bake the layers, let them cool completely, wrap them tightly in plastic wrap, and freeze them. Frost them while they are frozen; it’s actually easier!
Why do I need to separate the eggs?
Whipping the egg whites separately and folding them in at the end acts as an extra leavener, giving the cake a lighter, more velvet-like texture compared to just dumping whole eggs in.
Is this cake suitable for stacking?
Yes, this recipe produces a relatively sturdy crumb that holds up well to stacking, provided you level the tops and chill the cake once assembled to set the frosting.
Conclusion
And there you have it, friends! The only Red Velvet Cake recipe you will ever need. It is lush, dramatic, and undeniably delicious. I know looking at a long ingredient list can be intimidating, but take it one step at a time. The look on your family’s faces when you cut into that stark white frosting to reveal the brilliant red interior is worth every second of effort.
If you try this recipe, please leave a comment below or tag me on Pinterest! I absolutely love seeing your baking creations. Happy baking, mamas!