Moist Red Velvet Sheet Cake With Oreo Crumbs Recipe
Forget the stress of stacking layers; this Red Velvet Sheet Cake is effortless, ultra-moist, and topped with a surprise Oreo crunch. It is the perfect marriage of classic Southern elegance and cookies ‘n’ cream fun!
20 minutes
30 minutes
50 minutes (plus cooling)
24 servings
Dessert
Baking
American / Southern
Vegetarian
Hey friends! If you have been following my baking adventures for a while, you know that I have a serious love-hate relationship with layer cakes. I love eating them, but the stacking, the leveling, the crumb coating? Let’s just say it sometimes ends in tears in my kitchen. That is exactly why I am completely obsessed with sheet cakes. They are the unsung heroes of the baking world—low maintenance, high reward, and absolutely perfect for feeding a crowd of hungry kids (and adults!).
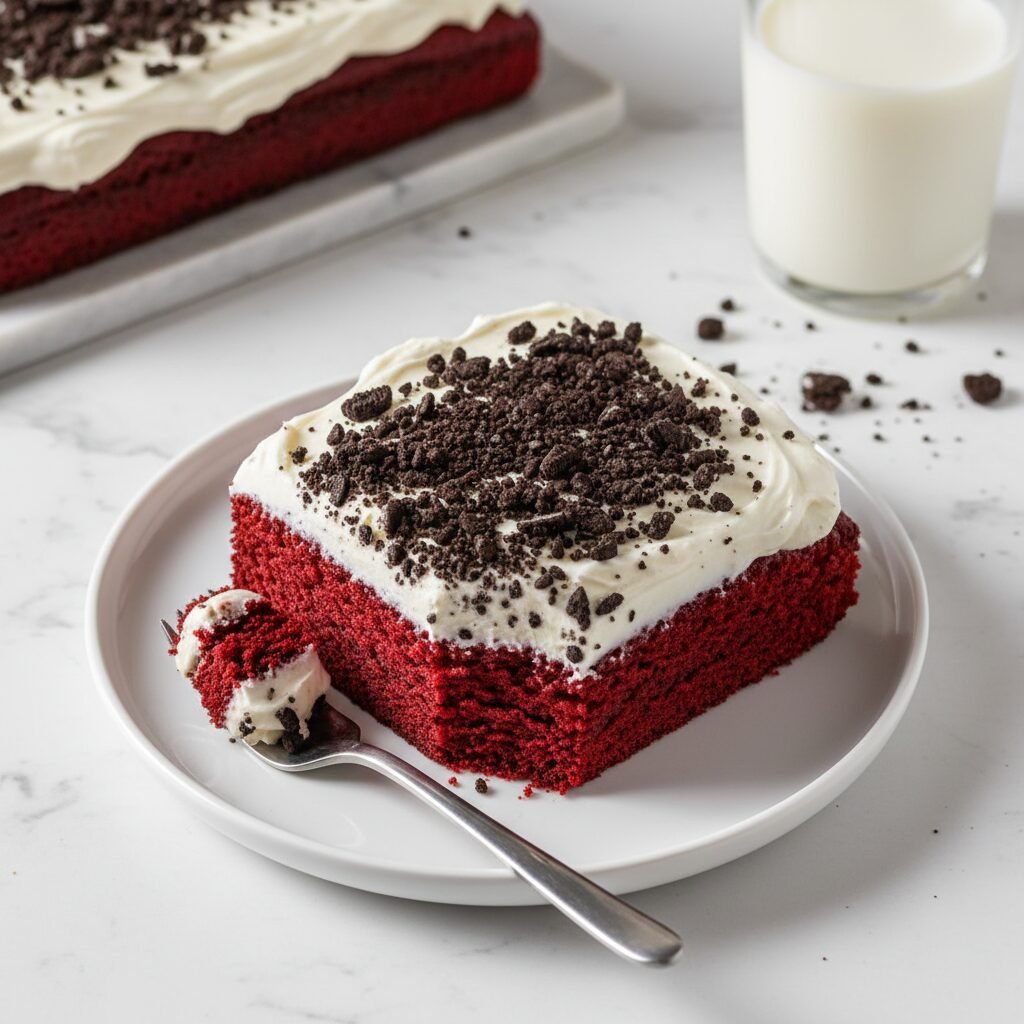
Today, I am sharing a recipe that has quickly become a legend in our neighborhood: Moist Red Velvet Sheet Cake With Oreo Crumbs. We are taking the classic, velvety texture of traditional red velvet and giving it a modern, textural twist. There is something undeniably magical about that deep crimson sponge paired with tangy, luscious cream cheese frosting. But when you add a generous dusting of crushed Oreo cookies on top? Oh mama, it is a game-changer.
This cake is incredibly soft, thanks to a specific blend of buttermilk and oil, and the chocolatey crunch of the Oreos cuts through the sweetness of the frosting perfectly. Whether you are prepping for a Valentine’s Day party, a birthday bash, or just need a Tuesday pick-me-up, this recipe is your new best friend. Grab your aprons, because we are about to bake something spectacular!
History & Origins
Red velvet cake has a fascinating and somewhat mysterious history that dates back to the Victorian era. Originally, the term “velvet” was used to describe cakes with a soft, velvety crumb, distinguishing them from the coarser sponge cakes of the time. The reddish hue actually wasn’t originally from food coloring! In the early 20th century, raw cocoa powder reacted with acidic ingredients like buttermilk and vinegar, revealing a natural reddish-brown tint caused by anthocyanins in the cocoa.
However, the vibrant, neon-red color we know and love today became popular during the Great Depression. The Adams Extract company, looking to boost sales during tough times, marketed the cake with red food coloring and tear-off recipe cards in grocery stores. It became a Southern staple, famous for its dramatic look and distinctive flavor.
Fast forward to the modern era, and we are seeing a fusion of classics. The addition of Oreo crumbs is a nod to the massive popularity of the “Cookies ‘n’ Cream” trend that exploded in the 80s and 90s. By combining the Southern heritage of red velvet with the nostalgic crunch of America’s favorite cookie, we get a dessert that bridges generations.
Why This Recipe Works
You might be wondering, what makes this specific recipe foolproof? It all comes down to the science of moisture and acidity. First, we use oil instead of butter for the cake base. While butter provides flavor, it contains water that evaporates; oil is 100% fat and remains liquid at room temperature, ensuring the cake stays moist for days. We rely on the buttermilk and vinegar not just for flavor, but to tenderize the gluten strands in the flour, resulting in that melt-in-your-mouth texture.
The flavor profile is a delicate balance. Red velvet is essentially a mild chocolate cake, but the acidity gives it a distinct tang. The cream cheese frosting is non-negotiable here; its sharpness cuts through the sugar. Finally, the Oreo crumbs provide a necessary textural contrast. A soft cake with soft frosting can sometimes feel one-note, but the crunchy, slightly bitter cocoa of the cookie crumbs awakens the palate and makes every bite interesting.
Why You’ll Love This Recipe
- ✓Requires zero stacking or leveling—perfect for beginners!
- ✓Stays moist for up to 4 days thanks to the oil-based batter.
- ✓The Oreo topping adds a surprising crunch that kids go crazy for.
- ✓Feeds a large crowd easily (up to 24 slices).
- ✓Visually stunning contrast between red cake, white frosting, and black crumbs.
Equipment You’ll Need
- ✓9×13 inch baking pan (metal preferred)
- ✓Stand mixer or handheld electric mixer
- ✓Large mixing bowls
- ✓Whisk
- ✓Rubber spatula
- ✓Offset spatula (for frosting)
- ✓Ziploc bag and rolling pin (for crushing Oreos)
Ingredients
- ✓For the Cake:
- ✓2 1/2 cups all-purpose flour
- ✓1 1/2 cups granulated sugar
- ✓1 teaspoon baking soda
- ✓1 teaspoon salt
- ✓1 teaspoon cocoa powder (unsweetened)
- ✓1 1/2 cups vegetable oil (or canola oil)
- ✓1 cup buttermilk, room temperature
- ✓2 large eggs, room temperature
- ✓2 tablespoons red food coloring (liquid works best here)
- ✓1 teaspoon white distilled vinegar
- ✓1 teaspoon pure vanilla extract
- ✓For the Cream Cheese Frosting:
- ✓16 oz (2 blocks) cream cheese, softened
- ✓1/2 cup unsalted butter, softened
- ✓4 cups powdered sugar, sifted
- ✓1 teaspoon vanilla extract
- ✓Pinch of salt
- ✓For the Topping:
- ✓15-20 Oreo cookies, crushed into coarse crumbs
Instructions
- Preheat and Prep: Preheat your oven to 350°F (175°C). Grease a 9×13 inch baking pan generously with non-stick spray or butter, and dust with a little flour to prevent sticking.
- Mix Dry Ingredients: In a medium bowl, whisk together the flour, sugar, baking soda, salt, and cocoa powder. Make sure there are no lumps of cocoa.
- Mix Wet Ingredients: In a large bowl (or your stand mixer bowl), combine the vegetable oil, buttermilk, eggs, food coloring, vinegar, and vanilla extract. Whisk vigorously until the mixture is fully combined and bright red.
- Combine: Slowly add the dry ingredients to the wet ingredients. Mix on low speed just until the flour disappears. Do not overmix! Overmixing will make the cake tough instead of tender.
- Bake: Pour the batter into the prepared pan and smooth it out with a spatula. Bake for 28-32 minutes, or until a toothpick inserted into the center comes out clean or with just a few moist crumbs.
- Cool: Let the cake cool completely in the pan on a wire rack. If you try to frost it while warm, the cream cheese will melt into a sad puddle!
- Make the Frosting: While the cake cools, beat the softened cream cheese and butter together until smooth and creamy (about 3 minutes). Gradually add the powdered sugar, one cup at a time, beating on low. Add vanilla and salt, then whip on high for 2 minutes until fluffy.
- Assemble: Spread a thick layer of frosting over the cooled cake using an offset spatula. Take your crushed Oreos and sprinkle them generously over the top, covering the white frosting with delicious black crumbs.
- Serve: Slice into squares and serve immediately, or chill for 30 minutes to let the frosting set slightly.
Expert Cooking Tips
- ✓Room Temperature is Key: Ensure your buttermilk, eggs, cream cheese, and butter are all at room temperature. This ensures a smooth batter and a lump-free frosting.
- ✓The Cocoa Trick: Don’t use too much cocoa powder. Red velvet isn’t a chocolate cake; it’s a vanilla cake with a hint of cocoa. Too much cocoa will muddy the beautiful red color.
- ✓Crushing Oreos: For the best texture, don’t pulverize the Oreos into a fine dust. Put them in a Ziploc bag and bash them with a rolling pin so you have a mix of dust and larger chunky pieces.
- ✓Dye Decisions: Liquid dye usually works better for red velvet than gel paste because it incorporates easier into the liquid batter, but gel provides a more intense color if that is all you have.
Substitutions and Variations
If you find yourself missing an ingredient, don’t panic! Here are some mom-approved swaps. No buttermilk? Make your own by adding 1 tablespoon of lemon juice or vinegar to a cup of regular milk and letting it sit for 5 minutes. If you don’t want to use red food coloring, you can omit it entirely for a ‘Velvet’ cake (it will be a light tan/cocoa color) or use beet powder for a natural alternative, though the shade will be more purple. You can also swap the Oreos for crushed chocolate chips or even pecans if you want a more traditional Southern vibe.
Common Mistakes to Avoid
The biggest mistake people make is overbaking the cake. Because it’s dark in color, it’s hard to tell when it’s browning. Start checking at the 28-minute mark. Another common error is frosting too soon. I know it smells amazing and you want to eat it, but if that cake is even slightly warm, your beautiful cream cheese frosting will slide right off. Patience is a virtue, mamas!
Serving Suggestions
This cake is rich, so I love serving it with a tall glass of cold milk or a hot cup of coffee to balance the sweetness. If you are feeling extra fancy for a holiday party, add a fresh raspberry or a sprig of mint on top of the Oreo crumbs for a pop of color. It looks stunning on a white platter!
Storage and Reheating Tips
Because of the cream cheese frosting, this cake needs to be stored in the refrigerator. Cover the pan tightly with plastic wrap or foil. It will stay fresh for up to 5 days. Actually, I think it tastes even better on day two when the flavors have melded! You can also freeze individual slices wrapped in plastic wrap for up to 3 months.
Nutrition Facts (Estimated)
| Serving Size | 1 slice |
| Calories | 380 kcal |
| Fat | 18g |
| Saturated Fat | 7g |
| Unsaturated Fat | 10g |
| Trans Fat | 0g |
| Cholesterol | 45mg |
| Sodium | 210mg |
| Carbohydrates | 52g |
| Fiber | 1g |
| Sugar | 32g |
| Protein | 4g |
Frequently Asked Questions
Can I make this cake ahead of time?
Absolutely! In fact, red velvet cake often tastes better the next day as the crumb softens. You can bake the cake one day, keep it covered at room temperature, and then frost it the next day before serving.
Why did my cake turn out brown instead of red?
This usually happens if you use too much cocoa powder or if your baking soda reacted too strongly with the cocoa without enough acidity. Make sure to measure the cocoa carefully and don’t skip the vinegar!
Can I use butter instead of oil for the cake?
You can, but I don’t recommend it for this specific recipe. Oil coats the flour proteins better than butter, preventing gluten formation and keeping the cake incredibly moist. If you must use butter, the cake will be slightly denser and drier.
Do I remove the cream from the Oreos before crushing?
No way! Keep the cream filling in. When you crush the cookies, the cream helps the crumbs clump together slightly, creating delicious little clusters of cookies ‘n’ cream goodness.
Can I make this as a layer cake instead of a sheet cake?
Yes, this batter divides perfectly into two 8-inch or 9-inch round pans. You will just need to adjust the baking time down to about 25-30 minutes. Keep an eye on them!
Is red food coloring safe?
Standard food dyes are FDA approved, but if you are sensitive to dyes, you can look for ‘No-Artificial-Dye’ red coloring found in health food stores, or use natural beet juice concentrate, though the flavor may shift slightly.
How do I get my frosting perfectly smooth?
The secret is room temperature ingredients and sifting your powdered sugar. If your butter or cream cheese is cold, you will get lumps. Sifting the sugar ensures you don’t have gritty pockets.
Can I use a different frosting?
While cream cheese is the traditional pairing, a cooked flour frosting (Ermine frosting) is the historical original pairing. A vanilla buttercream or a white chocolate ganache would also be delicious if you aren’t a fan of cream cheese.
Conclusion
There you have it, mamas—the Moist Red Velvet Sheet Cake With Oreo Crumbs that is going to make you the star of the next potluck. It is moist, tangy, sweet, and crunchy all at the same time. I hope this recipe brings a little bit of joy and a lot of deliciousness to your kitchen. If you make it, please snap a picture and tag me on Pinterest or Instagram; I absolutely love seeing your creations! Happy baking!

