Moist Red Velvet Bundt Cake Recipe
This isn’t just a cake; it’s a hug in edible form! With its velvety crumb and that signature tangy cream cheese glaze, this Red Velvet Bundt Cake is the easiest showstopper you’ll ever bake.
20 minutes
55 minutes
1 hour 30 minutes
12-14 Slices
Dessert
Baking
American
Vegetarian
Oh my goodness, friends, do I have a treat for you today! If there is one dessert that screams "celebration" in our house, it is unequivocally Red Velvet. But let’s be honest for a second—layer cakes can be a bit of a high-maintenance drama queen, right? The leveling, the crumb coating, the stacking… sometimes a mama just doesn’t have the time (or the patience) for that kind of architectural engineering!
Enter the glorious Red Velvet Bundt Cake. It gives you all that luxurious, velvety texture and that stunning pop of crimson color, but with a fraction of the effort. You literally pour the batter into the pan, bake, and drizzle. It is foolproof and fabulous.
This recipe holds a special place in my heart because it was the first "fancy" cake I baked for my husband when we were dating. He took one bite, closed his eyes, and I knew I had him hooked! The secret here is the combination of oil and buttermilk, which ensures the cake stays moist for days—though I promise you, it won’t last that long on your counter. Whether you are prepping for a Valentine’s Day party, a Christmas spread, or just a Tuesday night pick-me-up, this cake delivers every single time.
History & Origins
Isn’t food history fascinating? I love digging into the stories behind our favorite treats. The term "Velvet" cake actually dates back to the Victorian era, used to distinguish these soft, fine-crumbed cakes from the coarser sponge cakes of the time. But the Red Velvet we know and love has a bit of a mysterious past!
Some say it originated at the Waldorf Astoria in New York, while others credit the Adams Extract company in Texas, who popularized the recipe during the Great Depression to sell more food coloring and vanilla. Originally, the red hue wasn’t from a bottle of dye; it was a chemical reaction between raw cocoa powder (which contains anthocyanins) and the acidic ingredients like buttermilk and vinegar. This reaction revealed a reddish-brown tint. Nowadays, modern cocoa is processed differently, so we help nature along with a little food coloring to get that vibrant, show-stopping red that makes the kids go "Wow!"
Why This Recipe Works
You might be wondering, "Why not just use butter?" or "Why the vinegar?" Let me put on my science apron for a moment! This recipe relies on oil instead of butter for the main fat. While butter adds flavor, it contains water which can evaporate and dry out a cake. Oil is 100% fat and remains liquid at room temperature, coating the flour proteins and preventing gluten formation. This results in a sensationally tender, moist crumb that stays soft.
Secondly, the buttermilk and vinegar are non-negotiable. They provide the acidity needed to react with the baking soda. This reaction creates carbon dioxide bubbles, which gives the dense batter its lift and fluffiness. Without it, you’d have a heavy red brick! That acidity also tenderizes the gluten and adds that signature "tang" that cuts through the sweetness of the sugar.
Why You’ll Love This Recipe
- ✓Incredibly moist texture that lasts for days
- ✓No fussy layering or frosting skills required
- ✓Stunning vibrant red color perfect for holidays
- ✓Tangy cream cheese glaze balances the sweetness
- ✓Freezer-friendly for make-ahead hosting
Equipment You’ll Need
- ✓10-12 cup Bundt Pan (non-stick is best)
- ✓Stand mixer or electric hand mixer
- ✓Large mixing bowl
- ✓Medium mixing bowl
- ✓Whisk
- ✓Rubber spatula
- ✓Wire cooling rack
- ✓Measuring cups and spoons
Ingredients
- ✓For the Cake:
- ✓2 1/2 cups all-purpose flour
- ✓1 1/2 cups granulated sugar
- ✓1 teaspoon baking soda
- ✓1 teaspoon salt
- ✓1/4 cup unsweetened cocoa powder
- ✓1 1/2 cups vegetable oil (or canola oil)
- ✓1 cup buttermilk, room temperature
- ✓2 large eggs, room temperature
- ✓2 tablespoons red food coloring (liquid)
- ✓1 teaspoon white distilled vinegar
- ✓1 teaspoon vanilla extract
- ✓For the Cream Cheese Glaze:
- ✓4 oz cream cheese, softened to room temperature
- ✓2 tablespoons unsalted butter, softened
- ✓2 cups powdered sugar
- ✓3-4 tablespoons milk
- ✓1/2 teaspoon vanilla extract
Instructions
- Prep the Oven and Pan: Preheat your oven to 350°F (175°C). This is the most critical step: Grease your Bundt pan thoroughly! I recommend using a baking spray containing flour, or grease generously with shortening and dust with cocoa powder (so you don’t see white flour streaks on your red cake).
- Mix Dry Ingredients: In a medium bowl, whisk together the flour, sugar, baking soda, salt, and cocoa powder. Make sure there are no lumps of cocoa. Set this aside.
- Mix Wet Ingredients: In a large bowl or the bowl of your stand mixer, combine the vegetable oil, buttermilk, eggs, food coloring, vinegar, and vanilla extract. Mix on medium speed until well combined and the color is a bright, uniform red.
- Combine: Slowly add the dry ingredients to the wet ingredients. Mix on low speed just until the flour disappears. Do not overmix! Stop the mixer and use a rubber spatula to scrape the sides and bottom of the bowl to ensure everything is incorporated.
- Bake: Pour the batter into your prepared Bundt pan. Tap the pan gently on the counter to release any trapped air bubbles. Bake for 50-60 minutes, or until a toothpick inserted into the center comes out clean or with just a few moist crumbs.
- Cool: Remove from the oven and let the cake cool in the pan for exactly 10 minutes. Then, place a wire rack over the pan and flip it over to release the cake. Let it cool completely before glazing.
- Make the Glaze: While the cake cools, beat the cream cheese and butter together until smooth and creamy. Gradually add the powdered sugar, milk, and vanilla. Whisk until you reach a pourable consistency. If it’s too thick, add a teaspoon more milk; too thin, add more sugar.
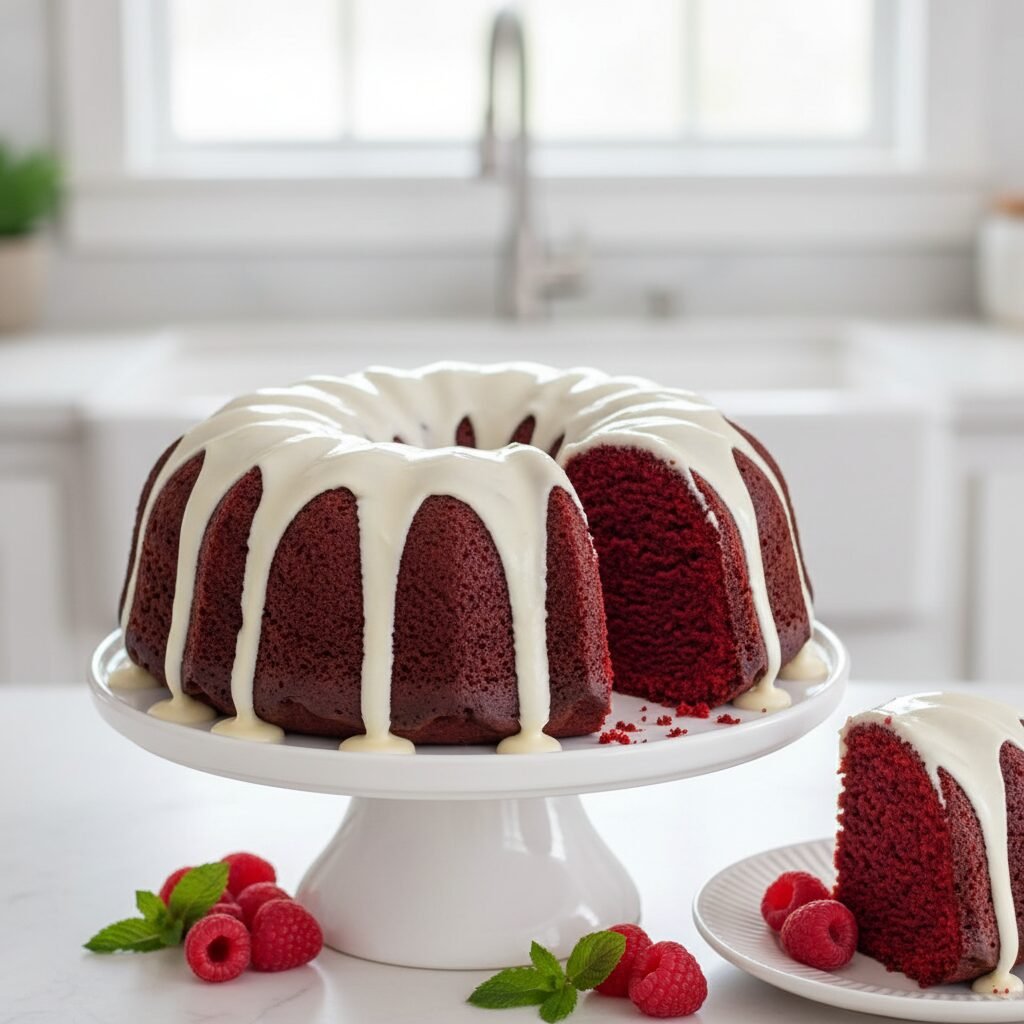
- Decorate: Drizzle the glaze over the cooled cake, letting it run down the grooves naturally. Serve and enjoy!
Expert Cooking Tips
- ✓Room Temperature is Key: Ensure your buttermilk, eggs, and cream cheese are at room temperature. This creates a smoother emulsion and a better rise.
- ✓The Bundt Pan Grease: I cannot stress this enough—get into every nook and cranny of that pan. Nothing is sadder than a broken Bundt cake!
- ✓Quality Cocoa: Use regular unsweetened cocoa powder, not Dutch-processed. The acidity in regular cocoa helps the rising reaction.
- ✓Don’t Overbake: Start checking at the 50-minute mark. Overbaking is the enemy of moist cake.
Substitutions and Variations
If you find yourself missing an ingredient, don’t panic! Here are some mom-approved swaps:
- Buttermilk: No buttermilk? No problem. Add 1 tablespoon of lemon juice or white vinegar to a measuring cup, then fill to the 1-cup line with regular milk. Let it sit for 5 minutes until it curdles.
- Vegetable Oil: You can substitute melted coconut oil or canola oil. I don’t recommend olive oil as the flavor is too strong.
- Red Dye: If you prefer a natural coloring, you can use beet powder, though it will change the flavor profile slightly and the color will be more of a rusty brown than bright red.
- Cake Flour: You can use cake flour instead of all-purpose for an even lighter crumb, but AP flour works perfectly fine for a sturdy Bundt structure.
Common Mistakes to Avoid
We have all been there—baking fails happen! Here is how to avoid the big ones with this recipe:
The biggest heartbreak is the cake sticking to the pan. This usually happens because the pan wasn’t greased well enough or the cake was flipped too soon (or too late). The 10-minute rule is golden!
Another common mistake is overmixing the batter. Once that flour hits the wet ingredients, gluten starts to form. If you mix it like crazy, your cake will be tough and rubbery instead of tender and velvety. Gentle hands, mama!
Serving Suggestions
This cake is a stunner on its own, but if you want to elevate your hosting game, serve slices with a side of fresh raspberries or strawberries. The tart fruit cuts through the rich cream cheese glaze beautifully. For a winter twist, garnish with sugared cranberries and a sprig of rosemary for a festive look. It pairs perfectly with a hot cup of coffee or a cold glass of milk for the kids.
Storage and Reheating Tips
Because of the cream cheese in the glaze, this cake should technically be stored in the refrigerator if you aren’t eating it within a few hours. However, cold cake can taste dry! I recommend storing it in an airtight container in the fridge for up to 5 days, but let the slices come to room temperature before serving for the best texture.
Freezing: This cake freezes beautifully! You can freeze the unglazed cake whole, wrapped tightly in plastic wrap and foil, for up to 3 months. Thaw overnight on the counter before glazing.
Nutrition Facts (Estimated)
| Serving Size | 1 Slice |
| Calories | 480 kcal |
| Fat | 24g |
| Saturated Fat | 8g |
| Unsaturated Fat | 15g |
| Trans Fat | 0g |
| Cholesterol | 65mg |
| Sodium | 310mg |
| Carbohydrates | 62g |
| Fiber | 1g |
| Sugar | 38g |
| Protein | 5g |
Frequently Asked Questions
Can I make this recipe into cupcakes?
Absolutely! This batter will make about 24 cupcakes. Reduce the baking time to 18-22 minutes at 350°F.
Why did my cake sink in the middle?
This usually happens if the oven door was opened too early during baking, causing a temperature drop, or if the cake was underbaked. It can also happen if there was too much leavening (baking soda).
Do I really need the vinegar?
Yes! Please don’t skip it. You won’t taste the vinegar at all, but it is chemically necessary to activate the baking soda and preserve the red color.
Can I use gel food coloring instead of liquid?
You can. Gel is much more concentrated, so you will need significantly less. Start with a teaspoon and add more until you reach your desired shade of red.
How do I keep the cake from drying out?
The oil in this recipe is the secret weapon against dryness. Also, ensure you store it in an airtight container. Air is the enemy of moisture!
Can I use a different frosting?
Sure! A chocolate ganache or a simple vanilla sugar glaze works well, but traditional Cream Cheese frosting is the classic pairing for a reason.
What if I don’t have a Bundt pan?
You can bake this in two 8-inch or 9-inch round cake pans. The bake time will reduce to about 30-35 minutes. You can then layer them.
Is Red Velvet just chocolate cake with dye?
Sort of, but not quite! It has a mild chocolate flavor, but it’s much lighter than a standard chocolate cake. The texture is also distinctively ‘velvety’ due to the buttermilk and vinegar reaction.
Conclusion
There you have it, friends! The most delicious, reliable, and stunning Red Velvet Bundt Cake you will ever make. I truly hope this recipe brings as much joy to your kitchen as it does to mine. It is the perfect way to say "I love you" without saying a word. If you try this recipe, please tag me on Pinterest or Instagram—I absolutely love seeing your beautiful creations! Happy baking!

