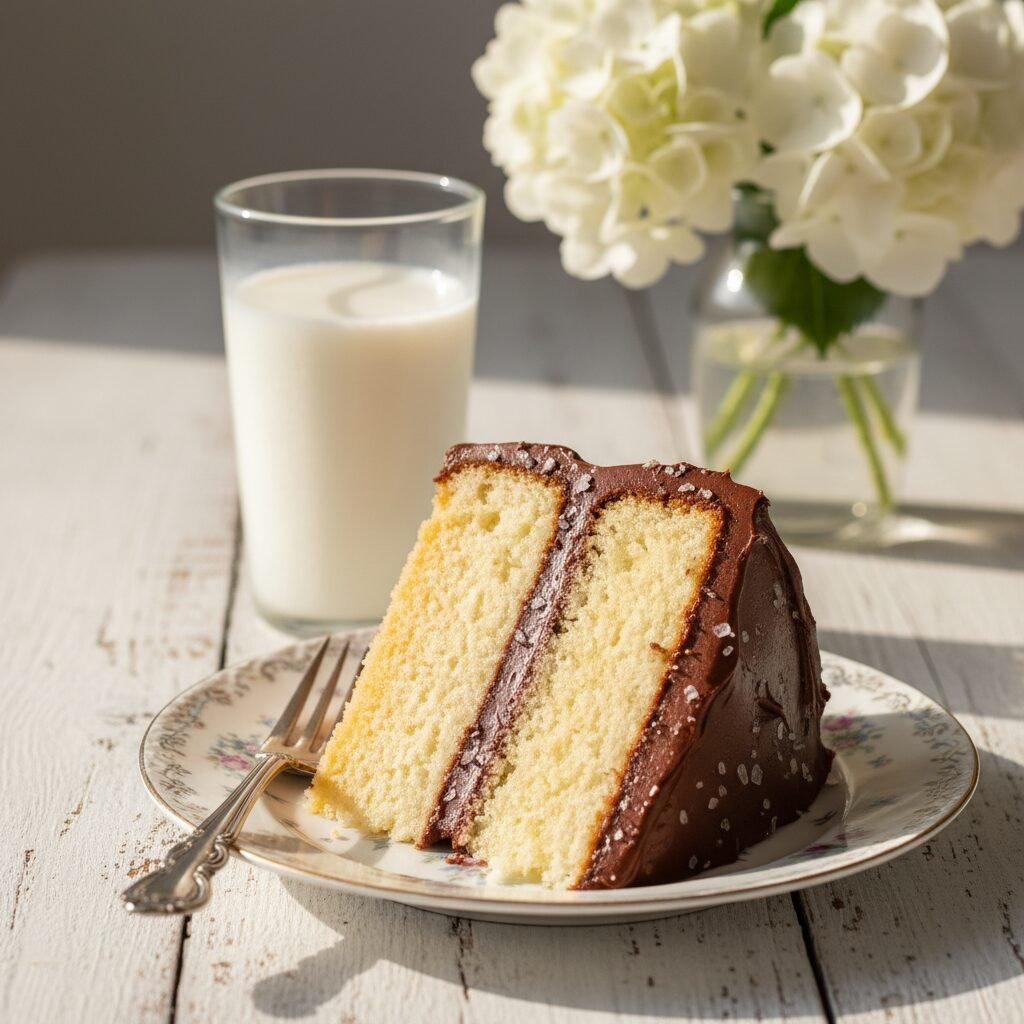
Moist Vanilla Layer Cake With Chocolate Frosting Recipe
Discover the holy grail of baking: a vanilla cake that is incredibly tender, buttery, and moist, paired perfectly with a decadent, silky chocolate buttercream. This recipe banishes dry crumbs forever and is the ultimate crowd-pleaser for birthdays and special celebrations.
45 minutes
30 minutes
1 hour 15 minutes
12-14 servings
Dessert
Baking
American
Vegetarian
There is something profoundly nostalgic about a classic yellow cake with chocolate frosting. It is the quintessential birthday cake, the image that pops into our minds when we close our eyes and make a wish. However, finding the perfect recipe—one that doesn’t rely on a box mix but still retains that plush, melt-in-your-mouth texture—can be a lifelong quest for many home bakers. Too often, homemade vanilla cakes turn out dense, dry, or flavorless, lacking that delicate crumb we crave. This recipe is the answer to those baking prayers. It is the result of years of testing, tweaking ratios of fat to flour, and experimenting with mixing methods to achieve a cake that is sturdy enough to stack but soft enough to feel like a cloud on your tongue.
In this comprehensive guide, we aren’t just throwing ingredients into a bowl; we are embracing the science of baking to create a masterpiece. The flavor profile here is pure, unadulterated vanilla, amplified by a hint of almond extract and the tang of buttermilk, which cuts through the sweetness. The frosting is not your average gritty buttercream; it is a whipped, fudgy, chocolate dream that tastes like a high-end truffle. Whether you are baking for a child’s birthday party, a sophisticated dinner party, or just because you need a slice of comfort on a Tuesday night, this Moist Vanilla Layer Cake with Chocolate Frosting is guaranteed to impress. Get ready to preheat your ovens and create a dessert that will become a family heirloom recipe for generations to come.
History & Origins
The concept of the ‘cake’ has evolved drastically over millennia, transforming from modified breads sweetened with honey and nuts in ancient civilizations to the light, airy confections we know today. The true turning point for the modern layer cake arrived in the mid-19th century with the invention of chemical leavening agents like baking soda and baking powder. Before this, bakers had to rely on yeast or the arduous task of mechanically whipping air into eggs to achieve lift. The introduction of baking powder allowed for the creation of ‘butter cakes’—the ancestors of our beloved vanilla layer cake—which were more consistent, easier to make, and possessed a finer crumb.
Vanilla itself has a storied history. Indigenous to Mexico and cultivated by the Totonac people (and later the Aztecs), vanilla was introduced to Europe by Spanish conquistadors in the 16th century. For a long time, it was an exclusive luxury used primarily to flavor chocolate drinks for aristocracy. It wasn’t until the mid-19th century, when a 12-year-old enslaved boy named Edmond Albius on the island of Réunion discovered how to hand-pollinate the vanilla orchid, that vanilla became more accessible. As for the pairing with chocolate frosting, this is a distinctly American evolution. In the early 20th century, as cocoa powder became affordable and accessible, American home bakers began slathering rich, fudge-like frostings onto their golden cakes, creating a visual and flavor contrast that became the standard for celebration cakes across the United States. This recipe honors that rich lineage, combining historical techniques with modern ingredient science.
Why This Recipe Works
This recipe succeeds where many others fail because it meticulously balances the ‘tenderizers’ (sugar, fats) against the ‘structure builders’ (flour, eggs). The secret weapon here is the combination of two types of fat: butter and oil. Butter is essential for that classic, rich flavor that oil simply cannot replicate. However, butter is about 18-20% water, which can evaporate during baking and lead to a drier crumb. Vegetable oil, being 100% fat, remains liquid at room temperature and coats the flour proteins, preventing gluten formation and ensuring the cake stays moist for days. By using both, we get the best of both worlds: the taste of butter and the texture of oil.
Furthermore, we utilize cake flour instead of all-purpose flour. Cake flour has a lower protein content (usually around 7-9%), which means less gluten forms during mixing. This results in a finer, softer crumb that feels velvety rather than bread-like. The addition of buttermilk is another critical factor; its acidity reacts with the baking soda to provide lift, while also breaking down long strands of gluten to tenderize the cake further. Finally, the ‘reverse creaming’ or modified mixing method ensures that all the dry ingredients are coated with fat before the liquid is added, drastically reducing the risk of over-mixing and resulting in a perfectly flat, even bake.
Why You’ll Love This Recipe
- ✓Uses a butter-oil blend for maximum flavor and moisture retention.
- ✓Cake flour ensures a velvety, tender crumb structure.
- ✓The chocolate buttercream is whipped to an airy, mousse-like consistency.
- ✓Stays moist for up to 4 days at room temperature.
- ✓Perfect structural integrity for stacking multiple layers.
- ✓Balances sweetness with a hint of tang from buttermilk.
Equipment You’ll Need
- ✓Two 8-inch or 9-inch round cake pans
- ✓Stand mixer with paddle attachment or electric hand mixer
- ✓Kitchen scale (highly recommended)
- ✓Sifter or fine-mesh sieve
- ✓Offset spatula
- ✓Wire cooling racks
- ✓Parchment paper
- ✓Measuring cups and spoons
Ingredients
- ✓2 1/2 cups (300g) Cake flour, sifted
- ✓2 cups (400g) Granulated white sugar
- ✓2 tsp Baking powder
- ✓1 tsp Baking soda
- ✓1 tsp Fine sea salt
- ✓1/2 cup (113g) Unsalted butter, room temperature
- ✓1/3 cup (80ml) Vegetable oil or canola oil
- ✓3 large Eggs, room temperature
- ✓2 large Egg yolks, room temperature
- ✓1 tbsp Pure vanilla extract
- ✓1 cup (240ml) Buttermilk, room temperature
- ✓1 1/2 cups (340g) Unsalted butter, softened (for frosting)
- ✓4-5 cups (500-625g) Powdered sugar, sifted (for frosting)
- ✓3/4 cup (65g) Unsweetened cocoa powder, sifted (for frosting)
- ✓1/4 cup (60ml) Heavy cream (for frosting)
- ✓2 tsp Vanilla extract (for frosting)
- ✓Pinch of salt (for frosting)
Instructions
- Preheat your oven to 350°F (175°C). Grease two 8-inch or 9-inch round cake pans with butter or non-stick spray. Line the bottoms with parchment paper rounds and grease the parchment. Dust with flour and tap out the excess.
- In the bowl of a stand mixer fitted with the paddle attachment, combine the sifted cake flour, granulated sugar, baking powder, baking soda, and salt. Mix on low speed for 30 seconds just to combine.
- Add the room temperature butter (cut into cubes) and the vegetable oil to the dry ingredients. Mix on low speed until the mixture resembles coarse sand or damp crumbs. This coats the flour in fat.
- In a separate medium bowl or large measuring cup, whisk together the eggs, egg yolks, vanilla extract, and buttermilk until well combined.
- With the mixer on low speed, slowly pour about half of the wet ingredient mixture into the crumbly flour mixture. Once added, increase the speed to medium-high and beat for exactly 2 minutes. This builds the cake’s structure.
- Scrape down the sides and bottom of the bowl. Turn the mixer to low speed and add the remaining liquid mixture in two batches, mixing for about 15-20 seconds after each addition. Do not over-mix at this stage; stop as soon as the batter is uniform.
- Divide the batter evenly between the prepared cake pans. Use a kitchen scale for precision if desired.
- Bake for 28-32 minutes, or until a toothpick inserted into the center comes out clean or with just a few moist crumbs attached. The cakes should spring back lightly when touched.
- Remove from the oven and let the cakes cool in the pans for 15 minutes. Then, carefully run a knife around the edges and invert them onto a wire rack to cool completely before frosting.
- To make the frosting: In a clean mixing bowl, beat the softened butter on medium-high speed for 5 minutes until it is pale, creamy, and doubled in volume.
- Reduce speed to low and gradually add the sifted powdered sugar and cocoa powder. Once incorporated, increase speed to high and beat for 2 minutes.
- Add the vanilla extract, heavy cream, and a pinch of salt. Beat on medium-high speed for another 3-4 minutes until the frosting is fluffy, glossy, and spreadable. Add more cream if it’s too stiff, or more sugar if it’s too loose.
- Assemble the cake: Place one cooled cake layer on your serving plate. Spread a generous layer of chocolate frosting over the top. Place the second cake layer on top (flat side up).
- Apply a thin ‘crumb coat’ of frosting all over the cake and refrigerate for 20 minutes to set. This locks in the crumbs.
- Finish by frosting the top and sides with the remaining chocolate buttercream. Create swirls with an offset spatula for a rustic look.
Expert Cooking Tips
- ✓Room temperature ingredients are non-negotiable. Cold eggs or buttermilk will seize the butter and break your emulsion, leading to a dense cake.
- ✓Weigh your flour. If you scoop with a cup, you might accidentally pack in too much flour, resulting in a dry cake. 300g is the magic number.
- ✓Don’t skip the parchment paper. It guarantees your cakes will release from the pan without tearing.
- ✓Sift your cocoa powder and powdered sugar for the frosting to avoid gritty lumps that clog your piping bag or ruin the texture.
- ✓If your cakes have a dome on top, use a serrated knife to level them off before stacking for a professional, stable finish.
- ✓Tap the pans on the counter before baking to release any large air bubbles trapped in the batter.
Substitutions and Variations
Baking is chemistry, so substitutions should be made with caution. If you do not have cake flour, you can make a DIY version: for every cup of all-purpose flour, remove 2 tablespoons of flour and replace them with 2 tablespoons of cornstarch, then sift 3 times. However, real cake flour yields better results. If you don’t have buttermilk, you can make a ‘sour milk’ substitute by adding 1 tablespoon of white vinegar or lemon juice to a cup of whole milk and letting it sit for 10 minutes; alternatively, dilute sour cream or plain yogurt with a little milk until it reaches a pourable consistency. For the oil, any neutral oil works, such as grapeseed, canola, or vegetable oil; avoid olive oil as the flavor is too strong. In the frosting, you can use salted butter if you prefer a ‘salted chocolate’ flavor profile, just omit the added pinch of salt.
Common Mistakes to Avoid
The most common mistake is over-mixing the batter after the liquids are added. While the initial beating step builds structure, mixing too much at the end develops excess gluten, making the cake tough and rubbery. Another frequent error is checking the cake too early and opening the oven door; the sudden drop in temperature can cause the cake to collapse in the center. Wait until at least 25 minutes have passed before peeking. Regarding the frosting, adding the powdered sugar too quickly can create a mess and a grainy texture; add it slowly. Finally, never frost a warm cake. If the cake is even slightly warm, the butter in the frosting will melt, causing the layers to slide apart and the frosting to become greasy.
Serving Suggestions
This cake is a showstopper on its own, but it pairs beautifully with fresh berries—strawberries or raspberries provide a tart contrast to the sweet chocolate and vanilla. For a birthday celebration, top with colorful sprinkles or gold leaf for an elegant touch. Serve slices with a scoop of vanilla bean ice cream or a dollop of lightly sweetened whipped cream. A glass of cold milk or a hot cup of coffee is the perfect beverage accompaniment, as the bitterness of the coffee highlights the cocoa notes in the frosting. For a summer twist, you could fill the center layer with fresh fruit jam or lemon curd instead of frosting.
Storage and Reheating Tips
Because this cake uses oil and butter, it stays moist longer than all-butter cakes. It can be stored at room temperature in an airtight cake keeper for up to 4 days. If you live in a very hot or humid climate, you may want to refrigerate it, but be sure to bring it back to room temperature before serving, as cold butter-based cakes can taste firm and dry. For freezing: You can freeze the unfrosted layers by wrapping them tightly in plastic wrap and then foil for up to 3 months. To freeze a fully frosted cake or slices, place them on a baking sheet in the freezer for an hour to harden the frosting, then wrap tightly in plastic wrap and foil. Thaw overnight in the refrigerator before bringing to room temperature.
Nutrition Facts (Estimated)
| Serving Size | 1 slice |
| Calories | 650 |
| Fat | 35g |
| Saturated Fat | 18g |
| Unsaturated Fat | 15g |
| Trans Fat | 0.5g |
| Cholesterol | 95mg |
| Sodium | 320mg |
| Carbohydrates | 82g |
| Fiber | 3g |
| Sugar | 55g |
| Protein | 6g |
Frequently Asked Questions
Can I turn this recipe into cupcakes?
Yes, absolutely! This batter makes excellent cupcakes. Line a muffin tin with liners and fill them 2/3 full. Bake at 350°F for 18-22 minutes. This recipe yields approximately 24 standard cupcakes.
Why did my cake sink in the middle?
Sinking usually happens for one of three reasons: the oven door was opened too early, the cake was underbaked (the center was still raw), or there was too much leavening (baking powder/soda) which caused it to rise too fast and then collapse.
Can I use all-purpose flour instead of cake flour?
You can, but the texture will be different. All-purpose flour has more protein, so the cake will be slightly denser and more bread-like. If you must use it, use a scant measurement (don’t pack it) and mix as little as possible.
My frosting is too runny, what do I do?
If your kitchen is warm or you added too much liquid, the frosting can be soft. Place the bowl in the fridge for 15 minutes to firm up the butter, then re-whip. You can also add more sifted powdered sugar, 1/4 cup at a time, to stiffen it.
Can I make the cake layers ahead of time?
Yes. In fact, chilled cake layers are easier to frost. You can bake the layers the day before, let them cool completely, wrap them in plastic wrap, and store them in the fridge overnight.
Is it necessary to use both baking powder and baking soda?
Yes. Baking soda reacts with the acid in the buttermilk to create lift and tenderize the crumb. Baking powder provides the secondary lift needed for a fluffy texture. They perform different chemical functions in this recipe.
Why do I need to use room temperature ingredients?
Room temperature ingredients emulsify (blend) much better. When butter, eggs, and milk are at the same temp, they trap air bubbles that expand during baking, creating a lighter cake. Cold ingredients lead to a curdled batter.
Can I use a different flavor of frosting?
Certainly. This vanilla base pairs with almost anything. Strawberry buttercream, cream cheese frosting, or a Swiss meringue buttercream would all be delicious choices.
How do I know when the butter is creamed enough?
For the frosting, the butter should be very pale (almost white) and fluffy. If it still looks yellow and dense, keep beating. For the cake batter (reverse creaming), you just want the fat to coat the flour, looking like wet sand.
Conclusion
Mastering the perfect moist vanilla layer cake is a milestone for any home baker, and with this recipe, you have all the tools you need to succeed. The combination of the reverse creaming method, the specific fat blend, and the high-quality ingredients results in a cake that is truly superior to anything you can buy at a grocery store. The contrast between the light, fragrant vanilla sponge and the rich, fudgy chocolate frosting is a timeless classic that brings joy to every table. We hope this recipe brings a little extra sweetness to your next celebration. Don’t forget to pin this recipe for later and share your baking triumphs with us on social media!

