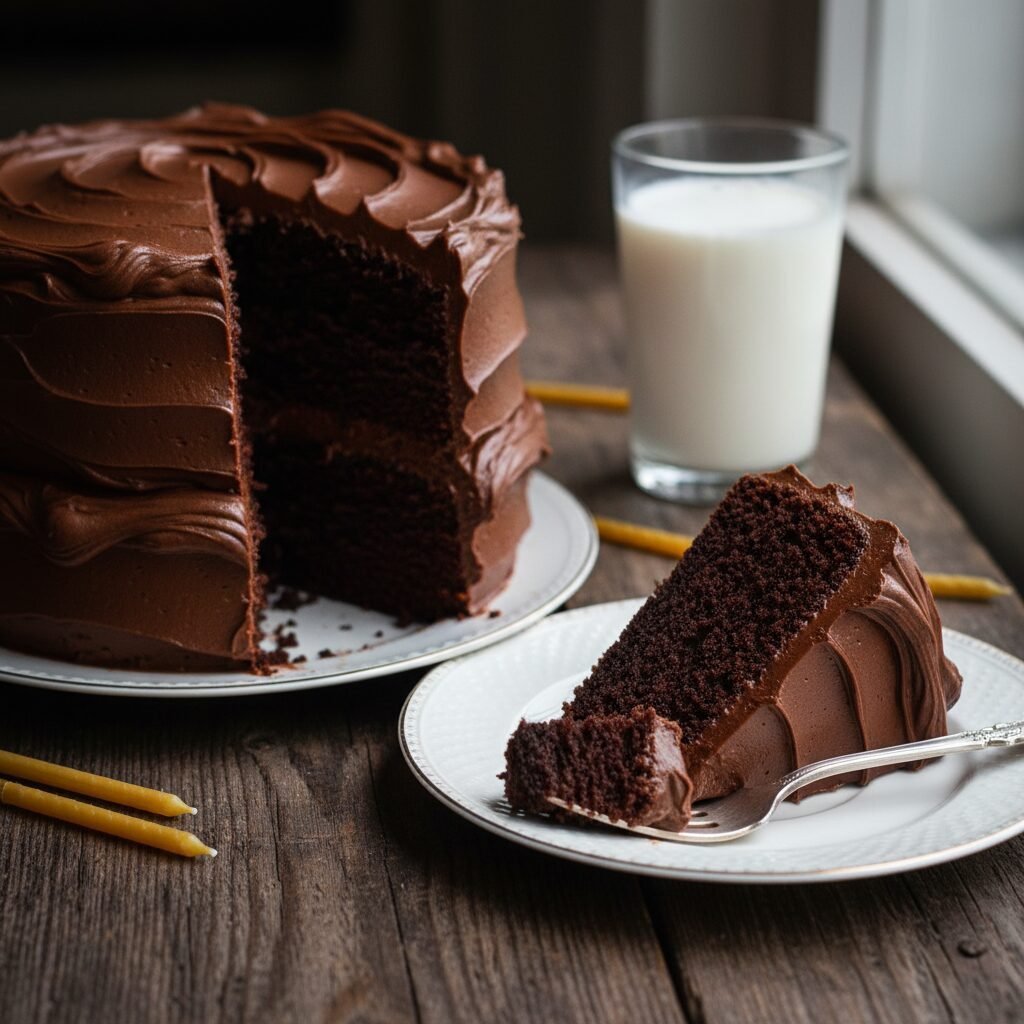
Moist Chocolate Birthday Cake For Two Layers Recipe
Discover the secret to the most decadent, moist chocolate birthday cake you’ve ever tasted. This foolproof two-layer recipe uses a special boiling water method to bloom the cocoa, resulting in a rich, fudgy crumb that stays soft for days.
30 minutes
35 minutes
1 hour 30 minutes
12-16 servings
Dessert
Baking
American
Vegetarian
There is something undeniably magical about a homemade chocolate birthday cake. It is the centerpiece of childhood memories, the grand finale of dinner parties, and the ultimate comfort food when you need a slice of happiness. However, finding the ‘perfect’ recipe can be a lifelong quest. We have all suffered through dry, crumbly sponges that require gallons of milk to wash down, or cakes that lack that deep, punchy chocolate flavor we crave. This recipe changes everything. It is not just another chocolate cake; it is the gold standard for what a celebration cake should be.
This Moist Chocolate Birthday Cake for two layers is engineered to be fail-proof. It balances the science of baking with the art of flavor. The result is a cake with a crumb that is tender but sturdy enough to hold up to generous swoops of buttercream. It possesses a darkness that speaks to the quality of the cocoa, yet a sweetness that appeals to kids and adults alike. Whether you are a seasoned baker looking for a reliable go-to or a novice attempting your first layered creation, this recipe delivers professional bakery-style results right in your home kitchen. Prepare to ruin all other chocolate cakes for your friends and family, because once they try a slice of this, nothing else will compare.
History & Origins
The history of the chocolate cake is a fascinating journey that mirrors the evolution of chocolate itself. While the indigenous peoples of the Americas consumed chocolate as a bitter beverage for centuries, it wasn’t until the mid-18th century, specifically 1765, that Dr. James Baker and John Hannon founded the first chocolate mill in America. However, for a long time, ‘chocolate cake’ referred to a yellow or white cake served with a chocolate drink on the side, rather than chocolate being an ingredient in the batter.
It wasn’t until the late 19th century that cooks began incorporating chocolate directly into the cake batter. The earliest recipes were likely for ‘Devil’s Food Cake,’ a name that emerged in the early 1900s to distinguish it from the snowy white Angel Food Cake. The ‘Devil’s’ moniker likely referred to the cake’s dark, reddish hue—a chemical reaction caused by the interaction between cocoa powder and baking soda—and its sinfully rich flavor.
By the 1930s and 40s, with the industrialization of food production and the availability of consistent cocoa powders and baking chocolates, the layered chocolate cake became an American staple. It became synonymous with birthdays and celebrations, symbolizing indulgence and love. Over the decades, recipes have shifted from using solid chocolate squares to cocoa powder, and from butter-based batters to oil-based ones, all in the pursuit of the ultimate moist texture. This recipe stands on the shoulders of that history, utilizing modern techniques to perfect the classic.
Why This Recipe Works
This recipe succeeds where many others fail due to three specific chemical interactions. First and foremost is the use of **boiling water**. When you add boiling water to the batter at the very end, you are doing two things: you are ‘blooming’ the cocoa powder, which releases its essential oils and intensifies the chocolate flavor, and you are ensuring the sugar is completely dissolved before baking, which leads to a smoother texture.
Secondly, this recipe uses **oil instead of butter**. While butter provides a lovely flavor, it contains water (about 15-20%) which evaporates during baking, and milk solids which can dry out the crumb. Oil is 100% fat and remains liquid at room temperature. This means your cake stays incredibly moist and soft for days after baking, rather than hardening as it cools.
Finally, the inclusion of **buttermilk** and baking soda creates a robust leavening reaction. The acidity in the buttermilk reacts with the baking soda to create carbon dioxide bubbles, giving the cake a phenomenal lift and a tender, airy crumb structure that prevents the dense, heavy texture often associated with rich chocolate cakes. It is a perfect harmony of ingredients designed for moisture retention and flavor depth.
Why You’ll Love This Recipe
- ✓Incredibly moist texture that lasts for 3-4 days.
- ✓Deep, intense chocolate flavor thanks to the boiling water method.
- ✓Sturdy enough to stack without crumbling.
- ✓Requires no fancy mixer—just two bowls and a whisk.
- ✓Perfect balance of sweetness and dark cocoa richness.
Equipment You’ll Need
- ✓Two 9-inch round cake pans
- ✓Large mixing bowl
- ✓Medium mixing bowl
- ✓Wire whisk
- ✓Electric hand mixer or stand mixer (for frosting)
- ✓Parchment paper
- ✓Wire cooling rack
- ✓Sifter or fine-mesh sieve
Ingredients
- ✓2 cups granulated white sugar
- ✓1 3/4 cups all-purpose flour
- ✓3/4 cup unsweetened cocoa powder (high quality)
- ✓1 1/2 teaspoons baking powder
- ✓1 1/2 teaspoons baking soda
- ✓1 teaspoon salt
- ✓2 large eggs, room temperature
- ✓1 cup whole milk
- ✓1/2 cup vegetable oil (or canola oil)
- ✓2 teaspoons pure vanilla extract
- ✓1 cup boiling water
- ✓FOR THE FROSTING: 1 cup (2 sticks) unsalted butter, softened
- ✓FOR THE FROSTING: 1 cup unsweetened cocoa powder
- ✓FOR THE FROSTING: 3 cups powdered sugar
- ✓FOR THE FROSTING: 1/3 cup heavy cream or whole milk
- ✓FOR THE FROSTING: 1 teaspoon vanilla extract
Instructions
- Preheat your oven to 350°F (175°C). Grease two 9-inch round cake pans generously with butter or cooking spray. Line the bottoms with parchment paper circles and dust the sides with a little cocoa powder or flour to prevent sticking.
- In a large bowl, sift together the sugar, flour, cocoa powder, baking powder, baking soda, and salt. Whisk vigorously to ensure all dry ingredients are evenly combined and there are no lumps.
- In a separate medium bowl, whisk together the eggs, milk, vegetable oil, and vanilla extract until fully blended.
- Pour the wet ingredient mixture into the dry ingredients. Mix by hand with a whisk or use an electric mixer on medium speed for about 2 minutes. The batter will be thick at this stage.
- Carefully pour the boiling water into the batter. Begin mixing on low speed (or whisking gently by hand) to incorporate the water. The batter will become very thin and liquidy—this is completely normal, so do not panic!
- Divide the batter evenly between the two prepared cake pans. Tap the pans gently on the counter once or twice to release any large air bubbles.
- Bake in the preheated oven for 30 to 35 minutes. Test for doneness by inserting a wooden toothpick into the center of the cake; it should come out clean or with just a few moist crumbs attached.
- Remove the cakes from the oven and let them cool in the pans for exactly 10 minutes. Then, run a knife around the edges to loosen them and carefully invert them onto a wire rack to cool completely before frosting.
- While the cakes cool, prepare the frosting. In a large bowl or stand mixer, cream the softened butter until pale and fluffy (about 3 minutes).
- Add the cocoa powder and mix until combined. Gradually add the powdered sugar and heavy cream, alternating between the two, while mixing on low speed. Once incorporated, increase to high speed and whip for 1 minute. Stir in the vanilla extract.
- To assemble, place one cake layer on your serving plate flat-side up. Spread a generous layer of frosting over the top. Place the second cake layer on top, flat-side up (for a flat top) or rounded-side up (for a domed look). Frost the top and sides of the entire cake.
- Decorate with sprinkles, chocolate shavings, or fresh berries as desired. Slice and serve!
Expert Cooking Tips
- ✓Ensure your boiling water is truly boiling. Hot tap water is not enough; you need the high heat to bloom the cocoa properly.
- ✓Do not overbake. Chocolate cake is dark, so you can’t rely on visual browning cues. Trust the toothpick test and check at the 30-minute mark.
- ✓Use room temperature eggs and milk. This prevents the batter from seizing or separating when mixed, ensuring a uniform crumb.
- ✓Invest in high-quality cocoa powder. Since chocolate is the main flavor, using a premium brand (like Valrhona or Ghirardelli) makes a massive difference.
- ✓Let the cakes cool completely. If you try to frost a cake that is even slightly warm, the butter in the frosting will melt, and your layers will slide apart.
- ✓Weigh your flour if possible. If using cups, spoon the flour into the cup and level it off. Scooping directly packs the flour and leads to a dry cake.
Substitutions and Variations
This recipe is quite versatile if you need to make swaps. For the **buttermilk**, if you don’t have any on hand, you can make a ‘sour milk’ substitute by adding 1 tablespoon of white vinegar or lemon juice to a measuring cup and filling it to the 1-cup line with regular milk; let it sit for 5 minutes before using.
Regarding the **oil**, vegetable or canola oil works best for a neutral flavor, but melted coconut oil or light olive oil can be used for a subtle flavor twist.
For a deeper flavor profile, substitute the **boiling water** with boiling hot coffee. The coffee enhances the chocolate notes without making the cake taste like a latte.
If you are **gluten-free**, this recipe works surprisingly well with a high-quality 1:1 gluten-free all-purpose flour blend (look for one containing xanthan gum).
For the **frosting**, you can swap heavy cream for milk for a lighter texture, or use coffee creamer for flavored frostings.
Common Mistakes to Avoid
The most common mistake is **opening the oven door too early**. This causes a sudden drop in temperature which can make the cake collapse in the center. Wait until at least 25 minutes have passed before checking.
Another error is **over-mixing the batter** once the flour is added (before the water step). Over-mixing develops gluten, which results in a tough, chewy cake rather than a tender one.
Using **cold ingredients** is a frequent issue; cold eggs and milk don’t emulsify well with the oil, leading to an uneven bake.
Finally, **ignoring the pan prep**. Chocolate cakes can be sticky. Always use parchment paper circles in the bottom of your pans; relying solely on grease often leads to the bottom of the cake tearing upon removal.
Serving Suggestions
This cake is rich and decadent, so it pairs beautifully with elements that cut through the sweetness. A scoop of vanilla bean ice cream is a classic choice. Fresh raspberries or strawberries add a tart brightness that complements the deep cocoa flavor perfectly. For a sophisticated touch, serve with a dollop of unsweetened whipped cream and a dusting of espresso powder. If serving for a birthday, rainbow sprinkles add a festive crunch. For beverages, a tall glass of cold milk is traditional, but a hot cup of dark roast coffee or a glass of Cabernet Sauvignon also pairs wonderfully with the chocolate.
Storage and Reheating Tips
Because this cake is oil-based, it stays moist at room temperature longer than butter cakes. You can store it in a cake keeper or covered tightly with plastic wrap at room temperature for up to 3 days. If you live in a very hot or humid climate, it is better to store it in the refrigerator, where it will last for up to 5-6 days; however, bring it to room temperature before serving for the best texture and flavor.
This cake freezes exceptionally well. You can freeze the unfrosted layers by wrapping them tightly in plastic wrap and then aluminum foil for up to 3 months. Thaw in the fridge overnight before frosting. You can also freeze individual slices of the finished cake; place them on a baking sheet to freeze the frosting solid, then wrap individually.
Nutrition Facts (Estimated)
| Serving Size | 1 slice (1/14th of cake) |
| Calories | 580 |
| Fat | 28g |
| Saturated Fat | 10g |
| Unsaturated Fat | 16g |
| Trans Fat | 0g |
| Cholesterol | 65mg |
| Sodium | 320mg |
| Carbohydrates | 78g |
| Fiber | 4g |
| Sugar | 45g |
| Protein | 6g |
Frequently Asked Questions
Can I use this recipe to make cupcakes?
Yes, absolutely! This recipe makes approximately 24-30 standard cupcakes. Fill liners about 2/3 full and reduce the baking time to 18-22 minutes.
Why is the batter so thin?
The batter is intentionally thin because of the cup of boiling water. This high liquid content ensures the cake stays moist and steams slightly as it bakes. Do not add more flour to thicken it.
Can I use Dutch-process cocoa powder?
For this specific recipe, natural unsweetened cocoa powder is preferred because its acidity reacts with the baking soda to help the cake rise. However, you can use Dutch-process if you replace the baking soda with baking powder, though the texture may change slightly.
Can I make this cake ahead of time?
Yes. In fact, the flavor and moisture often improve the day after baking. You can bake the layers one day, wrap them, and frost them the next day.
My cake sank in the middle. What happened?
This usually happens if the oven door was opened too early, the oven wasn’t hot enough, or there was too much leavening (baking soda/powder). Ensure your oven thermometer is accurate.
Can I reduce the sugar?
Sugar provides moisture and structure, not just sweetness. Reducing it significantly will result in a drier, denser cake. We recommend sticking to the recipe for the best texture.
Do I have to use a stand mixer?
No. The cake batter is actually best made by hand with a whisk to avoid over-mixing. A hand mixer is helpful for the frosting to get it fluffy, but even that can be done by hand with some elbow grease.
Can I bake this in a 9×13 pan?
Yes, this recipe fits perfectly in a standard 9×13 inch rectangular pan. You will need to adjust the baking time to roughly 35-40 minutes.
What if I don’t have parchment paper?
If you lack parchment, grease the pan heavily with butter or shortening, then dust it with cocoa powder (instead of flour, to avoid white streaks) and tap out the excess.
Is the boiling water step mandatory?
Yes, it is the key to this recipe. It blooms the cocoa and creates the unique emulsion that results in the moist crumb. Do not skip it or use cool water.
Conclusion
There are thousands of chocolate cake recipes on the internet, but this Moist Chocolate Birthday Cake for two layers truly stands apart. It combines the nostalgia of a classic birthday party with a sophisticated texture and flavor depth that will impress any guest. By following the simple steps and respecting the science behind the boiling water and oil-based batter, you guarantee a result that is moist, fudgy, and utterly delicious every single time. Whether you are celebrating a milestone or just celebrating a Tuesday, this cake brings joy to the table. Happy baking!

