Moist Chocolate Birthday Cake Recipe
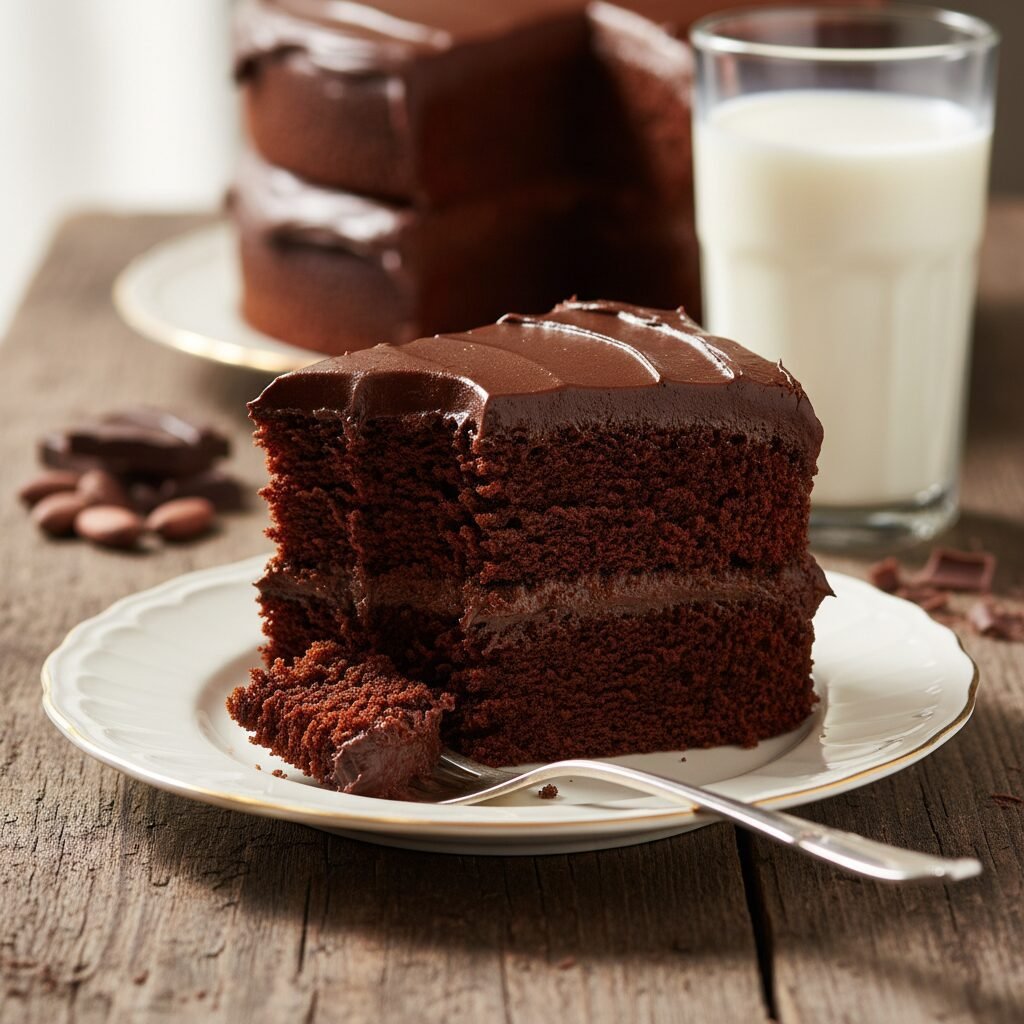
Forget dry, crumbly cakes—this is the only chocolate birthday cake recipe you will ever need. With a deeply fudgy crumb, rich cocoa flavor, and a silky buttercream frosting, it is the perfect centerpiece for any celebration.
20 minutes
35 minutes
55 minutes
12-16 Servings (Two 8-inch rounds)
Dessert
Baking
American
Vegetarian
There is something undeniably magical about a chocolate birthday cake. It is not just a dessert; it is a centerpiece of nostalgia, a vessel for candles, and the sweet climax of a celebration. However, we have all suffered through the disappointment of a dry, lackluster slice that requires a gallon of milk to wash down. That ends today. This recipe is the result of years of testing, tweaking, and obsession to find the perfect balance between a fluffy crumb and a fudgy, brownie-like texture. We are talking about a cake that stays moist for days, boasts a profound chocolate depth, and pairs perfectly with a classic American buttercream or a rich ganache.
What sets this cake apart is its reliance on science rather than just tradition. We move away from the standard creaming method to ensure a tender crumb that doesn’t dry out. The flavor profile is intense but not bitter, striking that sweet spot that appeals to both sophisticated adult palates and sugar-loving children. Whether you are baking for a milestone birthday, a casual get-together, or simply because you need a slice of chocolate heaven on a Tuesday night, this recipe delivers consistent, bakery-quality results right in your home kitchen. Prepare to become the designated cake baker for every family event moving forward, because once your guests taste this, they won’t settle for a box mix ever again.
History & Origins
The history of chocolate cake is a fascinating journey that mirrors the evolution of chocolate processing itself. For centuries, chocolate was consumed exclusively as a beverage. It wasn’t until 1828, when Coenraad van Houten learned how to mechanically extract fat from cacao liquor to produce cacao butter and defatted cocoa powder, that the possibility of chocolate as a baking ingredient emerged. However, even then, ‘chocolate cake’ usually referred to a yellow or white cake covered in chocolate frosting, or served alongside a cup of hot chocolate.
The true chocolate cake as we know it began to take shape in the late 19th century. In 1886, American cooks began adding chocolate to the cake batter itself, creating the first ‘Devil’s Food’ cakes. These early iterations were often reddish in hue due to a chemical reaction between natural cocoa powder and baking soda, a contrast to the snow-white Angel Food cakes popular at the time. By the mid-20th century, with the advent of convenient boxed mixes by companies like Betty Crocker and Pillsbury, chocolate cake became a staple of the American household. Yet, these convenience mixes often sacrificed texture for ease, leading to the airy, sometimes dry cakes many of us grew up with. This recipe harkens back to the scratch-made traditions of the early 1900s but utilizes modern understanding of food chemistry to ensure a moistness that those early bakers could only dream of. It is a modern classic deeply rooted in a rich culinary heritage.
Why This Recipe Works
The secret to this cake’s incredible texture lies in the specific combination of fat, liquid, and cocoa bloom. First, we use oil instead of butter for the cake batter. While butter offers great flavor, it is about 20% water and solidifies at room temperature, which can lead to a drier, firmer cake. Oil remains liquid at room temperature, ensuring the sensation of moistness in every bite. Second, we use buttermilk. The acidity in buttermilk reacts with the baking soda to create a robust rise, but it also breaks down the long strands of gluten in the flour, resulting in a significantly more tender crumb.
Perhaps the most critical step in this recipe is ‘blooming’ the cocoa powder. We mix the cocoa with boiling hot coffee (or water) before adding it to the batter. This hot liquid dissolves the cocoa powder effectively, releasing flavor compounds that are otherwise trapped in the starch particles. This process amplifies the chocolate intensity without requiring more cocoa, which could dry out the cake. The coffee doesn’t make the cake taste like a mocha latte; rather, it deepens the roasted notes of the chocolate, making it taste more like itself. Finally, this is a ‘dump and mix’ or ‘one-bowl’ method, which minimizes the risk of over-mixing the flour, preventing the development of tough gluten networks.
Why You’ll Love This Recipe
- ✓Stays incredibly moist for up to 4 days without drying out.
- ✓Deep, intense chocolate flavor boosted by hot coffee.
- ✓Simple one-bowl mixing method requires no fancy equipment.
- ✓Versatile batter that works for layers, sheet cakes, or cupcakes.
- ✓Perfect balance of sweetness and rich cocoa depth.
- ✓Foolproof recipe that yields bakery-quality results every time.
Equipment You’ll Need
- ✓Two 8-inch round cake pans
- ✓Large mixing bowl
- ✓Whisk
- ✓Electric mixer (optional for frosting)
- ✓Parchment paper
- ✓Wire cooling rack
- ✓Measuring cups and spoons
- ✓Offset spatula
Ingredients
- ✓2 cups granulated sugar
- ✓1 3/4 cups all-purpose flour
- ✓3/4 cup unsweetened cocoa powder (high quality preferred)
- ✓1 1/2 teaspoons baking powder
- ✓1 1/2 teaspoons baking soda
- ✓1 teaspoon salt
- ✓2 large eggs, room temperature
- ✓1 cup whole milk or buttermilk, room temperature
- ✓1/2 cup vegetable oil or canola oil
- ✓2 teaspoons pure vanilla extract
- ✓1 cup boiling water (or boiling hot coffee for depth)
Instructions
- Preheat your oven to 350°F (175°C). Grease two 8-inch round cake pans with butter or cooking spray and dust with cocoa powder. For extra insurance, line the bottoms with parchment paper rounds.
- In a large mixing bowl, whisk together the dry ingredients: sugar, flour, cocoa powder, baking powder, baking soda, and salt. Ensure there are no large lumps of cocoa.
- Add the wet ingredients (except the boiling water) to the dry mix: eggs, buttermilk, oil, and vanilla extract.
- Beat the mixture on medium speed with a hand mixer or stand mixer for about 2 minutes. Alternatively, you can whisk vigorously by hand. The batter should look smooth and well-combined.
- Carefully pour in the boiling water (or hot coffee). The batter will become very thin and liquidy—this is completely normal and exactly what you want. Stir gently by hand until combined.
- Divide the batter evenly between the prepared cake pans. Tap the pans gently on the counter to release any large air bubbles.
- Bake for 30 to 35 minutes. Test for doneness by inserting a wooden toothpick into the center of the cake; it should come out clean or with just a few moist crumbs attached.
- Remove from the oven and let the cakes cool in the pans for about 10 minutes. This allows them to set so they don’t fall apart when removed.
- Run a knife around the edges to loosen, then invert the cakes onto a wire rack to cool completely before frosting. Do not attempt to frost warm cakes, or the frosting will melt.
Expert Cooking Tips
- ✓Use room temperature ingredients (eggs and buttermilk) to ensure the batter emulsifies properly.
- ✓Do not skip the parchment paper; it guarantees your cakes won’t stick to the bottom of the pan.
- ✓If you don’t have buttermilk, make a substitute by adding 1 tablespoon of vinegar or lemon juice to 1 cup of milk and letting it sit for 5 minutes.
- ✓Weigh your flour if possible (approx. 120-125g per cup) to avoid a dense cake caused by over-measuring.
- ✓The boiling liquid step is crucial for blooming the cocoa—don’t use lukewarm water.
- ✓Rotate your pans halfway through baking if your oven has hot spots.
- ✓Freeze the cake layers for 20 minutes before frosting to make them easier to handle and reduce crumbs.
Substitutions and Variations
This recipe is quite forgiving, but here are some safe swaps. For the flour, you can use a 1:1 gluten-free baking flour blend if you are catering to gluten sensitivities, though the texture may be slightly less fluffy. If you are out of buttermilk, a mix of plain yogurt and milk (50/50 ratio) works wonders, or sour cream thinned with a little milk. For the oil, melted coconut oil or melted butter can be used, though melted butter will result in a slightly denser, drier crumb once the cake cools. You can substitute the eggs with ‘flax eggs’ (1 tbsp ground flaxseed meal + 3 tbsp water per egg) for a vegan version, though the rise will be less significant. Lastly, for the boiling liquid, hot coffee is highly recommended to enhance the chocolate flavor, but hot water works perfectly fine if you prefer to avoid caffeine.
Common Mistakes to Avoid
The most common mistake is over-baking. Chocolate cake is dark, so you can’t rely on visual browning cues. Trust the toothpick test and check a few minutes early. Another error is over-mixing the batter after adding the flour but before the water; this develops gluten and creates a tough cake. Always mix just until combined. Using cold ingredients is another pitfall; cold eggs and milk can shock the batter and prevent proper emulsion, leading to an uneven bake. Finally, many home bakers try to frost the cake before it is completely cool. Even a hint of warmth will cause your buttercream to slide right off the cake, creating a messy disaster. Patience is key.
Serving Suggestions
This cake is a showstopper on its own, but presentation makes it perfect for birthdays. Serve it on a pedestal cake stand to give it height and elegance. A classic chocolate buttercream or a Swiss meringue buttercream pairs beautifully. For a contrast in flavor, try a cream cheese frosting or a raspberry filling between the layers. If serving for a dinner party, a slice of this cake slightly warmed in the microwave for 10 seconds, paired with a scoop of vanilla bean ice cream and a drizzle of warm salted caramel sauce, transforms it into a high-end plated dessert. Fresh berries, particularly strawberries or raspberries, add a pop of color and acidity that cuts through the richness.
Storage and Reheating Tips
Because this cake is oil-based, it stays moist longer than butter cakes. It can be stored at room temperature in an airtight cake carrier for up to 4 days. If you have used a perishable filling or frosting (like cream cheese or fresh fruit), it must be refrigerated. In the fridge, it will last up to a week, but bring it to room temperature before serving for the best texture. For long-term storage, wrap individual unfrosted layers tightly in plastic wrap, then foil, and freeze for up to 3 months. Thaw overnight in the refrigerator before assembling and frosting.
Nutrition Facts (Estimated)
| Serving Size | 1 slice |
| Calories | 450 |
| Fat | 24g |
| Saturated Fat | 6g |
| Unsaturated Fat | 16g |
| Trans Fat | 0g |
| Cholesterol | 45mg |
| Sodium | 320mg |
| Carbohydrates | 58g |
| Fiber | 3g |
| Sugar | 35g |
| Protein | 5g |
Frequently Asked Questions
Can I make this recipe as cupcakes?
Yes! This batter makes fantastic cupcakes. Line a muffin tin with liners and fill them about 2/3 full. Bake at 350°F for 18-22 minutes.
Why is the batter so thin?
The batter is intentionally thin due to the high liquid content (milk, oil, boiling water). This ensures the cocoa hydrates fully and results in an ultra-moist cake. Don’t add more flour!
Can I use Dutch-processed cocoa powder?
Yes, you can use either natural or Dutch-processed cocoa. Dutch-processed will give a darker color and a smoother, less acidic flavor, while natural cocoa provides a lighter color and more complex fruity notes.
My cake sank in the middle, what happened?
This usually happens if the oven door was opened too early during baking, causing a temperature drop, or if there was too much leavening (baking soda/powder). Ensure your oven temperature is accurate using an oven thermometer.
Can I reduce the sugar?
You can reduce the sugar by about 1/4 cup without disastrous results, but sugar is structural in cakes. Reducing it too much will affect the moisture and texture, making the cake rubbery.
Can I bake this in a 9×13 pan?
Absolutely. A 9×13 inch rectangular pan will take slightly longer to bake, typically around 35-45 minutes. Keep an eye on it and use the toothpick test.
Do I have to use coffee?
No, the coffee is optional but recommended for enhancing chocolate flavor. If you skip it, simply use boiling water. The cake will still be delicious.
How do I get flat cake layers?
You can use ‘cake strips’ soaked in water wrapped around the outside of the pan to insulate the edges. This promotes even baking and prevents the center from doming too much.
Conclusion
There you have it—the blueprint for the ultimate chocolate birthday cake. This recipe is more than just a list of ingredients; it is a reliable companion for your most cherished celebrations. The deep, satisfying chocolate flavor combined with that impossibly moist crumb sets a new standard for what a homemade cake should be. Whether you are a novice baker or a seasoned pro, the simplicity of the method ensures success. So, preheat that oven, brew a little extra coffee, and get ready to bake a cake that will have your friends and family asking for the recipe before the last crumb is gone. Happy baking!

