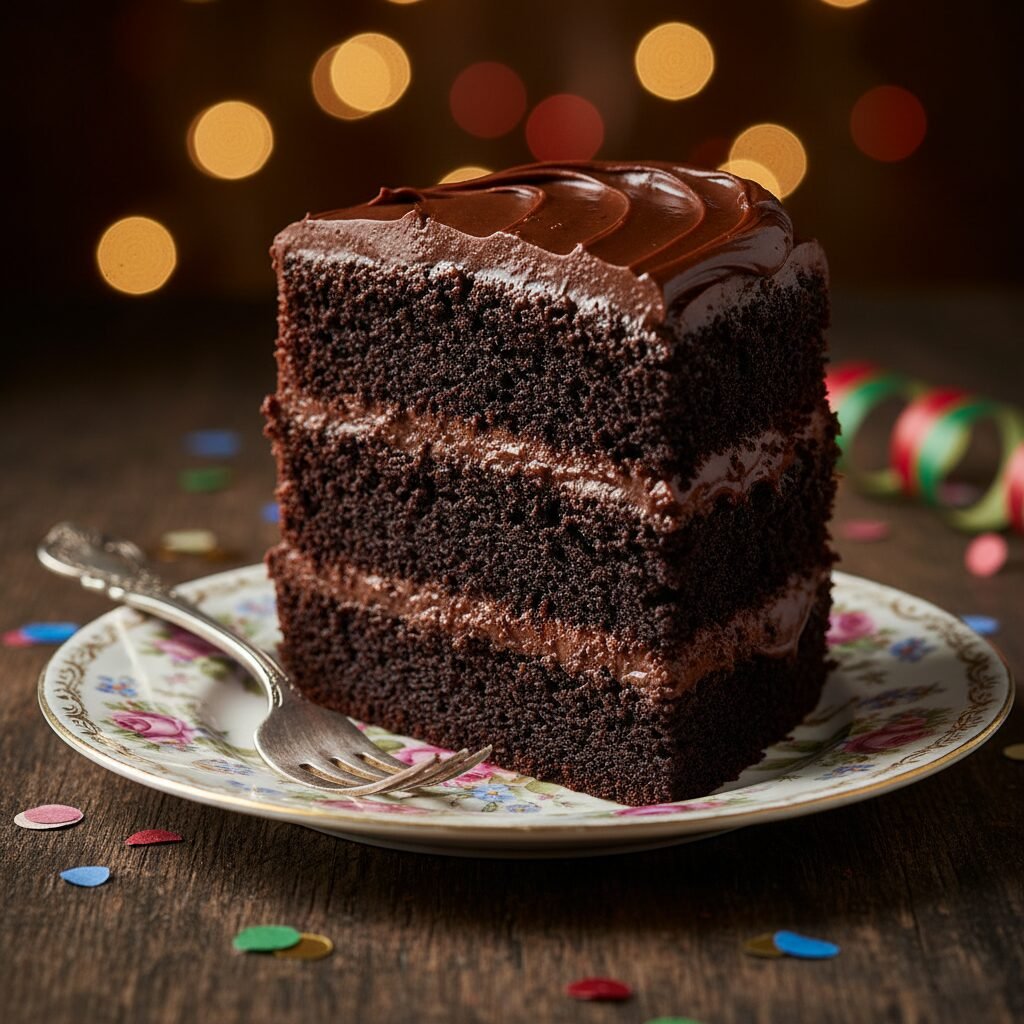
Moist Chocolate Birthday Cake With Buttermilk Recipe
This is the definitive recipe for a celebration-worthy chocolate cake that stays incredibly moist for days. Featuring a tender, dark chocolate crumb enhanced by tangy buttermilk and hot coffee, it is paired with a silky chocolate buttercream that makes it the perfect centerpiece for any birthday party.
25 minutes
35 minutes
1 hour 15 minutes
12-14 servings
Dessert
Baking
American
Vegetarian
There are few things in the culinary world as universally beloved yet surprisingly difficult to perfect as the classic chocolate birthday cake. We have all been there: sitting at a party, plastic fork in hand, eagerly anticipating that first bite, only to be met with a dry, crumbly disappointment that relies entirely on the frosting for moisture. This recipe ends that search forever. We are talking about a cake so deeply rich, so impossibly moist, and so intensely chocolatey that it resets the standard for what a homemade cake should be. The magic lies in the balance of ingredients. It is not just about dumping sugar and cocoa powder into a bowl; it is about understanding how fats, acids, and heat interact to create a crumb that is sturdy enough to stack but tender enough to melt in your mouth. This Moist Chocolate Birthday Cake with Buttermilk is designed for the home baker who wants bakery-quality results without the intimidation factor. The batter comes together quickly, filling your kitchen with the intoxicating aroma of blooming cocoa and vanilla. Whether you are baking for a child’s milestone birthday, a sophisticated dinner party, or simply because you survived a long week, this cake delivers pure comfort. It captures the nostalgia of the box mixes we grew up with but elevates the experience with wholesome ingredients and a depth of flavor that no preservative-laden mix could ever achieve. Prepare to become the designated cake baker for every family event moving forward, because once your friends and family taste this, they will settle for nothing less.
History & Origins
The history of the chocolate cake is a fascinating evolution that mirrors the development of modern baking technology. For centuries, chocolate was consumed primarily as a beverage, a luxury item reserved for the wealthy in Europe. It was not until the mid-19th century, with the invention of the cocoa press by Conrad van Houten, that cocoa powder became accessible and affordable enough to be used as a baking ingredient. However, early ‘chocolate cakes’ were often just white or yellow cakes served with chocolate frosting. The deep, dark chocolate cake we know today began to take shape with the introduction of chemical leaveners like baking soda and baking powder in the mid-1800s. This allowed for lighter, fluffier textures compared to the dense yeast-leavened cakes of the past. The specific addition of buttermilk to cakes has roots in the American South, where dairy farming was prevalent, and frugal cooks used the byproduct of butter-churning to add tenderness and tang to biscuits and cakes. The concept of the ‘Devil’s Food Cake,’ which is a close relative to this recipe, emerged in the early 20th century. The name allegedly referred to the reddish hue the cake would take on when the baking soda reacted with the natural cocoa powder available at the time, contrasting with the snowy white ‘Angel Food Cake.’ By the post-WWII era, with the rise of supermarket culture and convenience foods, the chocolate birthday cake cemented itself as an American icon. This recipe honors that long lineage, combining the old-school science of buttermilk baking with modern techniques to create a timeless dessert.
Why This Recipe Works
This recipe succeeds where others fail due to a precise chemical interplay between the acidic and alkaline ingredients. The star of the show is the buttermilk. Its acidity does two crucial things: it breaks down the long strands of gluten in the flour, ensuring the cake is tender rather than chewy, and it reacts vigorously with the baking soda to create carbon dioxide bubbles, giving the cake a magnificent rise and airy structure. Furthermore, the inclusion of oil instead of butter in the cake batter is a deliberate choice for moisture. While butter adds flavor, it contains water that evaporates during baking and is solid at room temperature, which can lead to a drier texture. Oil remains liquid at room temperature, coating the flour proteins and keeping the cake sensationally moist for days after baking. Finally, the ‘blooming’ technique used here—pouring hot coffee into the batter—is non-negotiable. The heat dissolves the cocoa powder instantly, releasing flavor compounds that remain trapped in cold liquid. This doesn’t make the cake taste like coffee; rather, it amplifies the chocolate, making it taste more like itself. The result is a batter that is quite thin, which allows it to level itself in the pan, baking up flat and even without the need for excessive trimming.
Why You’ll Love This Recipe
- ✓Stays moist for up to 4 days at room temperature.
- ✓Deep, intense chocolate flavor enhanced by hot coffee.
- ✓Uses oil instead of butter for a softer, more tender crumb.
- ✓Simple mixing method requires no stand mixer for the batter.
- ✓Versatile base that pairs with vanilla, peanut butter, or fruit frostings.
- ✓Perfect structural integrity for stacking layers.
Equipment You’ll Need
- ✓Two 9-inch round cake pans
- ✓Large mixing bowl
- ✓Whisk
- ✓Electric hand mixer or Stand mixer (for frosting)
- ✓Parchment paper
- ✓Wire cooling rack
- ✓Measuring cups and spoons
- ✓Offset spatula
Ingredients
- ✓2 cups all-purpose flour
- ✓2 cups granulated sugar
- ✓3/4 cup unsweetened cocoa powder (not Dutch-processed)
- ✓2 teaspoons baking soda
- ✓1 teaspoon baking powder
- ✓1 teaspoon salt
- ✓2 large eggs, room temperature
- ✓1 cup buttermilk, room temperature
- ✓1/2 cup vegetable oil or canola oil
- ✓2 teaspoons pure vanilla extract
- ✓1 cup freshly brewed strong hot coffee
- ✓1 cup unsalted butter, softened (for frosting)
- ✓3 cups powdered sugar (for frosting)
- ✓1/2 cup cocoa powder (for frosting)
- ✓3-4 tablespoons heavy cream (for frosting)
- ✓1 teaspoon vanilla extract (for frosting)
- ✓Pinch of salt (for frosting)
Instructions
- Preheat your oven to 350°F (175°C). Grease two 9-inch round cake pans with butter or cooking spray. Line the bottoms with parchment paper and grease the paper as well to ensure a seamless release.
- In a large mixing bowl, whisk together the flour, sugar, 3/4 cup cocoa powder, baking soda, baking powder, and 1 teaspoon salt until completely combined and no lumps remain.
- In a separate medium bowl, whisk together the eggs, buttermilk, vegetable oil, and 2 teaspoons of vanilla extract until smooth.
- Pour the wet ingredient mixture into the dry ingredients. Mix with a whisk or electric mixer on low speed until just combined. Do not overmix at this stage.
- Carefully pour the hot coffee into the batter. Whisk gently until the coffee is fully incorporated and the batter is smooth. Note that the batter will be very thin and liquid; this is normal and essential for the moist texture.
- Divide the batter evenly between the two prepared cake pans. Tap the pans gently on the counter to release any large air bubbles.
- Bake in the preheated oven for 30 to 35 minutes, or until a wooden toothpick inserted into the center comes out clean or with just a few moist crumbs attached.
- Remove the cakes from the oven and allow them to cool in the pans for about 10-15 minutes. Then, run a knife around the edges and invert them onto a wire rack to cool completely before frosting.
- While the cakes cool, prepare the frosting. In a large bowl or stand mixer, beat the softened butter until creamy and pale, about 3 minutes.
- Add the powdered sugar and 1/2 cup cocoa powder alternately with the heavy cream, beating on low speed initially to avoid a mess, then increasing to high speed.
- Add the vanilla extract and a pinch of salt. Whip the frosting on high speed for another 2-3 minutes until it is fluffy, glossy, and spreadable. Add more cream if it is too stiff, or more sugar if it is too runny.
- Once the cakes are completely cool, place one layer on your serving plate. Spread a generous layer of frosting over the top. Place the second cake layer on top and frost the top and sides of the entire cake.
Expert Cooking Tips
- ✓Use room temperature ingredients (eggs and buttermilk) to ensure the batter emulsifies properly.
- ✓Do not skip the parchment paper; it guarantees your cake layers won’t stick to the bottom of the pan.
- ✓If you don’t have a coffee maker, you can mix 2 teaspoons of instant espresso powder into 1 cup of boiling water.
- ✓Weigh your flour using a kitchen scale for the most accurate results; too much flour causes a dry cake.
- ✓Let the cake cool completely—absolutely no warmth remaining—before frosting, or the butter will melt and the layers will slide.
- ✓Sift your cocoa powder if it looks lumpy to avoid pockets of bitter dry powder in the cake.
- ✓Tap the pans on the counter before baking to pop large air bubbles and ensure a flat top.
Substitutions and Variations
If you find yourself without buttermilk, you can make a quick substitute by adding 1 tablespoon of white vinegar or lemon juice to a measuring cup and filling it to the 1-cup line with whole milk; let it sit for 5 minutes until curdled. For a caffeine-free version, you can substitute the hot coffee with hot water or even hot decaf coffee; however, the coffee truly enhances the chocolate flavor without adding coffee taste. If you prefer a gluten-free cake, replace the all-purpose flour with a high-quality 1:1 gluten-free baking flour blend that contains xanthan gum. You can substitute the vegetable oil with melted coconut oil or melted butter, though melted butter may result in a slightly denser texture once the cake cools. For the frosting, you can swap heavy cream for whole milk, though the texture will be slightly less rich.
Common Mistakes to Avoid
The most common mistake is overbaking the cake. Because the batter is dark, it is hard to see visual cues of doneness, so rely on the toothpick test. If you bake it until the toothpick is bone dry, the cake will be dry. Aim for a few moist crumbs. Another error is using cold ingredients; cold eggs hitting room temperature oil can cause the batter to curdle and affect the rise. Many bakers also mistakenly use Dutch-processed cocoa powder for the cake batter; this recipe relies on the acidity of natural unsweetened cocoa to react with the baking soda. Using Dutch-process (which is neutralized) might result in a cake that doesn’t rise properly. Finally, rushing the cooling process is a disaster waiting to happen—frosting a warm cake will lead to a melted, sliding mess.
Serving Suggestions
This cake is rich and decadent, so it serves well with a contrast in temperature or flavor. A scoop of high-quality vanilla bean ice cream is the classic pairing, as the cold creaminess cuts through the rich chocolate. Fresh berries, such as raspberries or strawberries, add a tart brightness that balances the sugar. For a birthday celebration, colorful sprinkles are a must. If you want to get fancy, a drizzle of salted caramel sauce or a dollop of unsweetened whipped cream on the side adds a sophisticated touch. Serve with a tall glass of cold milk or a hot cup of coffee.
Storage and Reheating Tips
This cake has incredible staying power thanks to the oil and buttermilk. It can be stored at room temperature in an airtight cake carrier or under a glass dome for up to 4 days without drying out. In fact, the flavor often improves on the second day. If you live in a very hot or humid climate, it is safer to store it in the refrigerator to keep the buttercream stable; just be sure to let slices come to room temperature before eating for the best texture. You can also freeze the unfrosted cake layers. Wrap them tightly in plastic wrap, then foil, and freeze for up to 3 months. Thaw in the refrigerator overnight before frosting.
Nutrition Facts (Estimated)
| Serving Size | 1 slice |
| Calories | 580 |
| Fat | 32g |
| Saturated Fat | 10g |
| Unsaturated Fat | 20g |
| Trans Fat | 0g |
| Cholesterol | 65mg |
| Sodium | 320mg |
| Carbohydrates | 72g |
| Fiber | 4g |
| Sugar | 48g |
| Protein | 6g |
Frequently Asked Questions
Can I make this recipe into cupcakes?
Yes, absolutely. This batter makes excellent cupcakes. Line a muffin tin with cupcake liners and fill them about 2/3 full. Reduce the baking time to approximately 18-22 minutes. The yield will be around 24 standard cupcakes.
Why is the batter so runny?
The batter is intentionally thin because of the ratio of liquid to flour. This high hydration level is what guarantees the moist texture after baking. Do not be tempted to add more flour; trust the recipe and the chemistry.
Can I use Dutch-processed cocoa powder?
It is best to use regular unsweetened cocoa powder for the cake batter. This recipe relies on baking soda, which requires an acid to activate. Natural cocoa is acidic, whereas Dutch-process is neutral. However, you can use Dutch-process cocoa for the frosting for a darker color and smoother flavor.
Will the cake taste like coffee?
No, the cake will not taste like a mocha cake. The hot coffee intensifies the cocoa flavor, making it taste more ‘chocolatey.’ If you are serving this to people who strictly dislike coffee, you can use hot water, but the flavor won’t be quite as deep.
How do I get flat cake layers?
This batter naturally levels out well because it is thin. However, you can use ‘cake strips’—fabric strips soaked in water and wrapped around the outside of the pan—to ensure the edges don’t bake faster than the center, resulting in a perfectly flat top.
Can I use salted butter for the frosting?
Yes, you can. If you use salted butter, omit the pinch of additional salt listed in the frosting ingredients. The salt helps to cut the sweetness of the powdered sugar.
Why did my cake sink in the middle?
Sinking usually happens if the oven door was opened too early, causing a temperature drop before the structure set. It can also happen if there was too much leavening (baking soda/powder) or if the batter was overmixed, incorporating too much air that collapsed.
Can I bake this in a 9×13 rectangular pan?
Yes, this recipe fits perfectly in a standard 9×13 inch sheet pan. You will likely need to increase the baking time to 35-40 minutes. Check with a toothpick starting at 35 minutes.
How far ahead can I make this cake?
You can bake the layers up to 2 days in advance if stored properly at room temperature, or up to a month in advance if frozen. The frosted cake is best enjoyed within 3-4 days.
Conclusion
There is something truly special about placing a homemade birthday cake on the table. It is a labor of love that transforms simple pantry staples into a memory. This Moist Chocolate Birthday Cake with Buttermilk is more than just a recipe; it is a reliable companion for your most cherished celebrations. The deep, dark crumb and the luscious frosting combine to create a dessert that feels indulgent yet comforting. Whether you are an experienced baker or trying your hand at scratch-baking for the first time, this cake promises success. So brew that coffee, crack those eggs, and get ready to enjoy the best chocolate cake of your life. Happy baking!

