Moist Chocolate Birthday Cake With Peanut Butter Frosting Recipe
This isn’t just a cake; it’s a celebration on a plate. Featuring a deeply rich, incredibly moist chocolate crumb paired with a fluffy, salty-sweet peanut butter frosting, this recipe is the gold standard for birthday parties and indulgent gatherings.
30 minutes
35 minutes
1 hour 5 minutes
12-14 servings
Dessert
Baking
American
Vegetarian
There are few flavor combinations in the culinary world as iconic and universally adored as chocolate and peanut butter. It is a marriage of textures and tastes that speaks directly to the soul—the deep, slightly bitter complexity of dark cocoa perfectly balanced by the creamy, salty-sweet richness of roasted peanuts. This Moist Chocolate Birthday Cake with Peanut Butter Frosting is not merely a dessert; it is an event. Designed to be the centerpiece of any celebration, this cake defies the common pitfalls of homemade chocolate cakes, which can often turn out dry or crumbly. Instead, this recipe promises a crumb that is impossibly soft, velvety, and moist, thanks to a few scientific tweaks in the batter, including the use of hot coffee and buttermilk.
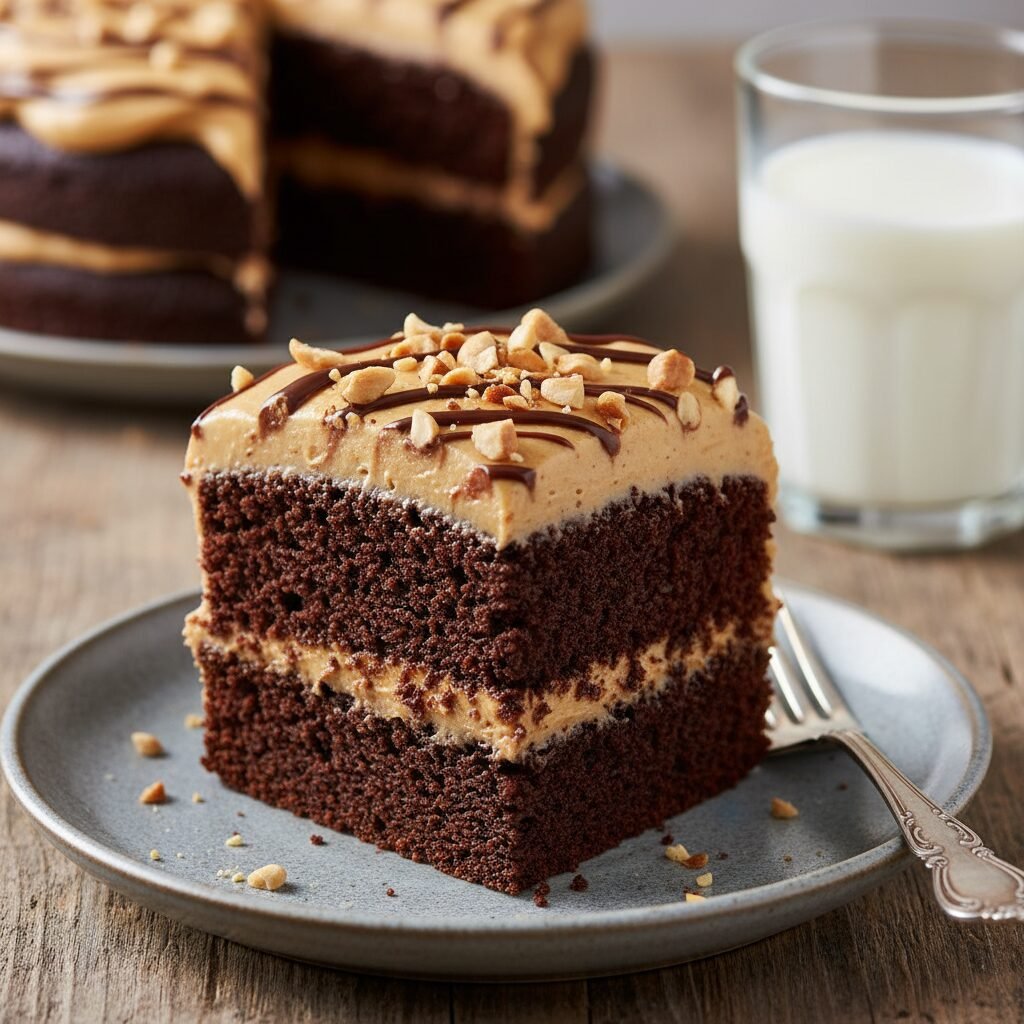
The experience begins the moment you slice into it. The knife glides effortlessly through the frosting and sinks into the tender sponge. The frosting itself is a masterpiece—a cloud-like buttercream that whips plenty of air into creamy peanut butter, ensuring it is spreadable and luscious without being overly heavy. Whether you are baking for a child’s birthday party, a sophisticated dinner party, or simply to satisfy a Tuesday night craving, this cake delivers on every level. It evokes memories of childhood treats while offering a refined texture that adults will appreciate. Get ready to ruin all other chocolate cakes for yourself, because once you try this version, there is simply no going back.
History & Origins
The history of the chocolate cake is a fascinating journey through culinary innovation. While chocolate has been consumed as a beverage for millennia, dating back to the Aztecs and Mayans, its use in baking is a relatively modern phenomenon. Until the mid-19th century, chocolate was primarily a drink. It wasn’t until 1828, when Coenraad van Houten discovered how to mechanically extract fat from cacao liquor to produce cocoa powder, that baking with chocolate became accessible and affordable. The first ‘chocolate cakes’ were actually yellow cakes served with chocolate frosting. It wasn’t until the late 1800s and early 1900s that cooks began mixing chocolate directly into the batter.
The ‘Devil’s Food’ style, which this recipe emulates, emerged in the early 20th century, distinguished by its dark color and moist texture, often achieved by the reaction between baking soda and cocoa powder. Meanwhile, peanut butter was making its own ascent in American culture. First patented by Marcellus Gilmore Edson in 1884 and popularized at the 1904 St. Louis World’s Fair, peanut butter became a household staple during the World Wars due to its protein content and shelf stability. The combination of chocolate and peanut butter, however, is a distinctly American obsession, solidified in pop culture by the invention of the Reese’s Peanut Butter Cup in the 1920s. This cake pays homage to that century-long love affair, combining the historic Devil’s Food technique with the comfort of American peanut butter culture.
Why This Recipe Works
This recipe succeeds where others fail due to a specific balance of fat, acidity, and temperature. First, we use oil instead of butter for the cake batter. While butter adds flavor, it contains water and solidifies at room temperature, which can lead to a drier cake. Oil remains liquid, coating the flour proteins and preventing gluten formation, ensuring the cake stays moist for days. Second, the addition of boiling hot coffee is crucial. The heat ‘blooms’ the cocoa powder, releasing its full flavor potential and dissolving the cocoa solids so they don’t dry out the batter.
Furthermore, the inclusion of buttermilk provides the necessary acidity to react with the baking soda. This reaction creates carbon dioxide gas, which leavens the cake, giving it a lofty, airy structure despite its rich ingredients. The acidity also tenderizes the gluten, contributing to that melt-in-your-mouth texture. For the frosting, we use a ratio of high-fat peanut butter to butter and heavy cream. The heavy cream adds a lightness that prevents the peanut butter from becoming gluey, resulting in a frosting that is stable enough to pipe but soft enough to swoon over.
Why You’ll Love This Recipe
- ✓Incredibly moist crumb that stays soft for days
- ✓Perfect balance of salty and sweet flavors
- ✓Rich, deep chocolate flavor enhanced by hot coffee
- ✓Creamy, fluffy frosting that pipes beautifully
- ✓Ideal for birthdays, holidays, and special occasions
- ✓Simple one-bowl method for the cake batter
Equipment You’ll Need
- ✓Two 9-inch round cake pans
- ✓Electric stand mixer or hand mixer
- ✓Large mixing bowls
- ✓Wire cooling rack
- ✓Whisk
- ✓Spatula
- ✓Offset spatula for frosting
- ✓Parchment paper
Ingredients
- ✓2 cups all-purpose flour
- ✓2 cups granulated sugar
- ✓3/4 cup unsweetened cocoa powder
- ✓2 teaspoons baking soda
- ✓1 teaspoon baking powder
- ✓1 teaspoon salt
- ✓1 cup buttermilk, room temperature
- ✓1/2 cup vegetable oil
- ✓2 large eggs, room temperature
- ✓2 teaspoons vanilla extract
- ✓1 cup freshly brewed strong hot coffee
- ✓1 cup unsalted butter, softened (for frosting)
- ✓1 cup creamy peanut butter (commercial brand preferred)
- ✓3 cups powdered sugar
- ✓1/4 cup heavy cream
- ✓1 teaspoon vanilla extract (for frosting)
- ✓Pinch of salt
Instructions
- Preheat your oven to 350°F (175°C). Grease two 9-inch round cake pans with butter or cooking spray and line the bottoms with parchment paper. Dust the sides with a little cocoa powder to prevent sticking.
- In the bowl of a stand mixer or a large mixing bowl, whisk together the flour, sugar, cocoa powder, baking soda, baking powder, and salt until well combined.
- Add the buttermilk, vegetable oil, eggs, and vanilla extract to the dry ingredients. Mix on medium speed for about 2 minutes until the batter is smooth and well-incorporated.
- Reduce the mixer speed to low and carefully pour in the hot coffee. Mix just until combined. The batter will be very thin and liquidy; this is normal and ensures a moist cake.
- Divide the batter evenly between the two prepared cake pans. Tap the pans gently on the counter to release any large air bubbles.
- Bake for 30-35 minutes, or until a wooden toothpick inserted into the center of the cake comes out clean or with just a few moist crumbs attached.
- Remove the cakes from the oven and let them cool in the pans for 10 minutes. Then, run a knife around the edges and invert them onto a wire rack to cool completely before frosting.
- To make the frosting: In a large bowl, beat the softened butter and peanut butter together on medium-high speed until smooth and creamy (about 2 minutes).
- Gradually add the powdered sugar, one cup at a time, mixing on low speed until incorporated. Add the pinch of salt.
- Add the vanilla extract and heavy cream. Increase the speed to high and whip the frosting for 3-4 minutes until it is light, fluffy, and spreadable. If it’s too stiff, add another teaspoon of cream.
- Assemble the cake: Place one layer on a serving plate or cake stand. Spread a generous layer of peanut butter frosting over the top. Place the second layer on top. Frost the top and sides of the entire cake with the remaining frosting.
- Garnish with chopped peanuts, chocolate shavings, or peanut butter cups if desired. Slice and serve.
Expert Cooking Tips
- ✓Do not overmix the batter once the flour is added to avoid a tough texture, though the liquidy batter makes this harder to do.
- ✓Use room temperature ingredients (eggs, buttermilk) to ensure the batter emulsifies properly.
- ✓Don’t skip the parchment paper; it guarantees your cakes come out of the pans perfectly intact.
- ✓If you don’t have buttermilk, you can make a substitute by adding 1 tablespoon of lemon juice or vinegar to 1 cup of milk and letting it sit for 5 minutes.
- ✓Make sure the coffee is very hot when adding it to bloom the cocoa effectively.
Substitutions and Variations
If you need to make this cake gluten-free, a high-quality 1:1 gluten-free flour blend works surprisingly well due to the moisture content of the cake. For a dairy-free version, swap the buttermilk for almond milk mixed with vinegar, and use a plant-based butter and cream alternative for the frosting. If you don’t drink coffee, you can substitute hot water, though the coffee really enhances the chocolate flavor without making the cake taste like mocha. For the oil, melted coconut oil or canola oil are excellent alternatives. In the frosting, natural peanut butter (the kind that separates) is not recommended as it can cause the frosting to break or become oily; stick to standard commercial creamy peanut butter for the best texture.
Common Mistakes to Avoid
The most common mistake is over-baking the cake. Because the batter is dark, it’s hard to see when it’s browning. Rely on the toothpick test and start checking at the 30-minute mark. Another mistake is frosting the cake before it is completely cool. Even a slightly warm cake will melt the butter in the frosting, causing the layers to slide apart and the frosting to become a greasy mess. Finally, using cold ingredients for the batter can cause the oil to seize or the emulsion to break, leading to an uneven crumb. Always plan ahead and bring your dairy and eggs to room temperature.
Serving Suggestions
This cake is rich, so it pairs beautifully with a glass of cold milk or a hot cup of black coffee to cut through the sweetness. For a birthday extravaganza, serve it with a scoop of vanilla bean ice cream on the side. You can garnish the top with mini peanut butter cups, a drizzle of chocolate ganache, or chopped roasted peanuts for added crunch. It looks stunning on a white ceramic cake stand which contrasts with the dark chocolate sponge and golden frosting.
Storage and Reheating Tips
The cake can be stored at room temperature in an airtight container or cake keeper for up to 3 days. The oil-based batter keeps it moist. If you live in a very hot or humid climate, it is safer to refrigerate it to prevent the buttercream from melting. In the fridge, it will last for up to 5-6 days; just let it come to room temperature before serving for the best flavor and texture. You can also freeze individual slices wrapped tightly in plastic wrap and foil for up to 3 months.
Nutrition Facts (Estimated)
| Serving Size | 1 slice |
| Calories | 650 |
| Fat | 36g |
| Saturated Fat | 14g |
| Unsaturated Fat | 20g |
| Trans Fat | 0g |
| Cholesterol | 65mg |
| Sodium | 380mg |
| Carbohydrates | 78g |
| Fiber | 4g |
| Sugar | 45g |
| Protein | 10g |
Frequently Asked Questions
Can I make this cake ahead of time?
Yes, you can bake the cake layers up to 2 days in advance. Wrap them tightly in plastic wrap and store them at room temperature or in the fridge. Make the frosting the day you plan to assemble.
Will the cake taste like coffee?
No, the coffee flavor is indistinguishable in the final product. It serves to deepen and intensify the chocolate flavor, making it taste more ‘chocolatey’.
Why is my batter so runny?
This is intentional! The high liquid content is what ensures the cake remains moist after baking. Do not be tempted to add more flour.
Can I use natural peanut butter?
It is not recommended for the frosting. Natural peanut butter can separate and make the buttercream oily or gritty. Commercial creamy brands work best.
Can I make this as cupcakes?
Absolutely. This recipe will yield approximately 24-30 cupcakes. Bake them for 18-22 minutes at the same temperature.
What creates the ‘moist’ texture?
The combination of vegetable oil (which stays liquid at room temp) and buttermilk breaks down the gluten and keeps the crumb tender.
Can I use Dutch-processed cocoa?
Yes, but since this recipe uses baking soda, regular unsweetened cocoa powder is preferred for the best rise. If using Dutch, ensure your baking powder is fresh.
How do I prevent the cake from sticking to the pan?
Parchment paper rounds are the best insurance policy. Grease the pan, put the paper in, and grease the paper.
Conclusion
In the world of baking, few things are as rewarding as producing a bakery-quality cake in your own kitchen. This Moist Chocolate Birthday Cake with Peanut Butter Frosting is a testament to how simple ingredients, when combined with the right technique, can create something truly magical. It captures the essence of celebration—indulgent, sweet, and comforting. Whether you are blowing out candles or just treating yourself to a slice of happiness, this recipe is sure to become a cherished favorite in your repertoire. Happy baking!

