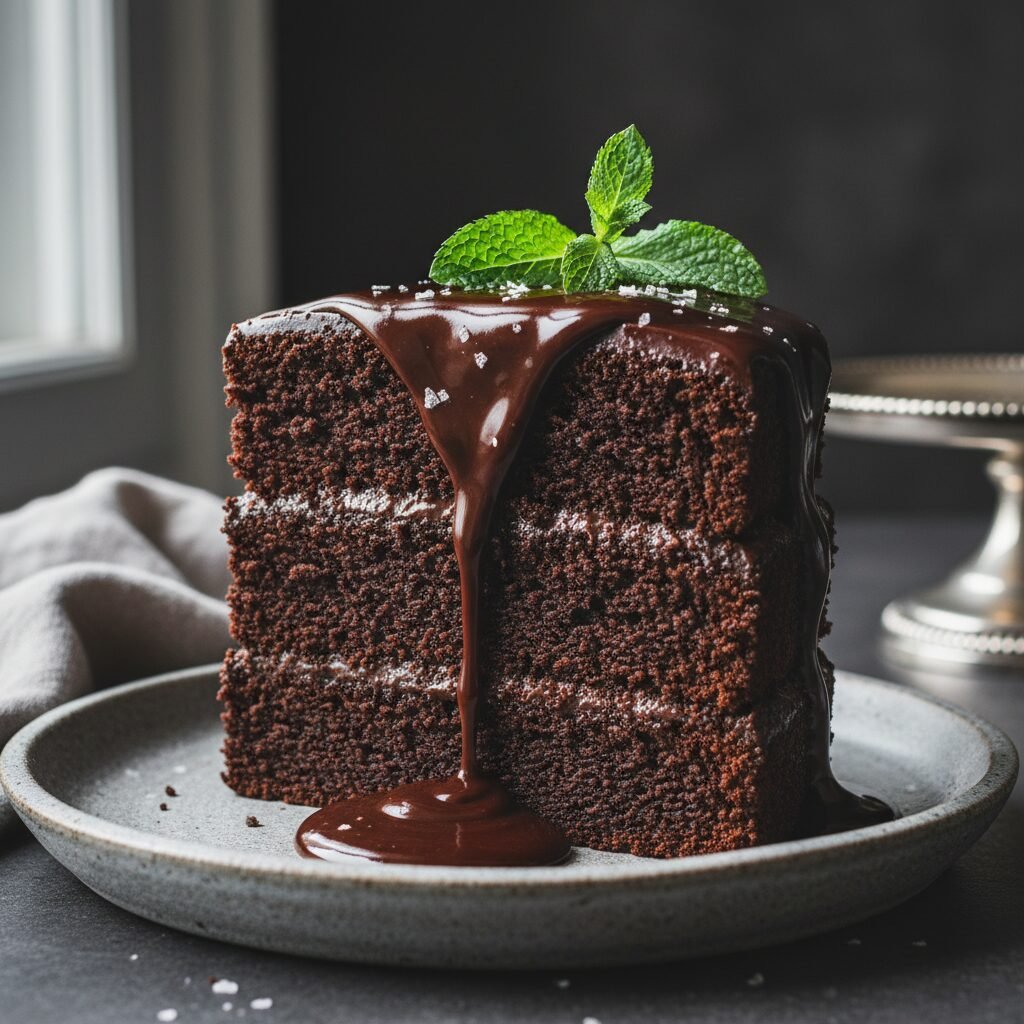
Moist Chocolate Layer Cake Recipe
Forget every dry cake you’ve ever tasted; this is the gold standard for homemade chocolate cake. Featuring an impossibly moist crumb and a rich, velvety buttercream, this recipe uses a secret boiling water technique to bloom the cocoa for maximum flavor intensity.
30 minutes
35 minutes
1 hour 15 minutes
12-14 servings
Dessert
Baking
American
Vegetarian
If there is one dessert that reigns supreme in the pantheon of American comfort food, it is the classic chocolate layer cake. However, finding the ‘perfect’ recipe can be a lifelong journey fraught with disappointment. We have all experienced the heartbreak of slicing into a beautiful, dark cake only to find it dry, crumbly, or lacking that deep, punchy cocoa flavor we crave. This recipe is the answer to those culinary prayers. It is not just a cake; it is an experience. The texture is incredibly soft, bordering on fudgy, yet it retains enough structure to stack proudly into towering layers.
What sets this specific version apart is the balance of ingredients designed to retain moisture for days. Unlike butter-based cakes that can firm up and dry out when cool, this oil-based batter ensures a tender crumb that stays soft at room temperature. Furthermore, the addition of hot coffee or boiling water isn’t just a quirk; it’s a chemical necessity that unlocks the full potential of the cocoa powder, transforming it from a simple dry ingredient into a luxurious flavor bomb. Whether you are celebrating a milestone birthday, hosting a dinner party, or simply nursing a broken heart, this cake is the ultimate remedy. It pairs perfectly with a cold glass of milk or a scoop of vanilla bean ice cream, creating a contrast of temperatures and textures that is pure bliss. Prepare to become the most popular baker in your circle, because once you make this, no other chocolate cake will do.
History & Origins
The history of chocolate cake is a fascinating evolution of culinary science and changing tastes. While chocolate itself has been consumed as a beverage for millennia, starting with the Mesoamericans, its use in baking is a relatively modern phenomenon. In the 18th century, chocolate was primarily a drink for the wealthy in Europe. It wasn’t until 1764, when Dr. James Baker discovered how to make chocolate by grinding cocoa beans between massive circular millstones, that chocolate became more accessible. However, early ‘chocolate cakes’ were actually yellow or white cakes served with a chocolate beverage on the side, or perhaps a chocolate frosting.
The real turning point came in the mid-19th century with the invention of Dutch-processed cocoa by Coenraad van Houten, which made cocoa powder easier to blend with water. The first true chocolate cakes as we know them began appearing in cookbooks around the 1880s. A significant leap occurred with the introduction of chemical leaveners like baking soda and baking powder, which replaced yeast and allowed for the lighter, fluffier textures we adore today. The ‘Devil’s Food’ moniker emerged in the early 20th century, allegedly to contrast with the light-as-air Angel Food cake, referencing its dark, dense, and sinful richness. During the Great Depression, the scarcity of butter and eggs led to the innovation of ‘Wacky Cake’ or ‘Depression Cake,’ which relied on vinegar and baking soda for lift—a technique that influenced the moist, oil-based cakes we prefer today. This recipe pays homage to that history, combining the richness of traditional Devil’s Food with modern techniques for superior moisture.
Why This Recipe Works
This recipe succeeds where others fail due to a few key scientific principles regarding fat and liquid. First, we utilize vegetable oil instead of butter for the cake batter. While butter provides flavor, it contains water and milk solids that can lead to a drier texture once the cake cools. Oil remains liquid at room temperature, guaranteeing that the cake stays incredibly moist and soft for days. Secondly, the inclusion of buttermilk is non-negotiable. The acidity in buttermilk reacts with the baking soda to create carbon dioxide bubbles, giving the cake a tremendous lift and a tender, airy crumb, while also breaking down the gluten strands to prevent toughness.
Perhaps the most critical step is the addition of boiling water (or hot coffee) at the very end of the mixing process. This technique, known as ‘blooming’ the cocoa, dissolves the cocoa powder completely and releases flavor compounds that are otherwise trapped. If using coffee, the bitterness enhances the chocolate notes without making the cake taste like a latte. Finally, the ratio of sugar to flour is carefully balanced to ensure the cake is sweet but structurally sound, preventing the dreaded sunken center often associated with ultra-moist cakes.
Why You’ll Love This Recipe
- ✓Stays moist for up to 4 days at room temperature.
- ✓Deep, intense chocolate flavor enhanced by blooming cocoa.
- ✓Foolproof oil-based batter that prevents dryness.
- ✓Versatile recipe that works for cupcakes or bundt pans.
- ✓Silky, easy-to-make chocolate buttercream frosting.
Equipment You’ll Need
- ✓Two 9-inch round cake pans
- ✓Stand mixer or hand mixer
- ✓Large mixing bowls
- ✓Whisk
- ✓Sifter or fine-mesh sieve
- ✓Wire cooling rack
- ✓Offset spatula
- ✓Parchment paper
Ingredients
- ✓2 cups granulated white sugar
- ✓1 3/4 cups all-purpose flour
- ✓3/4 cup unsweetened cocoa powder (high quality)
- ✓1 1/2 teaspoons baking powder
- ✓1 1/2 teaspoons baking soda
- ✓1 teaspoon salt
- ✓2 large eggs, room temperature
- ✓1 cup whole milk or buttermilk, room temperature
- ✓1/2 cup vegetable oil or canola oil
- ✓2 teaspoons pure vanilla extract
- ✓1 cup boiling water (or hot brewed coffee)
- ✓1 cup unsalted butter, softened (for frosting)
- ✓3 cups confectioners’ sugar (for frosting)
- ✓1/2 cup cocoa powder (for frosting)
- ✓1/4 cup heavy cream (for frosting)
Instructions
- Preheat your oven to 350°F (175°C). Grease two 9-inch round cake pans with butter and dust with flour, or line the bottoms with parchment paper for easy removal.
- In the bowl of a stand mixer or a large mixing bowl, stir together the sugar, flour, cocoa, baking powder, baking soda, and salt until no lumps remain.
- Add the eggs, buttermilk (or milk), vegetable oil, and vanilla extract. Beat on medium speed for about 2 minutes. The batter should look smooth and well-combined.
- Reduce the mixer speed to the lowest setting. Carefully pour in the boiling water (or hot coffee). The batter will become very thin and watery; this is normal and essential for the moisture content.
- Pour the batter evenly into the prepared pans. Tap the pans gently on the counter to release any large air bubbles.
- Bake for 30 to 35 minutes. Test for doneness by inserting a wooden toothpick into the center of the cake; it should come out clean or with just a few moist crumbs attached.
- Cool the cakes in the pans for 10 minutes, then remove them from the pans to wire racks to cool completely. They must be fully cool before frosting to prevent melting.
- To make the frosting, beat the softened butter until creamy. Add the cocoa powder and confectioners’ sugar alternately with the heavy cream and vanilla. Whip on high speed for 3 minutes until fluffy.
- Frost the top of one cake layer, stack the second layer on top, and cover the top and sides with the remaining frosting.
Expert Cooking Tips
- ✓Do not over-bake. Check the cake 5 minutes before the timer goes off to ensure it stays moist.
- ✓Use room temperature eggs and buttermilk to ensure the batter emulsifies properly.
- ✓If you don’t have buttermilk, make a substitute by adding 1 tablespoon of white vinegar or lemon juice to 1 cup of milk and letting it sit for 5 minutes.
- ✓Sifting the cocoa powder is crucial to avoid bitter, dry lumps in your batter.
- ✓Using hot coffee instead of water intensifies the chocolate flavor without adding a distinct coffee taste.
- ✓Freeze the cake layers for 20 minutes before frosting to reduce crumbs getting into the icing.
Substitutions and Variations
This recipe is quite robust, but here are some tested substitutions. For the flour, you can use a 1:1 gluten-free flour blend that contains xanthan gum if you need a gluten-free option. If you prefer a less refined sugar, coconut sugar can work, though it will alter the flavor profile slightly to be more caramel-like. For the fat, melted coconut oil or melted butter can replace the vegetable oil, though vegetable oil yields the moistest result. If you want to make this vegan, you can use flax eggs (2 tbsp ground flaxseed meal + 6 tbsp water) and a plant-based milk mixed with vinegar to mimic buttermilk, along with a vegan butter for the frosting. For the cocoa powder, Dutch-processed will give a darker color and mellower flavor, while natural cocoa powder provides a lighter color and slightly more acidity.
Common Mistakes to Avoid
The most common mistake is over-measuring the flour. If you scoop the flour directly with the measuring cup, you pack it down and can end up with 20% more flour than intended, leading to a dry cake. Always spoon the flour into the cup and level it off, or use a kitchen scale. Another error is opening the oven door too frequently; this causes temperature fluctuations that can make the cake sink in the middle. Finally, do not rush the cooling process. If you try to frost a cake that is even slightly warm, the buttercream will slide right off the sides and melt into a greasy mess. Patience is key for the perfect presentation.
Serving Suggestions
This cake is a showstopper on its own, but it pairs beautifully with fresh berries like raspberries or strawberries, which cut through the richness of the chocolate. A dollop of unsweetened whipped cream or a scoop of vanilla bean ice cream creates a delightful contrast. For a festive touch, you can garnish the top with chocolate shavings, sprinkles, or a dusting of powdered sugar. Serve slices at room temperature for the softest texture; cold cake tends to feel denser and less flavorful.
Storage and Reheating Tips
Because this cake is oil-based, it stays fresh longer than butter cakes. You can store it at room temperature in an airtight cake carrier for up to 4 days. If you live in a very hot or humid climate, it is better to store it in the refrigerator, but bring it back to room temperature before serving for the best taste. For long-term storage, you can freeze the unfrosted layers wrapped tightly in plastic wrap for up to 3 months. The frosted cake can also be frozen; place it in the freezer unwrapped until the frosting hardens, then wrap tightly in plastic wrap and foil.
Nutrition Facts (Estimated)
| Serving Size | 1 slice |
| Calories | 580 |
| Fat | 28g |
| Saturated Fat | 10g |
| Unsaturated Fat | 16g |
| Trans Fat | 0g |
| Cholesterol | 65mg |
| Sodium | 320mg |
| Carbohydrates | 78g |
| Fiber | 4g |
| Sugar | 45g |
| Protein | 6g |
Frequently Asked Questions
Can I use all-purpose flour instead of cake flour?
Yes, this recipe is specifically designed for all-purpose flour. It provides the right structure to hold up the moisture without becoming gummy.
Will the cake taste like coffee if I use it?
No. The coffee simply enhances the depth of the chocolate flavor. It will not taste like a mocha cake unless you use a very strong espresso concentrate.
Can I make this into cupcakes?
Absolutely. This batter makes about 24 standard cupcakes. Bake them at 350°F for 18-22 minutes.
Why is my batter so runny?
The batter is supposed to be very thin after adding the boiling water. Do not add more flour; trust the process, and it will bake up perfectly.
Can I reduce the sugar?
You can reduce the sugar by about 1/4 cup without ruining the structure, but reducing it further may affect the moisture and texture, as sugar is a liquid in baking.
Why did my cake sink in the middle?
This usually happens if the oven door was opened too early, the oven wasn’t hot enough, or there was too much leavening agent. Ensure your baking powder/soda is fresh.
Do I have to use a stand mixer?
No, this is a very forgiving batter. You can easily mix it by hand with a whisk, just ensure there are no large lumps.
What serves as the best frosting for this cake?
While the recipe includes a chocolate buttercream, this cake also pairs wonderfully with cream cheese frosting, Swiss meringue buttercream, or a simple ganache.
Conclusion
There are few things in life as satisfying as baking a cake from scratch that turns out perfectly, and this Moist Chocolate Layer Cake is guaranteed to deliver that satisfaction. From the ease of the ‘dump-and-mix’ method to the sophisticated depth of flavor achieved by blooming the cocoa, every element is designed for success. It’s the kind of recipe that gets passed down through generations, stained with cocoa fingerprints and loved by all. So preheat your oven, brew some coffee, and get ready to enjoy the best chocolate cake you have ever had. Happy baking!