Moist Chocolate Layer Cake With Peanut Butter Frosting Recipe
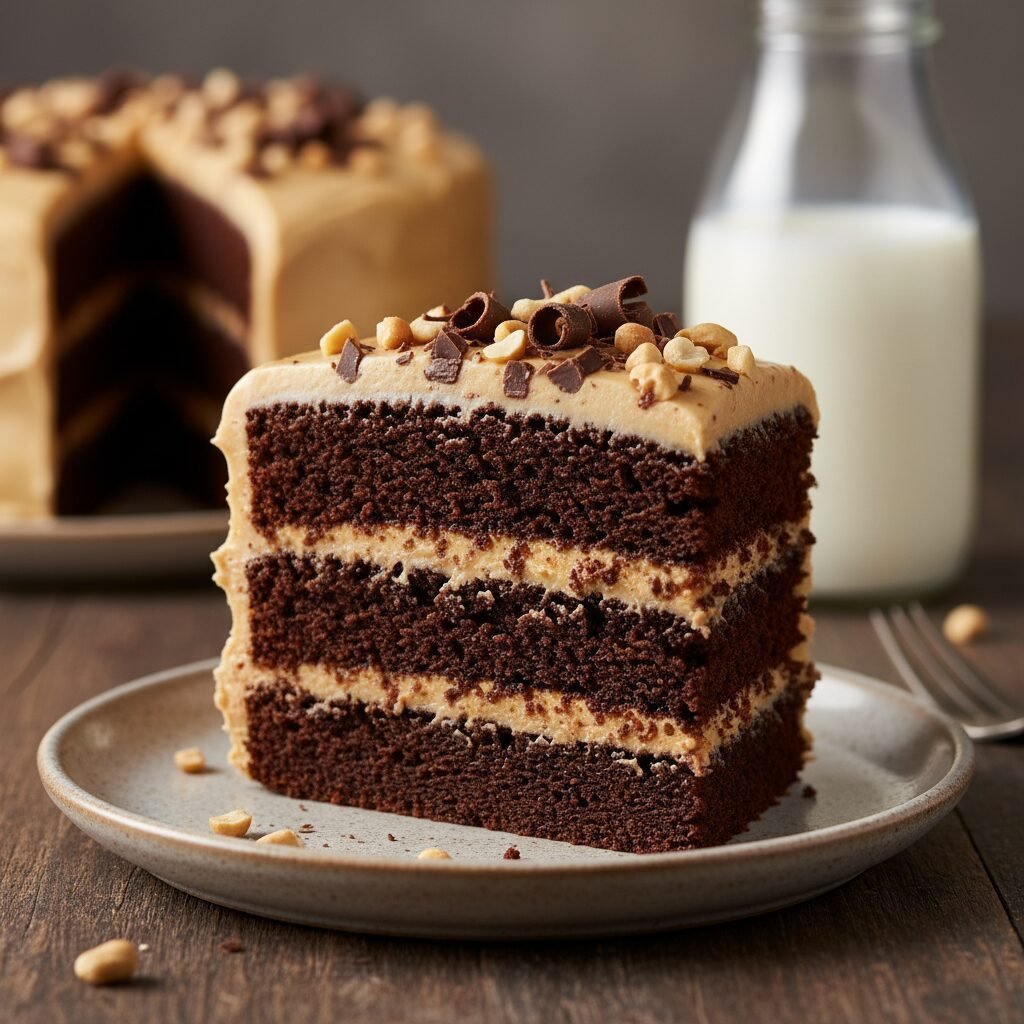
Discover the perfect marriage of rich, fudgy chocolate and salty-sweet peanut butter in this show-stopping layer cake. It is incredibly moist, deeply chocolaty, and topped with the fluffiest peanut butter buttercream you will ever taste.
30 minutes
35 minutes
1 hour 30 minutes
12-14 servings
Dessert
Baking
American
Vegetarian
There are few flavor combinations in the culinary world as iconic and universally adored as chocolate and peanut butter. It is a pairing that evokes childhood nostalgia, comfort, and pure indulgence. This Moist Chocolate Layer Cake with Peanut Butter Frosting is not just a dessert; it is a celebration of that timeless duo. Imagine sinking your fork into a crumb that is impossibly dark, tender, and moist—so moist that it stays fresh for days. The cake itself is built on a foundation of high-quality cocoa powder bloomed in hot coffee, a technique that intensifies the chocolate flavor and ensures a texture that hovers delightfully between a fluffy sponge and a dense fudge brownie.
But the cake is only half the story. The crowning glory is the peanut butter frosting. We aren’t talking about a heavy, cloying paste, but rather a light, airy buttercream that whips creamy peanut butter with softened butter and confectioners’ sugar until it resembles a sweet, nutty cloud. The saltiness of the peanut butter cuts through the richness of the chocolate, creating a balance that keeps you coming back for ‘just one more sliver.’ Whether you are baking for a birthday, a holiday gathering, or simply because it is Tuesday and you deserve a treat, this recipe is designed to impress. It captures the essence of a high-end bakery confection right in your own kitchen, filling your home with the intoxicating aroma of baking cocoa and toasted nuts. Get ready to pour a tall glass of cold milk, because this is the ultimate comfort cake experience.
History & Origins
The history of the chocolate cake is a journey that spans centuries, evolving from a beverage in ancient Mesoamerica to the fluffy layered confections we know today. Until the mid-19th century, chocolate was primarily consumed as a drink. It wasn’t until 1828, when Coenraad van Houten learned how to mechanically extract fat from cacao liquor to produce cocoa butter and cocoa powder, that chocolate became affordable and accessible for baking. The first ‘chocolate cakes’ were actually yellow cakes served with chocolate frosting. It wasn’t until the late 1800s and early 1900s, with the innovation of smoother cocoa powders and the availability of baking soda, that the batter itself became chocolate. The specific style of ‘Devil’s Food’ cake, known for its dark color and moist texture, emerged around 1902, often utilizing boiling water or coffee to enhance the cocoa.
Peanut butter, on the other hand, has its roots in the work of Marcellus Gilmore Edson, Dr. John Harvey Kellogg, and Ambrose Straub, who patented peanut paste processes in the late 19th century. Originally a protein source for the elderly, it quickly became an American staple. The marriage of chocolate and peanut butter is a distinctly American phenomenon, largely popularized in the mid-20th century by the invention of the peanut butter cup by H.B. Reese in the 1920s. Since then, the combination has dominated the candy and dessert aisles of the United States. This cake pays homage to that cultural history, combining the European tradition of rich tortes with the American love affair with peanut butter, resulting in a dessert that feels both classic and modern.
Why This Recipe Works
This recipe succeeds where many others fail due to a specific interplay of ingredients designed to maximize moisture and flavor depth. First, the use of oil instead of butter in the cake batter is crucial. While butter offers flavor, it contains water that evaporates during baking and solid fats that firm up at room temperature. Oil remains liquid at room temperature, ensuring the cake stays soft and moist on the palate days after baking. Secondly, the addition of hot coffee is not to make the cake taste like mocha, but to ‘bloom’ the cocoa powder. The heat dissolves the cocoa solids, releasing flavor compounds that cold liquids cannot access, resulting in a more profound chocolate taste.
Furthermore, the inclusion of buttermilk brings acidity to the batter. This acid reacts with the baking soda to create carbon dioxide, giving the cake a tender, airy lift while simultaneously breaking down long gluten strands to prevent toughness. For the frosting, the ratio of butter to peanut butter is engineered for stability and texture. Using too much peanut butter can make the frosting oily or heavy; this recipe balances it with unsalted butter and heavy cream to whip air into the mixture, creating a frosting that is spreadable, pipeable, and silky smooth without being greasy.
Why You’ll Love This Recipe
- ✓Uses hot coffee to bloom cocoa for intense chocolate flavor.
- ✓Oil-based batter ensures the cake stays moist for days.
- ✓Perfect balance of salty and sweet in the frosting.
- ✓Simple one-bowl method for the cake batter.
- ✓Versatile frosting that pipes beautifully for decoration.
Equipment You’ll Need
- ✓Two 9-inch round cake pans
- ✓Electric stand mixer or hand mixer
- ✓Large mixing bowls
- ✓Wire cooling rack
- ✓Offset spatula
- ✓Parchment paper
- ✓Sifter or fine-mesh sieve
- ✓Measuring cups and spoons
Ingredients
- ✓2 cups granulated sugar
- ✓1 3/4 cups all-purpose flour
- ✓3/4 cup unsweetened cocoa powder (high quality)
- ✓1 1/2 teaspoons baking powder
- ✓1 1/2 teaspoons baking soda
- ✓1 teaspoon salt
- ✓2 large eggs, room temperature
- ✓1 cup whole milk or buttermilk
- ✓1/2 cup vegetable oil or canola oil
- ✓2 teaspoons vanilla extract
- ✓1 cup boiling hot coffee (or boiling water)
- ✓1 cup unsalted butter, softened (for frosting)
- ✓1 cup creamy peanut butter (standard commercial brand, not natural)
- ✓3-4 cups powdered sugar, sifted
- ✓1/4 cup heavy cream or whole milk
- ✓1 teaspoon vanilla extract (for frosting)
- ✓Pinch of salt (to taste for frosting)
Instructions
- Preheat your oven to 350°F (175°C). Grease two 9-inch round cake pans with butter or cooking spray and line the bottoms with parchment paper. Dust the sides with a little cocoa powder or flour to prevent sticking.
- In a large bowl, whisk together the sugar, flour, cocoa, baking powder, baking soda, and salt until well combined and no lumps remain.
- Add the eggs, buttermilk, oil, and vanilla extract to the dry ingredients. Beat on medium speed with an electric mixer for about 2 minutes. The batter should look smooth and thick.
- Reduce the mixer speed to the lowest setting and carefully pour in the boiling hot coffee. Mix just until combined. The batter will be very thin and liquidy; this is normal and essential for a moist cake.
- Divide the batter evenly between the prepared cake pans. Tap the pans gently on the counter to release any large air bubbles.
- Bake for 30 to 35 minutes, or until a wooden toothpick inserted into the center comes out clean or with just a few moist crumbs attached.
- Remove the cakes from the oven and let them cool in the pans for about 10 minutes. Then, run a knife around the edges and invert them onto a wire rack to cool completely before frosting.
- While the cakes cool, prepare the frosting. In a large bowl or stand mixer, beat the softened butter and peanut butter together on medium-high speed until smooth and creamy (about 2-3 minutes).
- Gradually add the powdered sugar, one cup at a time, beating on low speed until incorporated. Scrape down the sides of the bowl as needed.
- Add the vanilla extract, a pinch of salt, and the heavy cream. Increase the speed to high and whip the frosting for 3-4 minutes until it is light, fluffy, and spreadable. If it is too stiff, add a teaspoon more cream; if too soft, add a little more sugar.
- To assemble, place one cake layer on your serving plate or cake stand. Spread a generous layer of peanut butter frosting over the top.
- Place the second cake layer on top. Use the remaining frosting to cover the top and sides of the cake. Use an offset spatula to create swirls or smooth the sides.
- Optional: Garnish with chopped peanuts, chocolate shavings, or a drizzle of chocolate ganache. Slice and serve!
Expert Cooking Tips
- ✓Do not skip the boiling water/coffee step; it blooms the cocoa and ensures a lump-free batter.
- ✓Use ‘regular’ creamy peanut butter (like Jif or Skippy) rather than natural styles that separate, as the oil separation in natural brands can break the buttercream.
- ✓Ensure all refrigerated ingredients (eggs, buttermilk, butter) are at room temperature to prevent the batter from curdling.
- ✓If your cakes dome significantly in the oven, use a serrated knife to level the tops before stacking for a professional look.
- ✓Chill the cake for 20 minutes after the ‘crumb coat’ (a thin layer of frosting) to make applying the final layer of frosting much easier and cleaner.
- ✓For an extra dark cake, use Dutch-processed cocoa powder, though regular unsweetened cocoa works perfectly fine.
Substitutions and Variations
If you do not have buttermilk on hand, you can easily make a sour milk substitute by adding one tablespoon of white vinegar or lemon juice to a cup of whole milk and letting it sit for 5 minutes. For a gluten-free version, replace the all-purpose flour with a high-quality 1:1 gluten-free baking flour blend that includes xanthan gum. If you are allergic to peanuts, this frosting works wonderfully with almond butter, cashew butter, or even sunflower seed butter for a nut-free school-safe option. Regarding the coffee, if you prefer to avoid caffeine or coffee flavor entirely, simply use boiling water; the cake will still be delicious but slightly less intense in chocolate depth. Vegetable oil can be swapped for melted coconut oil or grapeseed oil, though coconut oil may impart a slight coconut flavor.
Common Mistakes to Avoid
A frequent mistake is over-mixing the batter after adding the flour. While the 2-minute beat is necessary to build some structure, excessive mixing after that point can develop too much gluten, resulting in a tough, rubbery cake rather than a tender one. Another common error is frosting the cake before it is completely cool. Even a slightly warm cake will melt the butter in the frosting, causing the layers to slide apart and the frosting to become a greasy puddle. Additionally, using cold butter for the frosting will result in lumps that are impossible to whip out; ensure your butter is perfectly softened but not melted. Finally, be careful not to over-bake; check the cake 5 minutes before the timer goes off, as ovens vary greatly.
Serving Suggestions
This rich cake is best served in thin slices due to its decadence. It pairs beautifully with a cold glass of milk or a hot cup of black coffee to balance the sweetness. For an elegant dessert course, serve a slice alongside a scoop of vanilla bean ice cream or a dollop of unsweetened whipped cream. If you want to add texture, sprinkle the top with crushed roasted peanuts, chocolate curls, or even crushed pretzels for a salty crunch. A drizzle of warm chocolate ganache or caramel sauce over the plated slice can take the presentation to the next level.
Storage and Reheating Tips
This cake stores exceptionally well due to its oil-based batter. It can be kept at room temperature in an airtight cake carrier for up to 3 days. If you live in a particularly hot or humid climate, it is safer to store it in the refrigerator to prevent the frosting from melting. In the fridge, it will last for up to 5-6 days. Note that cold cake can taste dry, so always let refrigerated slices sit on the counter for 20-30 minutes to return to room temperature before eating. The cake layers can also be baked ahead of time, wrapped tightly in plastic wrap, and frozen for up to 3 months. Thaw frozen layers in the fridge overnight before frosting.
Nutrition Facts (Estimated)
| Serving Size | 1 slice |
| Calories | 580 |
| Fat | 34g |
| Saturated Fat | 12g |
| Unsaturated Fat | 20g |
| Trans Fat | 0g |
| Cholesterol | 65mg |
| Sodium | 320mg |
| Carbohydrates | 68g |
| Fiber | 4g |
| Sugar | 45g |
| Protein | 9g |
Frequently Asked Questions
Can I make this cake as cupcakes instead?
Yes, absolutely. This batter works perfectly for cupcakes. Line a muffin tin with liners and fill them about 2/3 full. Bake at 350°F for 18-22 minutes. This recipe will yield approximately 24-30 cupcakes.
Why is the batter so runny?
The batter is intentionally thin because of the high liquid content (milk, oil, coffee). This hydration is necessary for the cocoa to bloom and for the cake to remain moist during the baking process. Do not add more flour; trust the recipe!
Can I use natural peanut butter for the frosting?
It is not recommended. Natural peanut butter tends to separate and can make the buttercream oily or gritty. Commercial stabilized peanut butter (like Jif or Skippy) provides the smoothest, fluffiest texture.
Does the cake taste like coffee?
No, the coffee flavor is undetectable in the final product. It simply enhances the richness of the chocolate. However, if you are sensitive to caffeine, decaf coffee or boiling water works fine.
Can I use salted butter for the frosting?
Yes, but be careful with adding extra salt. If you use salted butter, omit the pinch of salt listed in the frosting ingredients, then taste and add more only if needed.
My cake sank in the middle, what happened?
This usually happens if the oven door was opened too early, causing a temperature drop, or if there was too much leavening (baking soda/powder). Ensure your oven is fully preheated and try not to open it until the cake is nearly done.
How do I get flat cake layers?
You can use ‘cake strips’ wrapped around the pan to insulate the edges, promoting even baking. Alternatively, simply trim the domed tops with a long serrated knife once the cakes are cool.
Can I freeze the frosted cake?
Yes. Place the frosted cake in the freezer uncovered for an hour to harden the frosting, then wrap it tightly in plastic wrap and foil. It can be frozen for up to 2 months.
Conclusion
There you have it—the blueprint for the most indulgent, crowd-pleasing chocolate cake you will ever bake. The contrast between the deep, dark chocolate sponge and the salty, creamy peanut butter frosting is truly a match made in dessert heaven. Whether you are an experienced baker or a novice in the kitchen, this recipe is forgiving and yields consistent, bakery-quality results. We hope this cake becomes a new tradition in your home, bringing smiles to faces and satisfying sweet tooths for years to come. Happy baking!

