Moist Dark Chocolate Cake Recipe
Discover the holy grail of dessert recipes with this incredibly moist dark chocolate cake. Infused with hot coffee to bloom the cocoa and using oil for lasting tenderness, this cake is foolproof, decadent, and destined to become your new go-to for every celebration.
20 minutes
35 minutes
55 minutes
12-14 servings (Two 8-inch rounds)
Dessert
Baking
American
Vegetarian
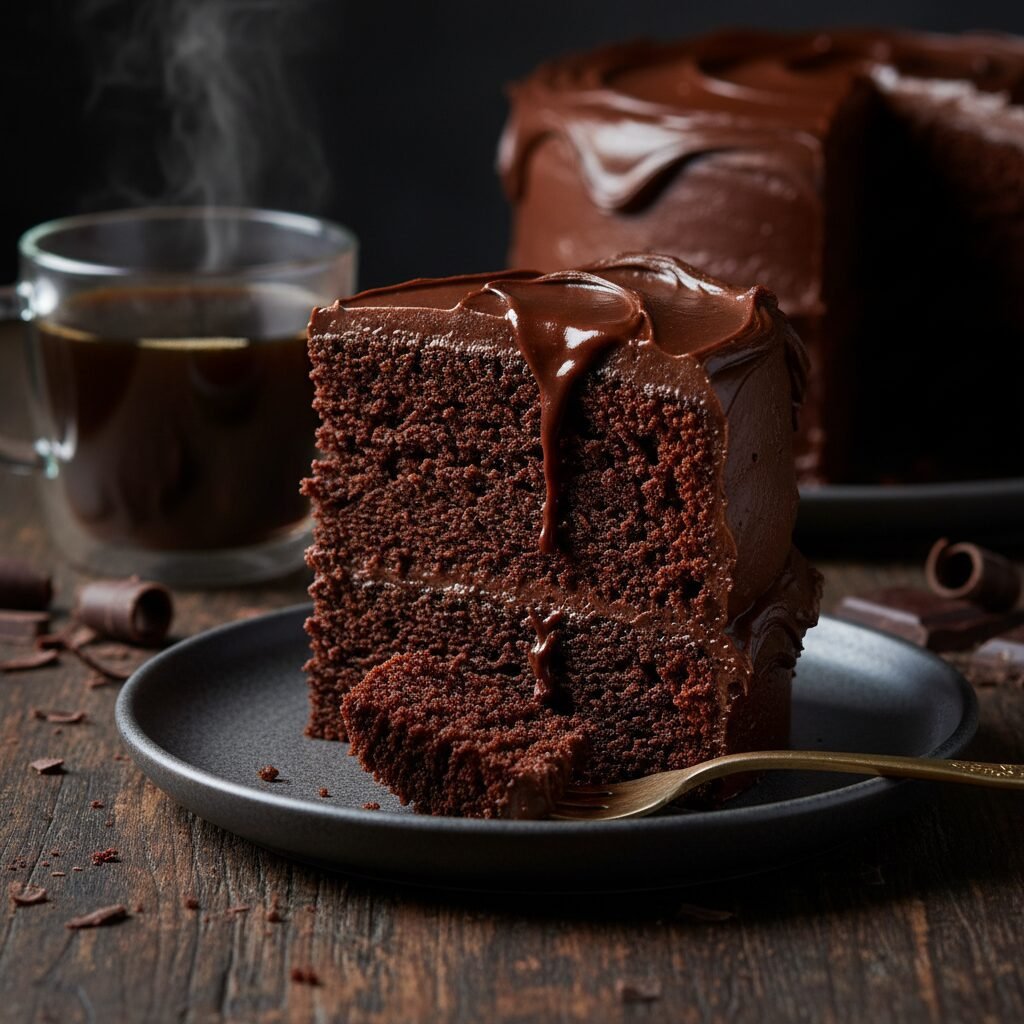
If you have been on a lifelong quest for the perfect chocolate cake, you can finally stop searching. We have all experienced the disappointment of a cake that looks beautiful on the outside but crumbles into a dry, flavorless disappointment the moment you take a bite. This recipe is the antithesis of that experience. This is the cake that dreams are made of: an impossibly dark, rich, and tender crumb that stays moist for days, not just hours. It balances the deep, complex bitterness of high-quality cocoa powder with just the right amount of sweetness, creating a flavor profile that is sophisticated enough for adults yet universally loved by children. The magic lies in the method and the ingredients. Unlike butter-based cakes that can firm up and dry out when cool, this oil-based batter ensures a luxurious, melt-in-your-mouth texture that persists even after refrigeration. Furthermore, the addition of boiling hot coffee does not make the cake taste like a morning brew; rather, it acts as a catalyst, unlocking the full potential of the chocolate and adding a depth of flavor that milk or water simply cannot achieve. Whether you are layering it with a silky Swiss meringue buttercream, a glossy ganache, or simply dusting it with powdered sugar, this Moist Dark Chocolate Cake is a showstopper. It is the kind of recipe that gets passed down through generations, scribbled on recipe cards, and requested at every birthday. Prepare your taste buds for a chocolate experience that is intense, fudgy, and utterly unforgettable.
History & Origins
The history of chocolate cake is a fascinating journey that mirrors the evolution of chocolate processing itself. For centuries, chocolate was consumed almost exclusively as a beverage by the Aztecs and Mayans, and later by wealthy Europeans. It wasn’t until 1764, when Dr. James Baker discovered how to make chocolate by grinding cocoa beans between massive circular millstones, that the ingredient became more accessible. However, the true turning point for chocolate cake arrived in 1828 with Conrad Van Houten of the Netherlands. He developed a mechanical extraction method to separate cocoa butter from cacao liquor, resulting in a compact rock of cocoa solids that could be ground into the powder we know today. This ‘Dutch processing’ made chocolate affordable and easy to bake with. The earliest chocolate cakes were actually yellow cakes with chocolate frosting or cakes made with yeast. It wasn’t until the late 19th and early 20th centuries, with the mass production of baking powder and baking soda, that the modern, fluffy chocolate cake began to take shape. The term ‘Devil’s Food Cake’ emerged around 1902, allegedly named to contrast with the snowy white ‘Angel Food Cake,’ but also referencing the reddish hue the cake would take on when natural cocoa powder reacted with high amounts of baking soda. During the Great Depression, ‘Wacky Cake’ or ‘Depression Cake’ became popular; these recipes omitted eggs and butter due to rationing, relying on vinegar and oil, which inadvertently taught bakers that oil yields a moister crumb than butter. Our recipe today draws on this rich lineage, utilizing the science of the 20th century to perfect the texture while honoring the deep cocoa flavor that has been prized for hundreds of years.
Why This Recipe Works
This recipe succeeds where many others fail due to a specific combination of chemical reactions and ingredient choices designed to maximize moisture and flavor depth. First and foremost is the choice of fat. While butter provides a delicious flavor, it is solid at room temperature. Vegetable oil remains liquid at room temperature, which means this cake stays incredibly soft and moist on the counter and doesn’t firm up into a brick in the fridge. Secondly, the inclusion of buttermilk is crucial. The acidity in the buttermilk reacts with the baking soda to create carbon dioxide bubbles, giving the cake a tremendous lift and a tender, airy crumb structure. It also helps to break down the long strands of gluten, preventing the cake from becoming tough. The third and perhaps most important secret weapon is the boiling hot coffee. When you mix hot liquid with cocoa powder, you ‘bloom’ the cocoa. This process dissolves the cocoa solids and releases flavor compounds that are otherwise trapped, resulting in a significantly more intense chocolate experience. The heat also begins to activate the baking powder immediately, giving the batter a head start on rising before it even hits the oven. Finally, using a combination of white and brown sugar adds moisture, as the molasses in brown sugar is hygroscopic, meaning it attracts and holds water, ensuring the cake remains fudgy days after baking.
Why You’ll Love This Recipe
- ✓Stays moist for up to 5 days due to the oil-based batter.
- ✓Deep, intense chocolate flavor enhanced by hot coffee.
- ✓Simple one-bowl mixing method requires no electric mixer.
- ✓Versatile enough for layer cakes, sheet cakes, or cupcakes.
- ✓Perfect balance of fluffy crumb and fudgy density.
Equipment You’ll Need
- ✓Two 8-inch round cake pans
- ✓Large mixing bowl
- ✓Whisk
- ✓Sifter or fine-mesh sieve
- ✓Measuring cups and spoons
- ✓Parchment paper
- ✓Wire cooling rack
Ingredients
- ✓2 cups granulated sugar
- ✓1 3/4 cups all-purpose flour
- ✓3/4 cup unsweetened cocoa powder (high quality)
- ✓1 1/2 teaspoons baking powder
- ✓1 1/2 teaspoons baking soda
- ✓1 teaspoon salt
- ✓2 large eggs, room temperature
- ✓1 cup whole milk or buttermilk, room temperature
- ✓1/2 cup vegetable oil (or canola oil)
- ✓2 teaspoons pure vanilla extract
- ✓1 cup boiling hot coffee (or boiling water)
Instructions
- Preheat oven to 350°F (175°C). Grease and flour two 8-inch round cake pans, or line the bottoms with parchment paper for easy removal.
- In a large bowl, sift together the sugar, flour, cocoa, baking powder, baking soda, and salt. Whisk briefly to ensure the dry ingredients are evenly combined.
- Add the eggs, buttermilk, oil, and vanilla extract to the dry ingredients. Beat with a whisk or an electric mixer on medium speed for about 2 minutes. The batter should look smooth and well-combined.
- Stir in the boiling hot coffee by hand. Pour it in slowly while whisking to avoid scrambling the eggs. The batter will be very thin and liquid; this is completely normal, so do not add more flour.
- Pour the batter evenly into the prepared pans. Tap the pans gently on the counter once or twice to release any large air bubbles.
- Bake for 30 to 35 minutes. Test for doneness by inserting a wooden toothpick into the center of the cake. It should come out clean or with just a few moist crumbs attached. Do not overbake.
- Remove from the oven and let the cakes cool in the pans for about 10 minutes. Then, run a knife around the edges and invert them onto a wire rack to cool completely before frosting.
Expert Cooking Tips
- ✓Use room temperature eggs and buttermilk to ensure the batter emulsifies properly.
- ✓Do not skip the boiling liquid; it is essential for blooming the cocoa powder.
- ✓Weigh your flour using a kitchen scale (approx. 120g per cup) to avoid a dense cake.
- ✓If you don’t have buttermilk, make a substitute by adding 1 tablespoon of vinegar to a cup of milk and letting it sit for 5 minutes.
- ✓Use high-quality cocoa powder (like Valrhona or Ghirardelli) for the best flavor payoff.
- ✓Don’t open the oven door during the first 20 minutes of baking to prevent the cake from sinking.
- ✓Let the cake cool completely before frosting, otherwise, your frosting will slide right off.
Substitutions and Variations
This recipe is quite resilient, allowing for several substitutions if you find your pantry lacking. For the flour, you can use a 1:1 Gluten-Free baking flour blend if you need to make this dietary-friendly; just look for a blend that contains xanthan gum. If you are out of buttermilk, you can use a mixture of regular milk and lemon juice (sour milk) or dilute sour cream or plain Greek yogurt with a little water until it reaches a pourable consistency. For the fat, while vegetable oil is recommended for moisture, you can use melted coconut oil (though it may add a slight coconut flavor) or melted butter (which will result in a slightly denser crumb). If you want to avoid caffeine, decaf coffee works perfectly, or you can simply use boiling water. Using water will yield a slightly less intense chocolate flavor, but the cake will still be delicious. For a different flavor twist, you can replace the vanilla extract with almond extract or add a pinch of cinnamon to the dry ingredients.
Common Mistakes to Avoid
The most common mistake with this cake is overbaking. Because the batter is dark, it is hard to see the visual cues of browning. Trust the toothpick test and check it at the 30-minute mark. If you bake it until it feels firm to the touch like a sponge cake, it may already be dry inside. Another frequent error is measuring flour by volume without fluffing it first; scooping packed flour directly from the bag can add up to 25% more flour than necessary, leading to a heavy, dry brick. Also, do not panic when you see how thin the batter is. Many bakers instinctively want to add more flour because it looks like soup compared to a butter-creamed cake batter. Resist the urge! The thin batter allows the steam to escape and creates that signature light, moist crumb. Finally, ensure your baking powder and soda are fresh; if they are expired, the cake will not rise and will be dense and gummy.
Serving Suggestions
This cake is incredibly versatile and serves as the perfect canvas for various toppings. For a classic birthday cake, frost it with a rich chocolate buttercream or a Swiss meringue buttercream. If you prefer something less sweet, a dark chocolate ganache makes for a sophisticated, glossy finish that looks professional. For a lighter summer dessert, serve slices naked (unfrosted) with a dollop of freshly whipped cream and a handful of raspberries or strawberries; the tart fruit cuts through the richness of the chocolate beautifully. It is also heavenly served warm with a scoop of vanilla bean ice cream and a drizzle of salted caramel sauce. A dusting of powdered sugar and some edible flowers can turn a simple single layer into an elegant tea-time treat.
Storage and Reheating Tips
Because this cake is oil-based, it keeps remarkably well. An unfrosted cake can be stored at room temperature, tightly wrapped in plastic wrap or in an airtight container, for up to 4 days. If the cake is frosted with a perishable frosting (like cream cheese or whipped cream), it must be stored in the refrigerator. However, bring it back to room temperature before serving for the best texture and flavor. This cake also freezes beautifully. To freeze, wrap individual layers (cooled and unfrosted) tightly in a layer of plastic wrap followed by a layer of aluminum foil. They can be frozen for up to 3 months. Thaw the layers in the refrigerator overnight before assembling and frosting. Even fully frosted slices can be frozen in airtight containers for a quick treat later.
Nutrition Facts (Estimated)
| Serving Size | 1 slice |
| Calories | 480 |
| Fat | 26g |
| Saturated Fat | 6g |
| Unsaturated Fat | 18g |
| Trans Fat | 0g |
| Cholesterol | 55mg |
| Sodium | 320mg |
| Carbohydrates | 60g |
| Fiber | 4g |
| Sugar | 35g |
| Protein | 6g |
Frequently Asked Questions
Can I use hot water instead of coffee?
Yes, absolutely. The coffee enhances the chocolate flavor without making the cake taste like coffee, but hot water works perfectly fine if you prefer to avoid it.
Why is the batter so runny?
The batter is supposed to be very thin and liquid. This high liquid content ensures the cake stays moist and steams as it bakes, creating a tender crumb. Do not add more flour.
Can I make this into cupcakes?
Yes! This recipe makes about 24 standard cupcakes. Bake them at 350°F for 18-22 minutes. Be careful not to overfill the liners as the batter rises significantly.
Should I use natural or Dutch-process cocoa powder?
You can use either for this recipe. Dutch-process will give a darker color and fudgier flavor, while natural cocoa will be slightly lighter and more acidic. Both react well here.
Can I reduce the sugar?
We don’t recommend reducing the sugar significantly. Sugar is structural and helps retain moisture. Reducing it too much will result in a rubbery texture and a cake that dries out faster.
Can I bake this in a 9×13 pan?
Yes, this recipe fits perfectly in a 9×13 inch rectangular pan. You will likely need to increase the baking time to 35-40 minutes.
Why did my cake sink in the middle?
This usually happens if the oven door was opened too early, causing a temperature drop, or if the cake was underbaked. It can also happen if there was too much leavening agent used.
Can I use olive oil?
Yes, you can use a mild olive oil. However, a strong extra-virgin olive oil might impart a savory flavor that clashes with the chocolate, so stick to ‘light’ or ‘pure’ olive oil.
How do I prevent the cake from sticking to the pan?
The most reliable method is to grease the pan with butter or spray, place a parchment paper circle in the bottom, and then grease and flour the sides.
Is this cake dairy-free?
It can be easily made dairy-free by using a plant-based milk (like almond or soy) mixed with a teaspoon of vinegar to mimic buttermilk.
Conclusion
There is something deeply comforting about a homemade chocolate cake that a bakery version just can’t replicate. This Moist Dark Chocolate Cake recipe is designed to be your faithful companion for all of life’s sweet moments, big or small. Its simplicity means you can whip it up on a whim, while its superior quality ensures it is worthy of your most special occasions. We hope this cake brings as much joy to your kitchen as it has to ours. Once you try it, you will understand why we call it the ultimate. Happy baking, and don’t forget to share a slice with someone you love!

