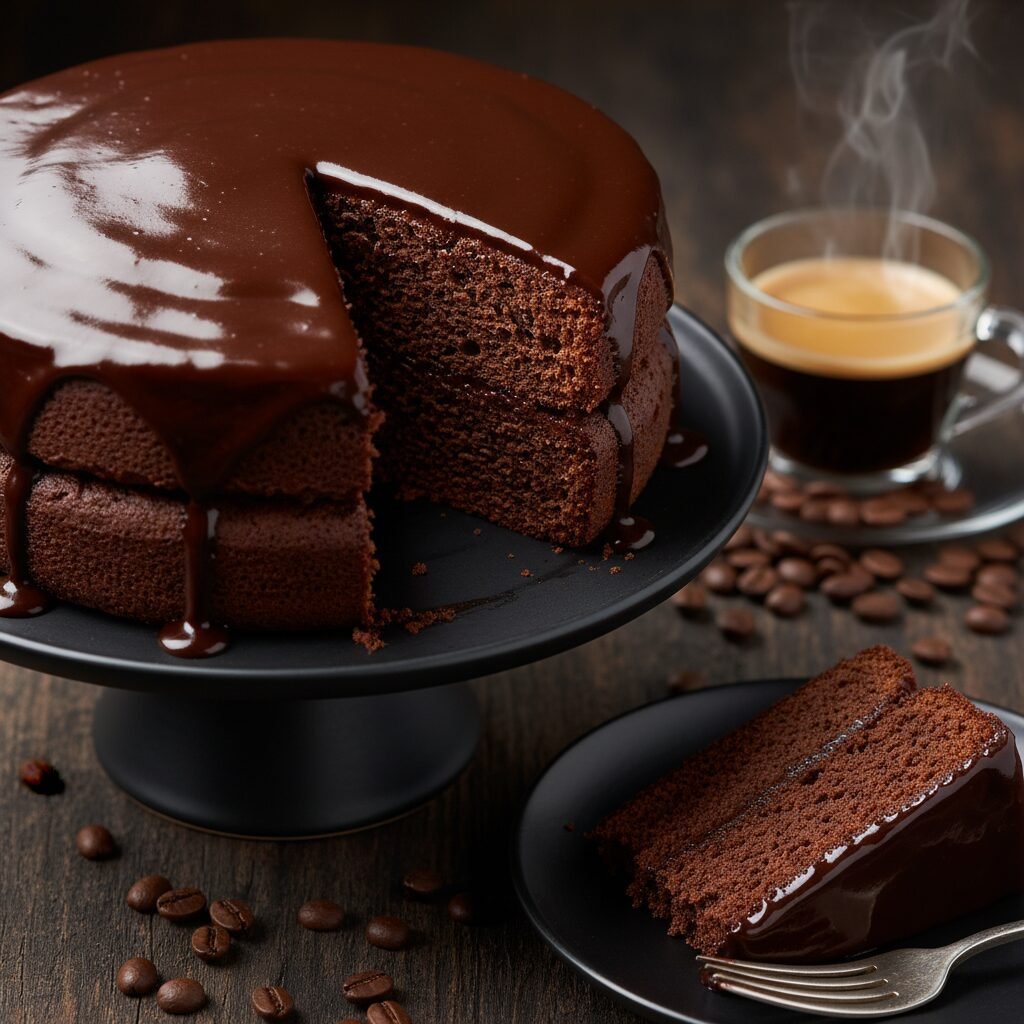
Moist Espresso Chocolate Cake With Chocolate Ganache Recipe
Experience the deepest, darkest chocolate flavor imaginable with this incredibly moist espresso chocolate cake. Paired with a luxurious, glossy ganache, this recipe uses hot coffee to bloom the cocoa, resulting in a decadent dessert that melts in your mouth.
20 minutes
35 minutes
55 minutes
12-14 servings
Dessert
Baking
American
Vegetarian
If you have been on an endless quest for the perfect chocolate cake, your search officially ends here. This isn’t just another dry sponge masked by heavy frosting; this is the Moist Espresso Chocolate Cake with Chocolate Ganache, a dessert that promises to redefine your baking standards. The secret weapon in this recipe is not an abundance of butter or a complicated technique, but rather the addition of hot espresso. Many home bakers fear that adding coffee will turn their confection into a mocha-flavored dessert, but fear not. The espresso acts as a flavor enhancer, deepening the complexity of the cocoa and bringing forward those rich, earthy notes that make chocolate so addictive, without imparting a distinct coffee taste.
Imagine a crumb so tender that it barely holds together as you slide your fork through it, yet it possesses enough structure to support a thick, pooling layer of glossy chocolate ganache. The texture is fudgy, almost akin to a brownie but with the lightness of a cake. We use oil instead of butter to ensure the cake stays soft for days, and the ganache—made from just heavy cream and premium semi-sweet chocolate—provides a sophisticated finish that is far superior to sugary buttercream. Whether you are celebrating a milestone birthday, hosting a dinner party, or simply soothing a Tuesday night craving, this cake delivers pure, unadulterated comfort. Prepare your kitchen for the intoxicating aroma of baking chocolate that will linger long after the last crumb is devoured.
History & Origins
The history of chocolate cake is a journey from a drink to a solid confection, evolving significantly over the last two centuries. Originally, chocolate was consumed primarily as a beverage by the Maya and Aztecs, and later by wealthy Europeans. It wasn’t until the 19th century, with the extraction of cocoa butter and the creation of cocoa powder by Conrad Van Houten in 1828, that baking with chocolate became accessible. The earliest ‘chocolate cakes’ were actually yellow or white cakes served with chocolate frosting. It wasn’t until the late 1800s that cooks began incorporating chocolate directly into the batter, giving rise to what was often called ‘Devil’s Food Cake’—a name supposedly derived from the cake’s reddish hue caused by the reaction between cocoa powder and baking soda, or perhaps simply because it was so sinfully delicious compared to the virtuous Angel Food Cake.
The specific innovation of adding hot liquid, particularly coffee or boiling water, to chocolate cake batter is a technique that gained popularity in American kitchens during the mid-20th century. Home economists discovered that ‘blooming’ cocoa powder with hot liquid released its full flavor potential and helped dissolve the sugar more effectively. The pairing of coffee and chocolate is a classic culinary marriage; the bitterness and acidity of coffee mirror and amplify the flavor profile of cocoa beans. Over the decades, this evolved into the modern ‘Espresso Chocolate Cake,’ a staple in high-end bakeries and a favorite among serious chocoholics who understand that the best chocolate flavor often needs a little caffeine kick to truly shine.
Why This Recipe Works
This recipe succeeds where many others fail due to three primary scientific principles: the blooming of cocoa, the choice of fat, and the acidity balance. First, the instruction to pour hot espresso over the cocoa powder and sugar is critical. Cocoa powder is essentially dried solids; adding hot liquid ‘blooms’ it, dissolving the particles and releasing flavor oils that would otherwise remain trapped. This process ensures that every bite is intensely chocolatey rather than dusty or mild.
Secondly, we use vegetable oil instead of butter. While butter provides great flavor, it contains water and milk solids, and it solidifies at room temperature. Oil is 100% fat and remains liquid at room temperature. This means the cake stays incredibly moist and tender on the counter, whereas a butter-based cake might dry out or firm up too much.
Finally, the chemistry between the ingredients is perfectly balanced. We use both baking powder and baking soda. The baking soda reacts with the acidity in the cocoa powder (and the slight acidity of the coffee and buttermilk), creating carbon dioxide bubbles that lift the heavy batter. The buttermilk tenderizes the gluten strands in the flour, preventing the cake from becoming tough. The result is a cake that is dense enough to be satisfying but light enough to not feel like a brick in your stomach.
Why You’ll Love This Recipe
- ✓Intense chocolate flavor boosted by fresh espresso.
- ✓Stays moist for days thanks to oil-based batter.
- ✓No electric mixer required; easy one-bowl method.
- ✓Luxurious two-ingredient ganache topping.
- ✓Perfect balance of sweetness and dark cocoa depth.
- ✓Ideal for beginners and professional bakers alike.
Equipment You’ll Need
- ✓Two 9-inch round cake pans
- ✓Large mixing bowl
- ✓Whisk
- ✓Measuring cups and spoons
- ✓Parchment paper
- ✓Wire cooling rack
- ✓Small saucepan (for ganache)
- ✓Offset spatula
Ingredients
- ✓2 cups granulated sugar
- ✓1 3/4 cups all-purpose flour
- ✓3/4 cup unsweetened cocoa powder (high quality)
- ✓1 1/2 teaspoons baking powder
- ✓1 1/2 teaspoons baking soda
- ✓1 teaspoon salt
- ✓2 large eggs, room temperature
- ✓1 cup whole milk or buttermilk
- ✓1/2 cup vegetable oil or canola oil
- ✓2 teaspoons pure vanilla extract
- ✓1 cup boiling hot espresso or strong black coffee
- ✓8 oz semi-sweet chocolate chips or chopped chocolate bar (for ganache)
- ✓1 cup heavy whipping cream (for ganache)
Instructions
- Preheat your oven to 350°F (175°C). Grease two 9-inch round cake pans with butter or cooking spray and line the bottoms with parchment paper to ensure easy release.
- In a large mixing bowl, whisk together the sugar, flour, cocoa powder, baking powder, baking soda, and salt until well combined and free of large lumps.
- Add the eggs, milk (or buttermilk), vegetable oil, and vanilla extract to the dry ingredients. Whisk by hand or beat on medium speed for about 2 minutes until the batter is smooth and consistent.
- Carefully pour in the boiling hot espresso. Whisk gently at first to avoid splashing, then mix until combined. Note: The batter will be very thin and liquidy; this is completely normal and essential for the moist texture.
- Divide the batter evenly between the prepared cake pans.
- Bake for 30 to 35 minutes, or until a wooden toothpick inserted into the center comes out clean or with just a few moist crumbs attached.
- Remove the cakes from the oven and let them cool in the pans for about 10 minutes. Then, run a knife around the edges and invert them onto a wire rack to cool completely before frosting.
- While the cakes cool, prepare the ganache. Place the chocolate chips in a heat-proof medium bowl.
- In a small saucepan, heat the heavy cream over medium heat until it just begins to simmer (do not let it come to a rolling boil).
- Pour the hot cream over the chocolate chips. Let it sit undisturbed for 5 minutes.
- Gently whisk the chocolate and cream mixture starting from the center and working your way out until it transforms into a glossy, smooth ganache.
- Let the ganache sit at room temperature for about 15-20 minutes to thicken slightly to a spreadable consistency.
- Once the cakes are cool, place one layer on your serving plate. Spread a layer of ganache over the top. Place the second layer on top and pour the remaining ganache over the center, using an offset spatula to spread it over the top and sides.
Expert Cooking Tips
- ✓Do not over-bake. Check the cake 5 minutes before the timer goes off; dry cake is usually just overcooked cake.
- ✓Use high-quality cocoa powder. Since chocolate is the main flavor, a premium Dutch-process or natural cocoa makes a huge difference.
- ✓Ensure your baking powder and soda are fresh. Expired leavening agents will result in a flat, dense cake.
- ✓Room temperature ingredients (eggs and milk) emulsify better, creating a more uniform crumb.
- ✓Don’t skip the parchment paper. It guarantees your cake won’t stick to the bottom of the pan.
- ✓If the ganache breaks (looks oily), whisk in a teaspoon of warm milk vigorously to bring it back together.
- ✓Let the cake cool completely. Frosting a warm cake will cause the ganache to melt and slide right off.
Substitutions and Variations
This recipe is quite forgiving and allows for several substitutions if you find yourself missing an ingredient. If you don’t have buttermilk, you can make a DIY version by adding one tablespoon of white vinegar or lemon juice to a cup of regular milk and letting it sit for 5 minutes. For a gluten-free version, substitute the all-purpose flour with a high-quality 1:1 gluten-free baking flour blend that includes xanthan gum. If you want to avoid caffeine entirely, you can use boiling water or decaf coffee instead of espresso; the chocolate flavor will still be good, though slightly less intense. Coconut oil (melted) can be swapped for vegetable oil for a subtle coconut aroma, or use melted butter for a richer taste, though the texture will be slightly denser. For the ganache, you can use dark chocolate for a less sweet, more sophisticated finish, or milk chocolate for a sweeter, kid-friendly topping.
Common Mistakes to Avoid
The most common mistake with this recipe is panicking over the consistency of the batter. When you add the boiling liquid, the batter becomes very thin and watery. Many bakers instinctively want to add more flour to thicken it—do not do this! The extra liquid cooks out and creates steam, which keeps the cake moist. Another frequent error is over-mixing the batter once the flour is added. Over-mixing develops gluten, which can make the cake tough and rubbery instead of tender. Lastly, rushing the cooling process is a recipe for disaster. If you try to remove the cakes from the pans too early, they may crumble because they are so tender. Similarly, applying the ganache before the cake is cool will result in a messy puddle rather than a beautiful glaze.
Serving Suggestions
This rich cake is best served in generous slices. Because the flavor is so deep and intense, it pairs beautifully with something creamy to cut through the richness. A dollop of lightly sweetened whipped cream or a scoop of vanilla bean ice cream is the classic accompaniment. For a fruitier contrast, serve with fresh raspberries or a strawberry coulis; the tartness of the berries highlights the dark chocolate notes. If you are serving this at a dinner party, a dusting of powdered sugar or edible gold leaf on top of the ganache adds an elegant touch. Pair it with a glass of cold milk, a hot espresso, or even a glass of red wine like a Cabernet Sauvignon or Merlot.
Storage and Reheating Tips
This cake stores exceptionally well due to its oil content. It can be kept at room temperature in an airtight container or cake dome for up to 3 days. In fact, many find it tastes even better the second day as the flavors meld. For longer storage, keep it in the refrigerator for up to 5 days, but be sure to let it come to room temperature before serving to regain its soft texture, as cold chocolate cake can feel firm. You can also freeze the unfrosted cake layers. Wrap them tightly in plastic wrap and then aluminum foil, and freeze for up to 3 months. Thaw overnight in the refrigerator before frosting.
Nutrition Facts (Estimated)
| Serving Size | 1 slice |
| Calories | 450 |
| Fat | 26g |
| Saturated Fat | 9g |
| Unsaturated Fat | 15g |
| Trans Fat | 0g |
| Cholesterol | 45mg |
| Sodium | 310mg |
| Carbohydrates | 52g |
| Fiber | 4g |
| Sugar | 32g |
| Protein | 6g |
Frequently Asked Questions
Can I make this cake ahead of time?
Absolutely. The cake layers can be baked a day in advance. Wrap them in plastic wrap once cooled and store at room temperature. The flavor often improves after sitting overnight.
Will the cake taste like coffee?
No, the cake will not taste like a cup of coffee. The espresso serves to enhance the chocolate flavor, making it richer and deeper. If you are very sensitive to coffee, you can use hot water instead.
Can I use instant coffee?
Yes, instant coffee works perfectly. Dissolve 1-2 teaspoons of instant coffee granules in 1 cup of boiling water and use it as directed.
My cake sank in the middle, what happened?
This usually happens if the oven door was opened too early during baking, causing a temperature drop, or if the leavening agents (baking soda/powder) were old. It can also happen if the batter was over-mixed.
Can I make this as cupcakes?
Yes! This batter makes excellent cupcakes. Fill liners about 2/3 full and bake for 18-22 minutes at 350°F. It should yield about 24-30 cupcakes.
Why do I need both baking soda and baking powder?
They serve different functions. Baking soda needs an acid (like buttermilk and coffee) to activate and help the cake brown and rise. Baking powder provides a second lift ensuring a fluffy texture.
Can I use Dutch-process cocoa?
Yes, you can use Dutch-process cocoa for a darker color and mellower flavor. Since the recipe uses baking powder and baking soda, it has enough leavening power to handle either natural or Dutch-process cocoa.
How do I get the ganache to be shiny?
The key to shiny ganache is not overheating the cream and adding a teaspoon of corn syrup or a small pat of butter at the end of mixing, though this recipe produces a naturally glossy finish if not overworked.
Conclusion
There are few things in life as universally satisfying as a truly excellent slice of chocolate cake. This Moist Espresso Chocolate Cake with Chocolate Ganache is more than just a recipe; it’s a reliable companion for celebrations, sorrows, and everything in between. By understanding the simple science behind the ingredients—how the hot coffee blooms the cocoa and the oil preserves moisture—you can consistently produce bakery-quality results in your own home. We hope this becomes your go-to recipe for years to come. Don’t forget to share a slice with someone you love, or keep it all to yourself; we certainly wouldn’t judge!