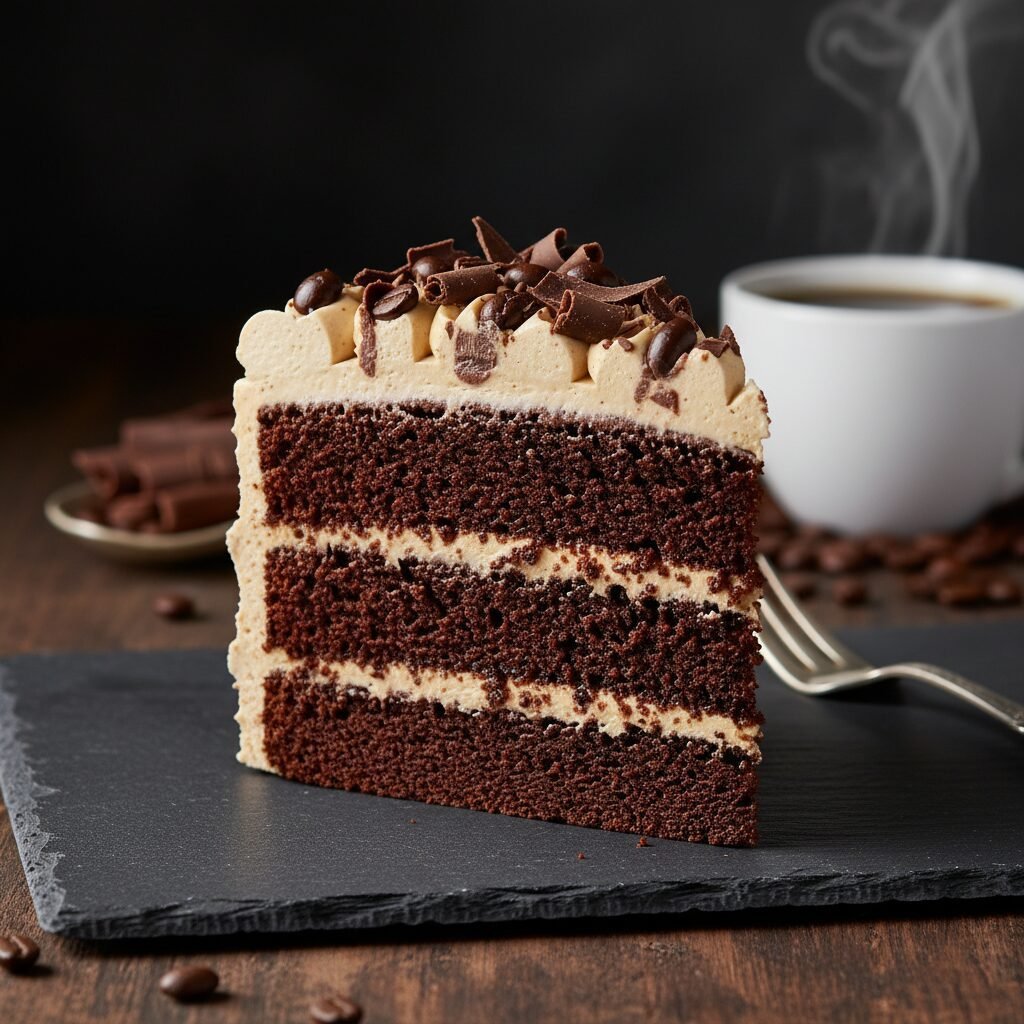
Moist Mocha Layer Cake With Espresso Buttercream Recipe
This is the definitive cake for coffee lovers: three decadent layers of incredibly moist dark chocolate cake infused with hot brewed coffee, enveloped in a silky, caffeine-kicked espresso buttercream. It is the perfect balance of rich cocoa and bold espresso, creating a sophisticated dessert that tastes like your favorite latte in cake form.
45 minutes
35 minutes
2 hours 30 minutes
12-14 servings
Dessert
Baking
American
Vegetarian
There are few flavor combinations in the culinary world as iconic and harmonious as chocolate and coffee. While chocolate cake on its own is a delight, the addition of coffee elevates it to an entirely new level of depth and sophistication. This Moist Mocha Layer Cake with Espresso Buttercream is not just a dessert; it is an experience designed for the true mocha enthusiast. We often find that chocolate cakes can lean towards being overly sweet or, conversely, too dry. This recipe solves both problems by utilizing the science of ‘blooming’ cocoa powder with hot coffee, which intensifies the chocolate flavor while ensuring the crumb remains incredibly tender and moist for days. The star of the show, however, might just be the espresso buttercream. Unlike standard chocolate frostings that can feel heavy, this buttercream is whipped to an airy consistency and spiked with concentrated espresso powder, cutting through the richness of the cake with a toasted, aromatic sharpness. Whether you are baking for a birthday, a holiday gathering, or simply to cure a mid-week slump, this cake promises to deliver bakery-quality results right from your home kitchen. It is dramatic, dark, and undeniably delicious, demanding a tall glass of cold milk or, naturally, a fresh cup of coffee on the side.
History & Origins
The term ‘Mocha’ is one of the most historically significant words in the world of coffee and chocolate, yet its origins are often overlooked by modern consumers who associate it simply with a flavoring syrup. The name derives from the port city of Al Mokha (Mocha) in Yemen, which was the primary marketplace for the world’s coffee trade from the 15th to the early 18th century. The coffee beans exported from this port, known as Mocha beans, were renowned for their distinct, earthy flavor and unique chocolate undertones. As coffee culture spread to Europe, chocolate was also making its debut from the Americas. By the 17th and 18th centuries, coffee houses in Europe began experimenting with mixing these two luxury ingredients. The Italians later perfected this union with desserts like Tiramisu and the Bicerin drink. However, the concept of the ‘Mocha Cake’ as we know it—a sponge cake flavored with coffee and chocolate—became a staple in American and British baking during the 20th century. As instant coffee and espresso powders became more accessible in the post-war era, home bakers began incorporating them into batters and frostings to mimic the flavors found in European patisseries. Today, the mocha layer cake stands as a testament to centuries of global trade, combining the cocoa of the Americas with the coffee traditions of the Middle East and the cake-baking techniques of the West.
Why This Recipe Works
This recipe succeeds where many others fail due to three specific chemical reactions and ingredient choices. First is the use of hot, freshly brewed coffee in the batter. Pouring hot liquid over cocoa powder is a technique known as ‘blooming.’ This process dissolves the fruitier, acidic notes of the cocoa and releases the deep, dark chocolate solids that are often trapped in the powder, resulting in a more robust flavor profile than simply sifting the cocoa with flour. Second, we utilize vegetable oil instead of butter for the cake sponge. While butter adds flavor, it contains water and solidifies at room temperature, which can lead to a drier texture over time. Oil remains liquid at room temperature, ensuring the cake stays soft and moist for days after baking. Third, the inclusion of buttermilk provides the necessary acidity to react with the baking soda. This reaction creates carbon dioxide bubbles that give the cake a lofty, airy lift, preventing the dense, fudgy texture of a brownie and keeping it light enough to stack into three impressive layers. Finally, the buttercream uses instant espresso powder rather than brewed coffee. This allows us to inject a potent coffee punch without adding excess liquid that would break the emulsion of the butter and sugar.
Why You’ll Love This Recipe
- ✓Deep, intense chocolate flavor enhanced by hot coffee
- ✓Stays moist for 3-4 days thanks to oil-based batter
- ✓Silky, stable buttercream that pipes beautifully
- ✓Perfect balance of sweet and bitter notes
- ✓Impressive 3-layer presentation for special occasions
- ✓No fancy equipment required—just standard bowls and mixers
Equipment You’ll Need
- ✓Three 8-inch round cake pans
- ✓Stand mixer or electric hand mixer
- ✓Large mixing bowls
- ✓Whisk
- ✓Rubber spatula
- ✓Parchment paper
- ✓Wire cooling rack
- ✓Offset spatula
- ✓Measuring cups and spoons
Ingredients
- ✓2 cups all-purpose flour
- ✓2 cups granulated sugar
- ✓3/4 cup unsweetened cocoa powder (Dutch-processed preferred)
- ✓2 teaspoons baking powder
- ✓1.5 teaspoons baking soda
- ✓1 teaspoon salt
- ✓1 cup buttermilk, room temperature
- ✓1/2 cup vegetable oil (or canola oil)
- ✓2 large eggs, room temperature
- ✓2 teaspoons vanilla extract
- ✓1 cup freshly brewed hot coffee (strong)
- ✓FOR THE BUTTERCREAM:
- ✓1.5 cups (3 sticks) unsalted butter, softened to room temperature
- ✓5 cups powdered sugar, sifted
- ✓1 tablespoon instant espresso powder
- ✓2 tablespoons heavy cream (plus more if needed)
- ✓1.5 teaspoons vanilla extract
- ✓Pinch of fine sea salt
- ✓Chocolate covered espresso beans (for garnish)
Instructions
- Preheat your oven to 350°F (175°C). Grease three 8-inch round cake pans with butter or cooking spray. Line the bottoms with parchment paper rounds and dust the sides with cocoa powder (prevents white flour streaks).
- In the bowl of a stand mixer or a large mixing bowl, whisk together the flour, sugar, cocoa powder, baking powder, baking soda, and salt until thoroughly combined and no lumps remain.
- Add the buttermilk, vegetable oil, eggs, and vanilla extract to the dry ingredients. Mix on medium speed until well combined, scraping down the sides of the bowl as needed. Do not overmix.
- Reduce the mixer speed to the lowest setting. Carefully pour in the hot coffee. The batter will be very thin and liquidy; this is normal. Mix gently just until combined to avoid splashing.
- Divide the batter evenly among the three prepared cake pans. Using a kitchen scale ensures perfectly even layers.
- Bake for 30-35 minutes, or until a toothpick inserted into the center comes out clean or with just a few moist crumbs attached. Avoid opening the oven door before the 25-minute mark to prevent sinking.
- Remove the cakes from the oven and let them cool in the pans for about 10-15 minutes. Then, carefully invert them onto a wire cooling rack to cool completely. The cakes must be completely cool before frosting.
- While the cakes cool, prepare the Espresso Buttercream. In a small bowl, dissolve the instant espresso powder into the heavy cream. Stir until smooth.
- In a large bowl using a handheld or stand mixer fitted with a paddle attachment, beat the softened butter on medium-high speed for about 5 minutes until it is pale, creamy, and fluffy.
- Gradually add the powdered sugar, one cup at a time, mixing on low speed until incorporated. Once all sugar is added, increase speed to high and beat for 2 minutes.
- Add the espresso-cream mixture, vanilla extract, and salt. Beat on medium-high speed for another 3-4 minutes until the buttercream is light, airy, and creamy. If it’s too stiff, add another teaspoon of cream; if too soft, add more powdered sugar.
- To assemble, place one cake layer on your serving plate or cake stand. Spread a generous layer of buttercream evenly over the top. Repeat with the second and third layers.
- Apply a thin ‘crumb coat’ of frosting over the entire cake and refrigerate for 20 minutes to set. This locks in the crumbs.
- Use the remaining buttercream to frost the top and sides of the cake. Use an offset spatula for a smooth finish or create rustic swirls.
- Garnish with chocolate-covered espresso beans or a dusting of cocoa powder. Slice and serve.
Expert Cooking Tips
- ✓Ensure all refrigerated ingredients (eggs, buttermilk, butter) are at room temperature before starting. This creates a smoother emulsion.
- ✓Do not skip the parchment paper. These cakes are very moist and can stick to the bottom of the pan without the paper barrier.
- ✓Use high-quality cocoa powder. Dutch-processed cocoa will give a darker color and a smoother, less acidic flavor.
- ✓When measuring flour, use the spoon-and-level method. Scooping directly with the cup packs the flour and leads to a dry cake.
- ✓If you don’t have buttermilk, make a substitute by adding 1 tablespoon of lemon juice or white vinegar to 1 cup of whole milk and letting it sit for 5 minutes.
- ✓Dissolving the espresso powder in the cream before adding it to the butter prevents grainy specks in your frosting.
- ✓Let the hot coffee cool slightly for 1-2 minutes so it doesn’t scramble the eggs upon contact, though tempering usually prevents this.
Substitutions and Variations
This recipe is quite versatile if you need to make adjustments based on dietary needs or pantry availability. For the flour, a high-quality 1:1 Gluten-Free All-Purpose Baking Flour blend works surprisingly well, though the texture may be slightly denser. If you are out of buttermilk, you can use a mixture of 50% sour cream and 50% regular milk, or plain Greek yogurt thinned with a little water. For the oil, melted coconut oil or melted butter can be used, though vegetable or canola oil yields the moistest crumb. If you need to make this decaf, simply use decaffeinated coffee and decaf instant espresso powder; the flavor profile will remain identical. For the frosting, if you find American buttercream too sweet, you can adapt the flavor profile into a Swiss Meringue Buttercream by adding the espresso paste at the end of the whipping process. Vegans can substitute flax eggs, almond milk with vinegar (for buttermilk), and vegan butter sticks for a plant-based version.
Common Mistakes to Avoid
The most common mistake with this cake is overbaking. Because the batter is dark, it is hard to see visual cues of browning. Rely on the toothpick test and check at the 30-minute mark. Another frequent error is frosting the cake while it is still slightly warm. This will cause the butter in the frosting to melt, leading to sliding layers and a greasy finish. Be patient and let the layers cool completely. In the batter stage, mixing the flour too vigorously after adding the wet ingredients develops gluten, which results in a tough, rubbery cake rather than a tender one. Always mix on low speed until just combined. Finally, using old baking powder or soda will prevent the cake from rising properly, resulting in dense, heavy pucks. Check your expiration dates before starting.
Serving Suggestions
This rich cake is best served in thin slices due to its decadence. It pairs beautifully with a beverage that cuts through the sweetness, such as a black coffee, an unsweetened latte, or a cold glass of milk. For a dessert course, serve it alongside a scoop of vanilla bean ice cream or a dollop of unsweetened whipped cream to balance the intense mocha flavor. You can also drizzle warm chocolate ganache or salted caramel sauce over the slice for added luxury. If serving at a party, garnish the plate with fresh raspberries or strawberries; the tartness of the fruit complements the dark chocolate and coffee notes perfectly.
Storage and Reheating Tips
This cake stores exceptionally well due to its oil base. It can be kept at room temperature in an airtight cake carrier for up to 3 days. If you live in a very hot or humid climate, it is safer to store it in the refrigerator for up to 5 days, but be sure to let slices come to room temperature before eating for the best texture and flavor release. For long-term storage, you can freeze the individual cake layers (unfrosted) wrapped tightly in plastic wrap for up to 3 months. You can also freeze the fully frosted cake or individual slices; just place them on a baking sheet in the freezer for an hour to harden the frosting, then wrap tightly in plastic wrap and foil. Thaw in the refrigerator overnight before serving.
Nutrition Facts (Estimated)
| Serving Size | 1 slice |
| Calories | 680 |
| Fat | 38g |
| Saturated Fat | 14g |
| Unsaturated Fat | 22g |
| Trans Fat | 0g |
| Cholesterol | 85mg |
| Sodium | 340mg |
| Carbohydrates | 82g |
| Fiber | 4g |
| Sugar | 55g |
| Protein | 8g |
Frequently Asked Questions
Can I use instant coffee for the cake batter instead of brewed coffee?
Yes, absolutely. Dissolve 2 teaspoons of instant coffee granules in 1 cup of boiling water. It works just as well as brewed coffee.
Will this cake keep me awake at night?
The cake contains caffeine from both the brewed coffee and the espresso powder. While it’s less than a full cup of coffee per slice, those very sensitive to caffeine might want to stick to decaf versions or eat this earlier in the day.
Why is my batter so runny?
Don’t panic! This recipe produces a very thin, liquid batter. This is intentional and ensures the cake is incredibly moist and light after baking.
Can I make this as cupcakes instead?
Yes. This recipe yields about 24-30 cupcakes. Bake them at 350°F for 18-22 minutes. Check for doneness early.
My frosting is too runny, how do I fix it?
If your kitchen is warm or you added too much liquid, the buttercream can be soft. Add more sifted powdered sugar, 1/4 cup at a time, or chill the bowl in the fridge for 10 minutes and re-whip.
Can I use natural cocoa powder instead of Dutch-processed?
You can, but the color will be lighter and the flavor slightly more acidic. Dutch-processed cocoa reacts less with the baking soda but provides that classic dark, fudgy look.
Do I have to use three pans?
You can use two 9-inch pans instead. The baking time may need to be increased slightly by 3-5 minutes as the layers will be thicker.
How do I get flat layers without doming?
You can use ‘cake strips’ soaked in water wrapped around the pans, or simply trim the domes off with a serrated knife after cooling (and eat the scraps!).
Can I make the cake layers ahead of time?
Yes, baking the layers a day in advance actually makes them easier to frost as the crumb sets. Wrap them in plastic and store at room temperature or in the fridge.
What is the best brand of espresso powder?
King Arthur Flour, DeLallo, and Medaglia D’Oro are all excellent brands for baking. Ensure it is ‘instant’ powder, not ground espresso beans.
Conclusion
Baking this Moist Mocha Layer Cake is a labor of love that rewards you with every bite. It is the kind of recipe that ends the search for the ‘perfect’ chocolate cake, adding that sophisticated twist of espresso that makes it unforgettable. Whether you are an amateur baker or a seasoned pro, the straightforward nature of this oil-based batter practically guarantees success. The contrast between the dark, tender sponge and the creamy, sweet-bitter frosting is a textural and flavor masterpiece. So, brew a fresh pot of coffee, gather your ingredients, and prepare to impress your friends, family, and most importantly, your own taste buds with this ultimate mocha experience.