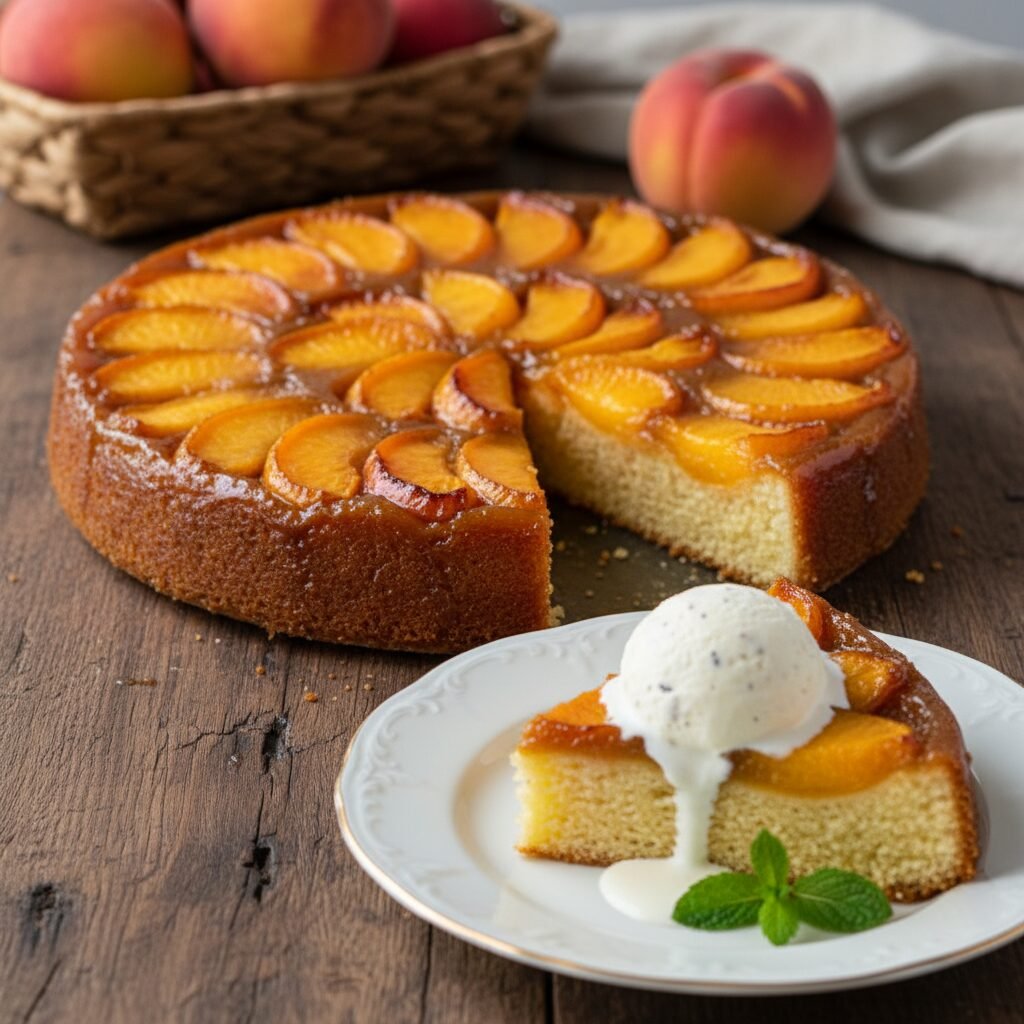
Moist Peach Upside Down Cake Recipe
Celebrate the sweetness of summer with this incredibly moist peach upside down cake. Featuring a layer of caramelized, juicy peaches atop a tender, buttery vanilla sponge, this dessert is a stunning centerpiece that is surprisingly easy to make.
20 minutes
45 minutes
1 hour 5 minutes
8 servings
Dessert
Baking
American
Vegetarian
There is something undeniably magical about the arrival of stone fruit season. The first bite of a ripe, juicy peach signals that summer is truly here, and there is no better way to honor this bounty than with a classic Moist Peach Upside Down Cake. This recipe is a love letter to rustic, home-style baking, where the presentation is built right into the pan. Unlike frosted cakes that require a steady hand and patience for decoration, this cake emerges from the oven as a glistening, golden masterpiece ready to be devoured. The beauty of this dessert lies in its textural contrasts. The topping is a sticky, sweet mosaic of caramelized fruit that has been roasted in a bath of butter and brown sugar, intensifying the natural peach flavor. Beneath this heavy fruit layer lies a cake that defies the laws of density; it is remarkably fluffy yet sturdy enough to hold the weight of the fruit. We achieve this through a specific balance of fats and the addition of sour cream, which ensures the crumb remains tender and moist for days. As the cake bakes, the juices from the peaches seep down into the batter, marrying the layers together in a way that frosting never could. Whether you are hosting a backyard barbecue, looking for a comforting Sunday afternoon treat, or simply have an abundance of peaches from the farmers market, this cake is the answer. It fills the kitchen with the intoxicating aroma of warm vanilla and toasted sugar, creating a sense of nostalgia and comfort before you even take the first bite.
History & Origins
The history of the upside-down cake is a fascinating journey through American culinary evolution, deeply rooted in practicality and the availability of cookware. Long before the modern oven became a household staple, early settlers and home cooks relied heavily on cast-iron skillets for baking over open fires or on wood-burning stoves. These early renditions were often called ‘skillet cakes’ or ‘spider cakes’ (named after the legged pans used in hearths). The method was simple: melt butter and sugar in the bottom of the pan, add fruit, pour batter on top, and bake. This technique allowed the fruit to caramelize and prevented the cake from drying out in the harsh heat of a hearth. While fruit cakes have existed since the Middle Ages, the definitive ‘upside-down’ craze truly took off in the United States during the 1920s. This surge in popularity is often attributed to the Dole Pineapple Company, which ran a massive contest seeking recipes for their canned pineapple. The pineapple upside-down cake became an icon of mid-century American baking. However, in the peach-growing regions of the South and the orchards of California, fresh stone fruit remained the star. The Peach Upside Down Cake is a seasonal adaptation of this tradition, celebrating the fresh harvest rather than canned goods. It represents a time when dessert was dictated by what was growing in the garden, bridging the gap between the rugged skillet cakes of the frontier and the refined tea cakes of the Victorian era. Today, it remains a beloved classic, cherished for its retro charm and timeless flavor.
Why This Recipe Works
This recipe succeeds where many others fail because it meticulously addresses the two most common complaints about upside-down cakes: a soggy bottom (which is actually the top) and a dry, flavorless sponge. First, we tackle the fruit layer. By melting the butter and brown sugar directly in the pan before adding the fruit, we create a barrier that begins to caramelize immediately. This ‘goo’ not only flavors the peaches but also helps them release their juices slowly, creating a syrup rather than a watery mess. For the cake batter, we deviate from standard sponge recipes by incorporating sour cream. The acidity in the sour cream tenderizes the gluten strands in the flour, resulting in a crumb that is soft and velvety. Furthermore, the high fat content from the butter and sour cream ensures the cake stays moist even after the initial heat of the oven has passed. We also use a combination of granulated sugar in the batter and brown sugar in the topping. The molasses in the brown sugar adds a depth of flavor that pairs perfectly with the peaches, while the white sugar keeps the cake light and airy. Finally, the ratio of fruit to batter is calculated so that every bite contains the perfect balance of tart, sweet peach and rich vanilla cake.
Why You’ll Love This Recipe
- ✓Uses fresh, seasonal peaches for superior flavor
- ✓Sour cream ensures a tender, melt-in-your-mouth crumb
- ✓No fancy decorating skills required—the pan does the work
- ✓Can be made in a cast-iron skillet or a standard cake pan
- ✓Perfect balance of caramelized sweetness and fruity tartness
- ✓Stays moist for days thanks to the rich batter
Equipment You’ll Need
- ✓9-inch round cake pan or 10-inch cast iron skillet
- ✓Electric hand mixer or stand mixer
- ✓Large mixing bowl
- ✓Medium mixing bowl
- ✓Whisk
- ✓Rubber spatula
- ✓Measuring cups and spoons
- ✓Peeler (optional)
Ingredients
- ✓1/4 cup unsalted butter, melted (for topping)
- ✓1/2 cup light brown sugar, packed (for topping)
- ✓3-4 medium fresh peaches, pitted and sliced into 1/2 inch wedges
- ✓1 1/2 cups all-purpose flour
- ✓1 1/2 teaspoons baking powder
- ✓1/4 teaspoon salt
- ✓1/2 cup unsalted butter, softened to room temperature (for cake)
- ✓3/4 cup granulated white sugar
- ✓2 large eggs, room temperature
- ✓1 teaspoon pure vanilla extract
- ✓1/2 cup sour cream or full-fat Greek yogurt, room temperature
- ✓1/4 cup whole milk, room temperature
Instructions
- 1. Preheat your oven to 350°F (175°C). Spray a 9-inch round cake pan or a 10-inch cast-iron skillet generously with non-stick cooking spray.
- 2. Prepare the topping: Pour the 1/4 cup of melted butter into the bottom of your prepared pan, tilting it to coat the bottom evenly. Sprinkle the packed brown sugar evenly over the melted butter.
- 3. Arrange the peaches: Place the peach slices in a concentric circle pattern on top of the brown sugar and butter mixture. Start from the outside edge and work your way in. Arrange them tightly as they will shrink slightly during baking. Set the pan aside.
- 4. Mix dry ingredients: In a medium bowl, whisk together the all-purpose flour, baking powder, and salt until well combined.
- 5. Cream butter and sugar: In a large bowl using a hand mixer or stand mixer fitted with the paddle attachment, beat the softened 1/2 cup butter and granulated sugar on medium-high speed until light, fluffy, and pale yellow (about 3-4 minutes).
- 6. Add wet ingredients: Lower the mixer speed to medium. Add the eggs one at a time, beating well after each addition. Scrape down the sides of the bowl. Mix in the vanilla extract and sour cream until combined.
- 7. Combine batter: Reduce mixer speed to low. Add half of the flour mixture to the wet ingredients, mixing just until streaks of flour disappear. Pour in the milk and mix briefly. Add the remaining flour mixture and mix until just combined. Do not overmix.
- 8. Assemble: Gently spoon the batter over the arranged peaches. Use a rubber spatula to spread the batter evenly, being careful not to displace the fruit pattern underneath.
- 9. Bake: Place the pan in the preheated oven and bake for 40-50 minutes, or until the top is golden brown and a toothpick inserted into the center of the cake comes out clean or with just a few moist crumbs.
- 10. Cool and Flip: Remove the cake from the oven. Let it cool in the pan for exactly 10 to 15 minutes. This allows the caramel to set slightly but stay liquid enough to release. Run a knife around the edge of the cake. Place a serving platter upside down over the pan, and using oven mitts, quickly and confidently flip the pan and plate over together. Lift the pan off to reveal the peaches.
- 11. Serve: Allow the cake to cool for at least 20 minutes before slicing to ensure clean cuts. Serve warm or at room temperature.
Expert Cooking Tips
- ✓Room temperature ingredients are crucial for a smooth batter that emulsifies properly.
- ✓Do not slice the peaches too thin, or they will dissolve into mush; 1/2 inch is ideal.
- ✓If using a springform pan, wrap the bottom in foil to prevent butter leakage.
- ✓The 10-minute cooling window is critical; flip too soon and it’s a mess, flip too late and it sticks.
- ✓If a peach slice sticks to the pan after flipping, simply lift it with a fork and patch it back onto the cake.
- ✓Use firm-ripe peaches rather than overripe ones for the best texture.
- ✓Toast the sugar slightly in the pan if using a cast iron skillet for a deeper caramel flavor.
Substitutions and Variations
This recipe is quite versatile regarding the fruit and dairy components. If fresh peaches are out of season, you can use canned peaches, but they must be drained thoroughly and patted dry with paper towels to avoid adding excess moisture to the caramel. Frozen peaches also work; thaw them completely and drain the liquid before using. Nectarines, plums, or apricots make excellent stone fruit substitutes and do not require peeling. For the batter, if you do not have sour cream, full-fat Greek yogurt or buttermilk are excellent alternatives that provide the same acidity and moisture. If you need to make this gluten-free, swap the all-purpose flour for a high-quality 1:1 gluten-free baking flour blend that contains xanthan gum. For a dairy-free version, use a high-quality plant-based butter and a thick coconut yogurt, though the caramelization may differ slightly in texture.
Common Mistakes to Avoid
The most common mistake with upside-down cakes is flipping the cake at the wrong time. If you flip it immediately out of the oven, the cake structure is too fragile and the caramel is too liquid, causing the cake to slide apart or the juice to run everywhere. If you wait until it is completely cold, the caramel hardens like glue, sticking the fruit to the pan. Stick to the 10-15 minute window. Another error is overmixing the batter after adding the flour. This activates the gluten too much, resulting in a rubbery, dense cake rather than a tender one. Lastly, using rock-hard, under-ripe peaches will result in a crunchy topping, while mushy, over-ripe peaches will release too much liquid and make the cake soggy. Choose fruit that gives slightly to pressure but is still firm.
Serving Suggestions
This cake is a showstopper on its own, but a few accompaniments can elevate it further. It is best served warm, which makes it the perfect vehicle for a scoop of cold vanilla bean ice cream, creating that delightful hot-cold contrast. Freshly whipped cream with a hint of cinnamon or bourbon is another sophisticated option. For a brunch setting, a dollop of crème fraîche or Greek yogurt balances the sweetness of the caramel. Garnish with fresh mint leaves or edible flowers for a pop of color that contrasts beautifully with the orange and yellow fruit.
Storage and Reheating Tips
Ideally, this cake is eaten the day it is baked. However, leftovers can be stored effectively. Because of the fresh fruit content, it is safer to store the cake in the refrigerator if keeping it for more than 24 hours. Cover it loosely with plastic wrap or store it in an airtight cake carrier. It will keep in the fridge for up to 3 days. To serve, bring the slice to room temperature or microwave it for 10-15 seconds to soften the crumb and revive the gooey caramel topping. Freezing is possible but not recommended as the texture of the peaches can become slightly watery upon thawing.
Nutrition Facts (Estimated)
| Serving Size | 1 slice |
| Calories | 380 |
| Fat | 18g |
| Saturated Fat | 11g |
| Unsaturated Fat | 6g |
| Trans Fat | 0.5g |
| Cholesterol | 85mg |
| Sodium | 190mg |
| Carbohydrates | 52g |
| Fiber | 2g |
| Sugar | 28g |
| Protein | 5g |
Frequently Asked Questions
Do I need to peel the peaches first?
This is a matter of personal preference. The skin of peaches softens significantly during baking and adds a lovely color and rustic texture. However, if you dislike the texture of peach skin or if the skins are particularly thick and fuzzy, you can peel them. A quick way to peel is to blanch them in boiling water for 30 seconds and then shock them in ice water.
Can I use frozen peaches?
Yes, you can use frozen peaches. The key is to thaw them completely and drain them very well. Pat them dry with paper towels to remove excess ice crystals and water. If you skip this step, the extra water will dilute the caramel and make the cake soggy.
Why did my fruit stick to the pan?
Sticking usually happens if the cake cooled for too long before flipping, allowing the sugar to harden. If this happens, place the pan back on a low burner (or in a warm oven) for a minute to re-melt the sugar slightly, then try flipping again.
Can I bake this in a cast-iron skillet?
Absolutely! A 10-inch cast-iron skillet is traditional and works beautifully. It conducts heat evenly and helps caramelize the edges of the cake. Just be careful when flipping, as the skillet will be very heavy.
My cake is soggy in the middle, what happened?
This could be due to juicy fruit releasing too much liquid or underbaking. If your peaches are very ripe, you might want to increase the baking time slightly. Always test with a toothpick in the center; it should come out clean, not wet.
Can I make this cake ahead of time?
It is best made on the day of serving. However, you can bake it the night before, leave it in the pan, and flip it the next day after warming the bottom of the pan on the stove to loosen the caramel.
What is the best way to arrange the peaches?
Concentric circles are the most visually appealing method. Start from the outer edge and overlap the slices slightly, working your way to the center. Remember that the bottom of the pan will be the top of the cake, so make it look nice!
Can I reduce the sugar in the recipe?
You can slightly reduce the sugar in the cake batter (down to 1/2 cup), but do not reduce the sugar in the topping. The brown sugar is essential for creating the caramel sauce and preserving the fruit.
Why did the batter leak out of my springform pan?
The butter and sugar topping becomes liquid before it caramelizes. Springform pans are not watertight. If you must use one, wrap the bottom and sides securely in heavy-duty aluminum foil and place it on a baking sheet to catch drips.
Can I use salted butter instead of unsalted?
Yes, but omit the 1/4 teaspoon of salt added to the dry ingredients. The salt content in butter varies by brand, so unsalted gives you more control, but salted butter works fine in a pinch.
Conclusion
This Moist Peach Upside Down Cake is more than just a dessert; it is a celebration of simple ingredients coming together to create something spectacular. The joy of flipping the pan to reveal the glistening, jewel-like fruit never gets old, and the taste is the pure essence of summer comfort. Whether you are an experienced baker or a novice in the kitchen, this recipe promises a high-reward result with minimal fuss. So, grab those fresh peaches while they are in season, preheat your oven, and get ready to enjoy one of the most delightful cakes you will ever bake. Don’t forget to share a slice with someone you love!