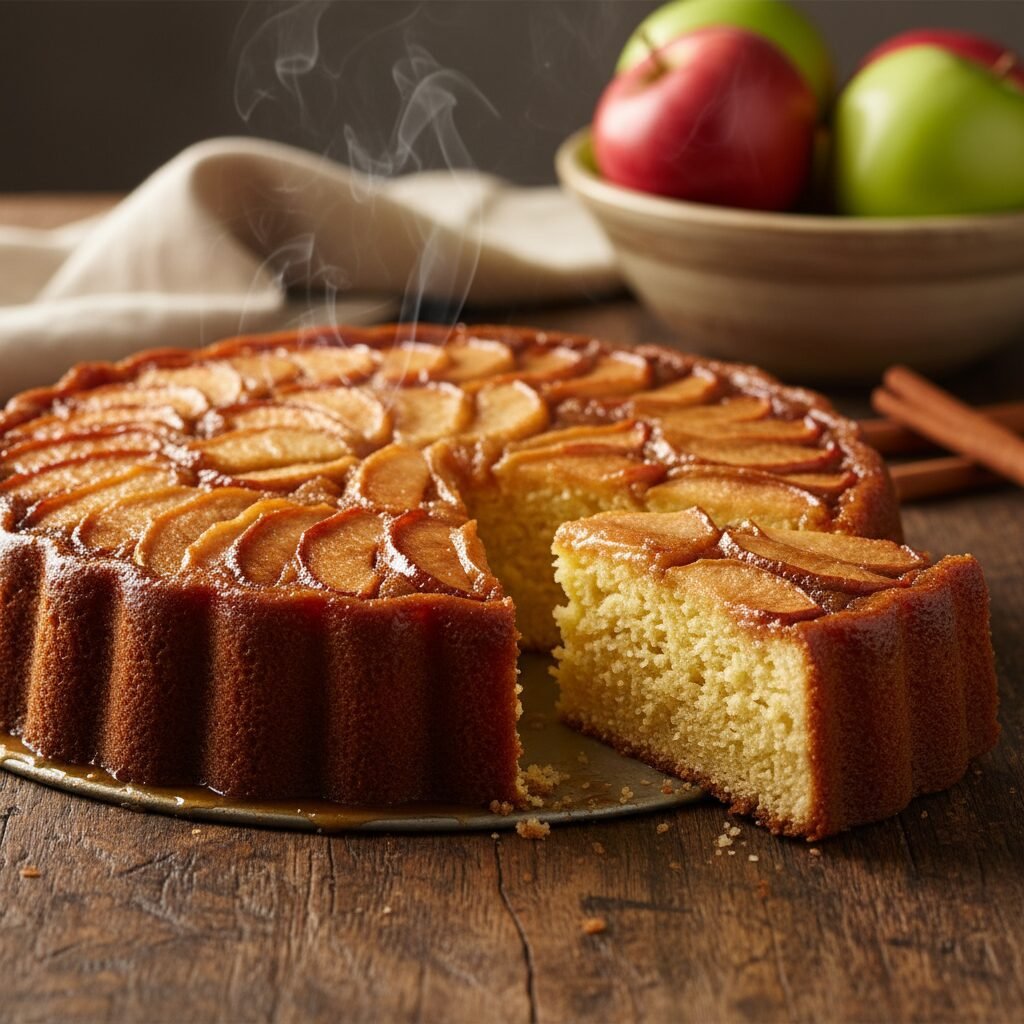
Moist Pear Cake With Coconut Topping Recipe
Discover the perfect balance of tender, fruit-filled crumb and caramelized crunch in this Moist Pear Cake with Coconut Topping. It is an easy, rustic dessert that pairs beautifully with your morning coffee or serves as a show-stopping finale to a cozy dinner.
20 minutes
45 minutes
1 hour 5 minutes
12 servings
Dessert
Baking
American / Scandinavian Fusion
Vegetarian
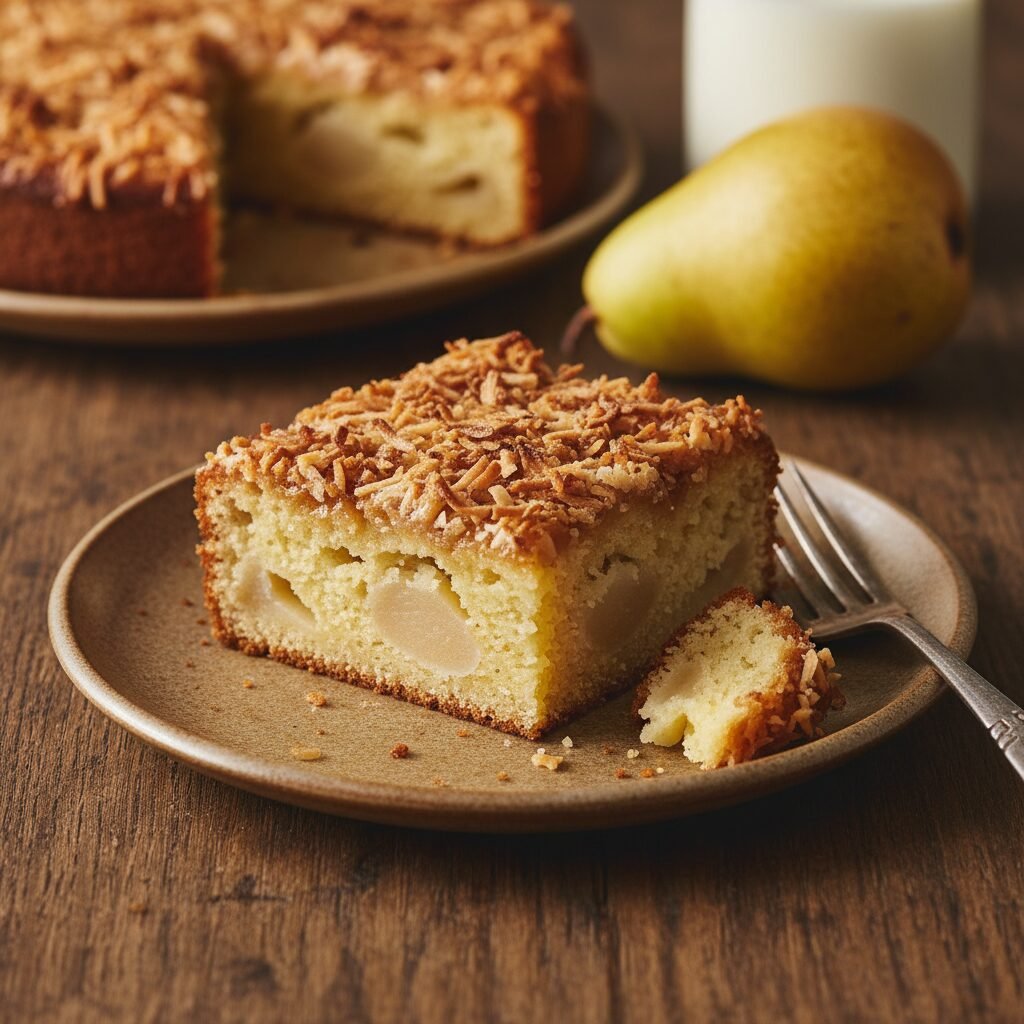
There is something undeniably magical about the transition from late summer to early autumn, a time when the markets are overflowing with the harvest’s best offerings. While apples often steal the spotlight in baked goods during this season, the humble pear deserves a standing ovation of its own. This Moist Pear Cake with Coconut Topping is my love letter to that underrated fruit. Imagine a cake so tender it almost melts in your mouth, studded with chunks of sweet, juicy pear that have softened into little pockets of nectar during baking. Now, top that with a golden, caramelized coconut layer that offers a satisfying ‘snap’ and chewy texture with every bite. The contrast is simply intoxicating.
As a food blogger who lives for texture, I find that pears bring a sophisticated floral note to desserts that apples sometimes lack. When folded into a buttery, vanilla-scented batter, they release just enough moisture to keep the crumb soft for days, yet they hold their shape enough to provide a delightful bite. The coconut topping, reminiscent of the classic Danish ‘Drømmekage’ (Dream Cake), adds a tropical warmth that surprisingly complements the orchard fruit perfectly. It is a flavor profile that feels both nostalgic and excitingly new. This isn’t just a cake; it’s a comfort ritual. Whether you are curling up with a book on a rainy Sunday or hosting a brunch for friends, the aroma of butter, brown sugar, and roasting pears wafting from your oven will set the perfect mood. It is rustic enough to feel approachable but elegant enough to impress even the most discerning palate.
History & Origins
The tradition of incorporating fresh fruit into cakes dates back centuries, rooted in the necessity of using seasonal bounties before they spoiled. In medieval Europe, fruit cakes were often dense, heavy loaves enriched with dried fruits and spices, serving as a method of preservation as much as a treat. However, the lineage of the fresh pear cake is more closely tied to the light tea cakes and tortes of France and Italy. In these culinary traditions, the ‘Gâteau aux Poires’ is a staple, often served simply with a dusting of powdered sugar. These cakes prioritize the fruit, using the batter merely as a vessel to bind the delicate pear slices together.
The addition of a caramelized coconut topping, however, introduces a distinct mid-century influence. Coconut became a pantry staple in the United States and parts of Europe during the post-war era, leading to a boom in recipes featuring shredded coconut. The specific style of topping used in this recipe—butter, brown sugar, and coconut broiled or baked onto the cake—bears a striking resemblance to the Danish ‘Drømmekage’ from Brovst. Legend has it that this ‘Dream Cake’ was discovered by a Danish food company in the 1960s during a recipe contest, submitted by a young girl who learned it from her grandmother. While the original uses a plain vanilla sponge, fusing this caramelized coconut concept with a moisture-rich pear cake creates a trans-Atlantic hybrid. It marries the rustic, orchard-focused baking of the American countryside with the caramelized, textural sophistication of Scandinavian coffee culture. This evolution of the recipe highlights how modern home baking is a delicious collage of global influences, brought together to create something uniquely comforting.
Why This Recipe Works
This recipe succeeds where many fruit cakes fail because of its careful management of moisture and texture. Pears are composed of a high percentage of water. In lesser recipes, this can lead to a soggy, dense bottom layer or a ‘gummy’ crumb. To combat this, we use a creaming method for the butter and sugar, incorporating plenty of air to create a sturdy structure that can support the fruit chunks without collapsing. Furthermore, by dicing the pears rather than grating them, we create distinct pockets of fruit that steam gently inside the batter, releasing their juices slowly rather than saturating the flour all at once.
The coconut topping is the second stroke of genius in this formulation. A plain fruit cake can sometimes feel one-note in texture—soft on soft. The topping, made with melted butter, brown sugar, and desiccated coconut, is added during the final stage of baking. This timing is crucial. If added too early, the heavy topping would sink to the bottom of the liquid batter. By adding it when the cake is partially set, it stays on top, caramelizing into a chewy, toffee-like crust. This provides a necessary textural contrast: the snap of the caramelized sugar and the chew of the coconut against the velvety softness of the pear-infused crumb. The brown sugar in the topping also adds a depth of molasses flavor that bridges the gap between the floral pear and the creamy coconut.
Why You’ll Love This Recipe
- ✓Incredible moisture retention that keeps the cake fresh for days.
- ✓A caramelized, chewy coconut topping that adds addictive texture.
- ✓Uses fresh seasonal pears for natural sweetness and floral aroma.
- ✓Simple preparation with no fancy equipment required.
- ✓Perfect for freezing and reheating for a quick treat.
- ✓A versatile dessert that works for breakfast, tea time, or after dinner.
Equipment You’ll Need
- ✓9-inch Springform Pan or round cake pan
- ✓Electric Hand Mixer or Stand Mixer
- ✓Large Mixing Bowl
- ✓Medium Saucepan
- ✓Rubber Spatula
- ✓Peeler and Knife
- ✓Wire Cooling Rack
Ingredients
- ✓2 large ripe Pears (Bartlett or Bosc), peeled, cored, and diced
- ✓1 1/2 cups All-Purpose Flour
- ✓1 tsp Baking Powder
- ✓1/2 tsp Salt
- ✓1/2 cup Unsalted Butter, softened
- ✓3/4 cup Granulated Sugar
- ✓2 large Eggs, room temperature
- ✓1 tsp Vanilla Extract
- ✓1/2 cup Whole Milk
- ✓For the Topping: 4 tbsp Unsalted Butter
- ✓For the Topping: 1/2 cup Light Brown Sugar, packed
- ✓For the Topping: 2 tbsp Milk or Heavy Cream
- ✓For the Topping: 1 cup Shredded Sweetened Coconut
Instructions
- Preheat your oven to 350°F (175°C). Grease a 9-inch springform pan generously with butter and line the bottom with parchment paper to ensure easy release.
- In a medium bowl, whisk together the flour, baking powder, and salt. Set this dry mixture aside.
- In a large mixing bowl, cream the softened butter and granulated sugar together using an electric mixer on medium-high speed until pale and fluffy, about 3-4 minutes.
- Add the eggs one at a time, beating well after each addition. Scrape down the sides of the bowl, then mix in the vanilla extract.
- Reduce the mixer speed to low. Add the flour mixture in three parts, alternating with the milk, beginning and ending with the flour. Mix only until just combined to avoid overworking the gluten.
- Using a rubber spatula, gently fold the diced pears into the batter. Do not overmix.
- Pour the batter into the prepared pan and smooth the top. Bake in the preheated oven for 25-30 minutes. The cake should be set on top but not fully cooked through yet.
- While the cake is baking, prepare the topping. In a small saucepan, combine the 4 tablespoons of butter, brown sugar, and milk/cream. Cook over medium heat, stirring constantly, until the butter is melted and the sugar is dissolved. Remove from heat and stir in the shredded coconut.
- After the cake has baked for roughly 25-30 minutes, carefully remove it from the oven. Gently spoon the coconut mixture evenly over the top of the cake.
- Return the cake to the oven and bake for another 15-20 minutes, or until the topping is golden brown and bubbly, and a toothpick inserted into the center comes out clean (avoiding pear chunks).
- Remove from the oven and let the cake cool in the pan for at least 20 minutes. Run a knife around the edge before releasing the springform ring. Allow to cool completely on a wire rack before slicing.
Expert Cooking Tips
- ✓Choose pears that are ripe but firm. If they are too mushy, they will disintegrate; if too hard, they won’t soften enough.
- ✓Room temperature ingredients are key. Cold eggs or milk can curdle the batter, affecting the final rise.
- ✓Don’t open the oven door too early or too often, as drafts can cause the cake to sink.
- ✓If the coconut topping starts browning too quickly before the cake is done, tent it loosely with aluminum foil.
- ✓Toss the diced pears in a tablespoon of the flour mixture before folding them in to prevent them from sinking to the bottom.
- ✓Use a springform pan for the best presentation, as the sticky topping makes flipping the cake out of a standard pan difficult.
Substitutions and Variations
This recipe is quite forgiving and allows for several delicious substitutions. If you don’t have pears, firm apples like Granny Smith or Honeycrisp work beautifully, though the flavor profile will shift slightly. For a stone fruit variation, try firm peaches or apricots in the summer. Regarding the flour, you can substitute a 1:1 gluten-free baking flour blend to make this cake gluten-free; just ensure the blend contains xanthan gum. For the dairy, almond milk or oat milk can replace whole milk in the batter, and a plant-based butter block can replace standard butter, though the caramelization on the topping may be slightly less rich. If you prefer a less sweet topping, use unsweetened coconut flakes, but increase the brown sugar by a tablespoon to help it bind. Dark brown sugar can be used instead of light for a deeper, molasses-rich flavor.
Common Mistakes to Avoid
The most common mistake with this cake is underbaking. Because pears release moisture as they cook, the batter around the fruit can remain raw even if the top looks done. Always test with a toothpick in the center of the cake, ensuring you aren’t just hitting a piece of fruit. Another issue is overmixing the batter after adding the flour; this develops gluten and leads to a tough, rubbery cake rather than a tender one. Be gentle and stop mixing as soon as the flour streaks disappear. Finally, adding the topping too early is a frequent error. If the batter hasn’t formed a skin or crust, the heavy coconut mixture will sink straight to the bottom, resulting in a soggy base and a bare top. Wait until the cake is mostly set.
Serving Suggestions
This cake is versatile enough to be served warm or at room temperature. If serving warm, a scoop of vanilla bean ice cream or a dollop of lightly sweetened whipped cream is non-negotiable—the cold cream melting against the warm, caramelized coconut is divine. For a sophisticated afternoon tea presentation, serve slices at room temperature with a dusting of powdered sugar and a side of crème fraîche to cut through the sweetness. It pairs exceptionally well with dark roast coffee, Earl Grey tea, or a dessert wine like a Sauternes.
Storage and Reheating Tips
To store this cake, allow it to cool completely to prevent condensation from making the coconut topping soggy. Place it in an airtight container or cover it tightly with plastic wrap. It can be kept at room temperature for up to 2 days, but due to the fresh fruit content, it is best stored in the refrigerator for up to 5 days. To reheat, slice a piece and warm it in the microwave for 15-20 seconds, or place it in a toaster oven for a few minutes to revive the crispness of the coconut topping. This cake also freezes well; wrap individual slices in plastic wrap and then foil, freezing for up to 3 months.
Nutrition Facts (Estimated)
| Serving Size | 1 slice |
| Calories | 320 |
| Fat | 16g |
| Saturated Fat | 10g |
| Unsaturated Fat | 5g |
| Trans Fat | 0g |
| Cholesterol | 45mg |
| Sodium | 180mg |
| Carbohydrates | 42g |
| Fiber | 3g |
| Sugar | 24g |
| Protein | 4g |
Frequently Asked Questions
Can I use canned pears instead of fresh?
Yes, you can use canned pears, but the texture will be softer. Ensure you drain them very thoroughly and pat them dry with paper towels to avoid adding excess liquid to the batter.
Why did my coconut topping sink?
The topping likely sank because it was added too early in the baking process. The cake needs to establish a structure and a semi-firm top crust before it can support the weight of the coconut mixture.
Can I make this cake in a square pan?
Absolutely. An 8×8 or 9×9 inch square baking pan works well. You may need to adjust the baking time slightly, checking for doneness a few minutes earlier.
Is it necessary to peel the pears?
While the skin is edible, peeling is recommended for this cake to ensure a uniform, tender texture. Pear skin can sometimes become tough or chewy when baked inside a batter.
Can I use desiccated coconut instead of shredded?
Yes, desiccated coconut works, but it is finer. The texture will be more like a crust than a chewy topping. If using sweetened shredded coconut, reduce the sugar slightly if you prefer it less sweet.
How do I know when the pears are ripe enough?
Press gently near the stem of the pear. If it gives slightly to pressure, it is ripe. Avoid rock-hard pears as they won’t soften enough, and avoid mushy pears as they will dissolve.
Can I add spices to the cake batter?
Yes! Cinnamon, cardamom, or ginger are excellent additions. Add 1/2 to 1 teaspoon of your preferred spice with the dry ingredients for a warmer flavor profile.
What if I don’t have a springform pan?
You can use a regular round cake pan. Line the bottom and sides with parchment paper leaving an overhang, so you can lift the cake out after it cools, preserving the topping.
Conclusion
There you have it—a recipe that transforms the humble pear into a centerpiece worthy of any gathering. This Moist Pear Cake with Coconut Topping is more than just a sweet treat; it is a celebration of textures and seasonal flavors that brings a sense of warmth to your kitchen. Whether you are an experienced baker looking for a new twist on fruit cake or a beginner wanting a foolproof recipe that delivers ‘wow’ factor results, this dish promises to deliver. Don’t forget to share your creations on Pinterest and tag us; we love seeing how you make these recipes your own. Happy baking!