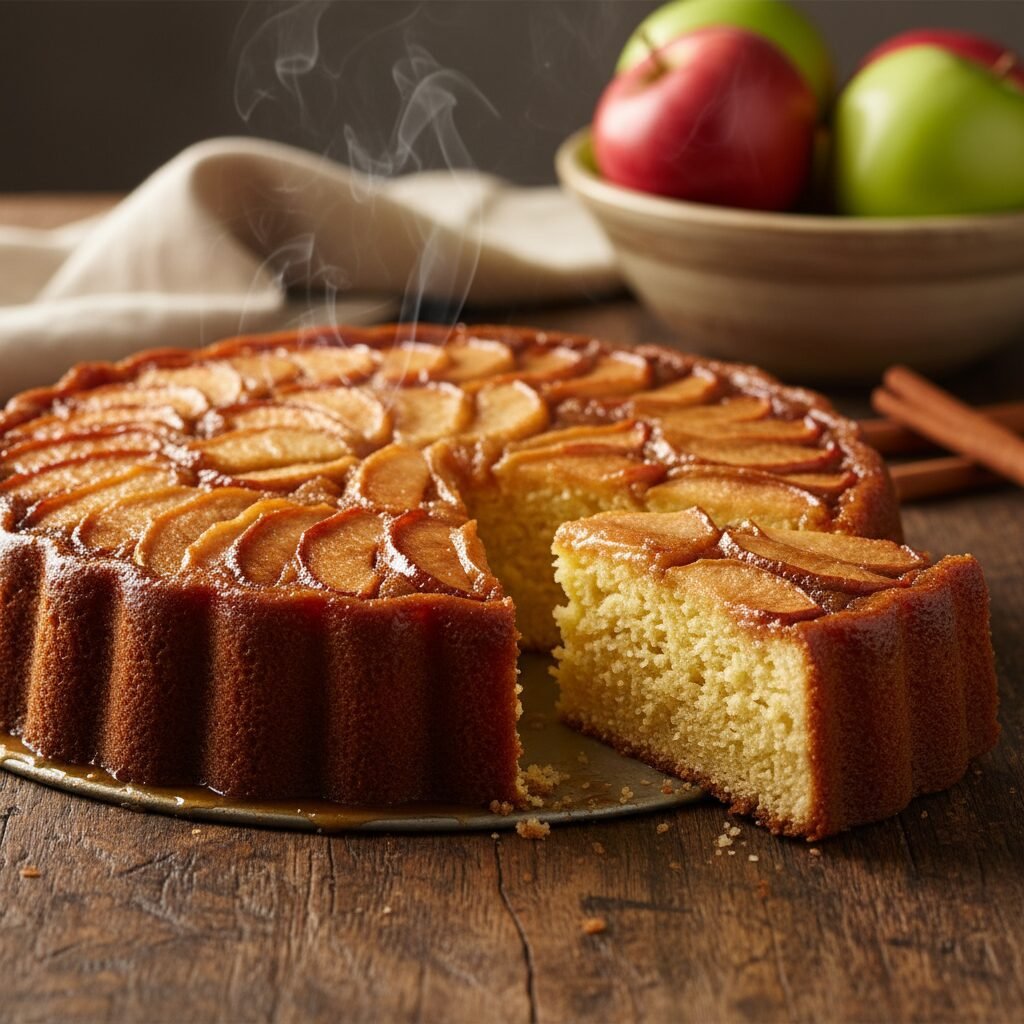
Moist Pear Upside Down Cake Recipe
Embrace the cozy flavors of fall with this incredibly moist Pear Upside Down Cake. Featuring tender, caramelized pears atop a fluffy, spiced vanilla bean sponge, this dessert is a stunning centerpiece that tastes even better than it looks.
20 minutes
45 minutes
1 hour 5 minutes
8-10 servings
Dessert
Baking
American / French Inspired
Vegetarian
When the crisp autumn air settles in, most bakers immediately reach for apples or pumpkins, leaving the humble pear vastly underrated and often overlooked. This Moist Pear Upside Down Cake is here to change that narrative entirely. Imagine a dessert where the fruit doesn’t just sit inside the batter but becomes the crowning jewel, bathed in a rich, buttery caramel that seeps into the very crumb of the cake. The beauty of an upside-down cake lies in its self-saucing nature; as the cake bakes, the butter and brown sugar layer at the bottom transforms into a luscious toffee-like glaze that coats the fruit and permeates the sponge.
In this specific recipe, we focus heavily on texture. Pears, specifically varieties like Bosc or Anjou, hold their shape beautifully under heat, offering a soft yet substantial bite that contrasts perfectly with the tender, airy cake crumb. We infuse the batter with warm spices—cardamom, cinnamon, and a hint of ginger—which complement the floral sweetness of the pears without overpowering them. This isn’t just a cake; it is a celebration of seasonal produce, designed to be rustic enough for a Tuesday night treat yet elegant enough for a holiday table. The aroma that fills your kitchen as the caramel bubbles and the cake rises is nothing short of intoxicating, promising a slice of comfort that is both nostalgic and sophisticated.
History & Origins
The concept of the upside-down cake is deeply rooted in the practical traditions of skillet cooking, long before modern ovens became a household staple. Historically, cakes were often cooked in cast-iron skillets over open fires or on stovetops. The method was simple: line the bottom of the pan with fruit and sugar, pour the batter on top, and cook. When inverted, the fruit would be displayed beautifully on top, glistening with its own juices and caramelized sugar. This technique dates back centuries, with European variations like the French Tarte Tatin—an accidental upside-down apple tart created by the Tatin sisters in the 1880s—serving as a famous precursor.
However, the upside-down cake as we know it in America gained massive popularity in the 1920s. This surge coincided with the widespread availability of canned pineapple, thanks to the Dole company’s marketing efforts. The Pineapple Upside-Down Cake became an icon of mid-century American baking. While pineapple stole the spotlight for decades, bakers began experimenting with stone fruits, apples, and pears to suit local seasons. Pears, with their ancient cultivation history dating back to 5000 B.C. in Asia and Europe, bring a sophisticated, old-world charm to this American classic. In many European cultures, pears were considered a luxury fruit, often poached in wine or served with cheese. adapting them into this skillet-style cake marries the rustic American tradition with a fruit that has been revered by poets and chefs for millennia.
Why This Recipe Works
This recipe succeeds where others fail because it meticulously balances moisture content and structural integrity. Pears release a significant amount of water when cooked. If not managed correctly, this can lead to a soggy cake layer. To combat this, we start by creating a ‘dry’ caramel base—melting butter and brown sugar together until bubbling before adding the fruit. This initiates the caramelization process early, ensuring the topping is thick and gooey rather than watery. Furthermore, we slice the pears thick enough to maintain their texture but thin enough to cook through simultaneously with the batter.
For the cake itself, we utilize a ‘reverse creaming’ method or a high-ratio mixing technique where the fat coats the flour particles before the liquid is added. This limits gluten development, resulting in an exceptionally tender, velvety crumb that can support the heavy fruit topping without collapsing. We also incorporate sour cream or full-fat Greek yogurt into the batter. The acidity in these dairy products reacts with the baking soda to create a superior lift, while the fat content ensures the cake remains moist for days. The addition of almond flour adds a subtle nuttiness and contributes to a more tender crumb structure, bridging the flavor profile between the caramelized fruit and the spiced sponge.
Why You’ll Love This Recipe
- ✓Naturally self-saucing with a rich salted caramel topping.
- ✓Uses sour cream for an incredibly moist and tender crumb.
- ✓Spiced with cardamom and ginger to enhance the pear flavor.
- ✓Beautiful presentation with minimal decorating effort required.
- ✓Perfect for using up seasonal, slightly firm pears.
Equipment You’ll Need
- ✓9-inch round cake pan or cast iron skillet
- ✓Electric hand mixer or stand mixer
- ✓Medium mixing bowls
- ✓Whisk
- ✓Rubber spatula
- ✓Peeler
- ✓Measuring cups and spoons
- ✓Wire cooling rack
Ingredients
- ✓For the Topping: 1/4 cup unsalted butter, melted
- ✓For the Topping: 1/2 cup packed dark brown sugar
- ✓For the Topping: 1/2 tsp ground cinnamon
- ✓For the Topping: 3 firm-ripe Bosc or Anjou pears, peeled, cored, and sliced into 1/4-inch wedges
- ✓For the Cake: 1 1/2 cups all-purpose flour
- ✓For the Cake: 1/2 cup almond flour (optional, or use more AP flour)
- ✓For the Cake: 1 tsp baking powder
- ✓For the Cake: 1/2 tsp baking soda
- ✓For the Cake: 1/2 tsp salt
- ✓For the Cake: 1 tsp ground cardamom
- ✓For the Cake: 1/2 tsp ground ginger
- ✓For the Cake: 1/2 cup unsalted butter, softened
- ✓For the Cake: 3/4 cup granulated sugar
- ✓For the Cake: 2 large eggs, room temperature
- ✓For the Cake: 1 tsp vanilla bean paste or pure vanilla extract
- ✓For the Cake: 1/2 cup sour cream or Greek yogurt, room temperature
- ✓For the Cake: 1/4 cup whole milk, room temperature
Instructions
- 1. Preheat your oven to 350°F (175°C). Grease the sides of a 9-inch round cake pan or a 9-inch cast-iron skillet lightly with butter.
- 2. Prepare the topping: Pour the 1/4 cup melted butter into the bottom of the cake pan, tilting to coat the bottom evenly. Sprinkle the dark brown sugar and 1/2 tsp cinnamon evenly over the butter.
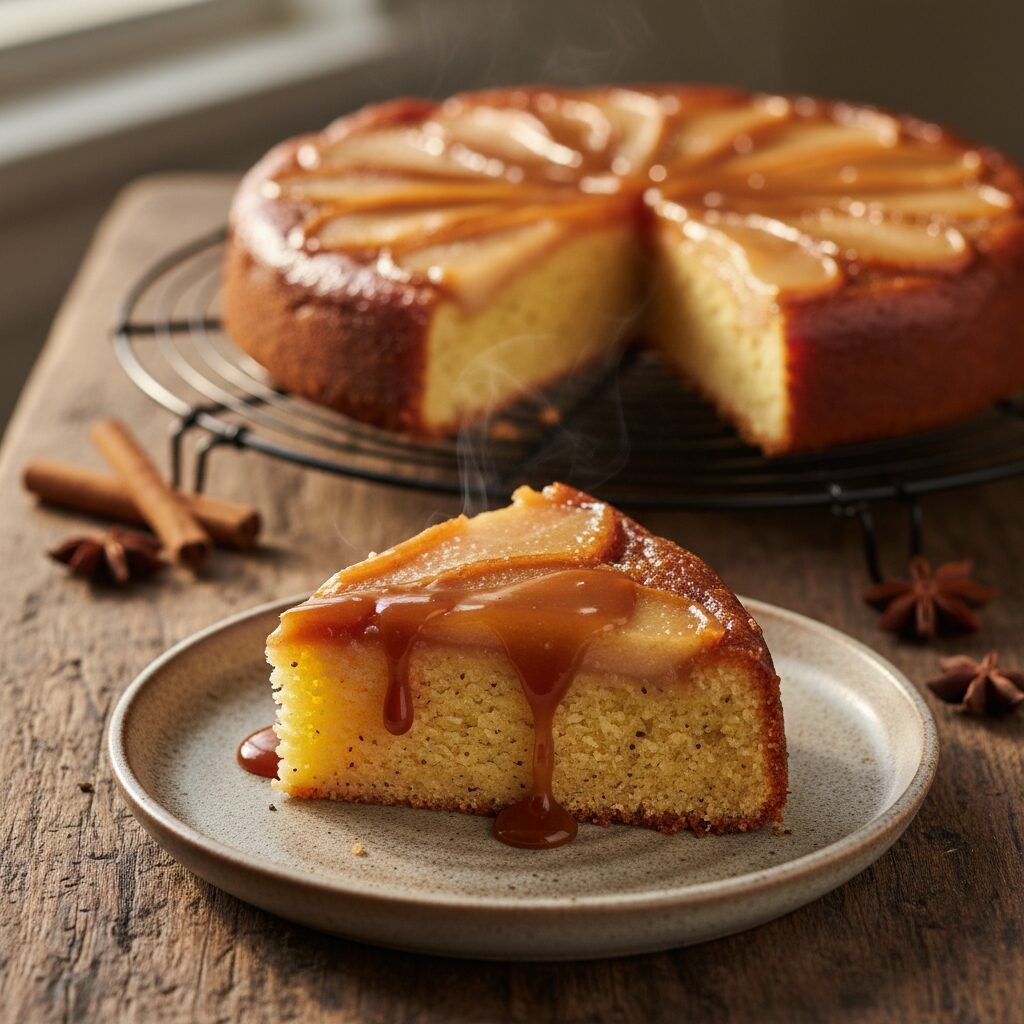
- 3. Arrange the pears: Place the pear slices in a concentric circular pattern on top of the sugar mixture. You can overlap them slightly for a beautiful design. Set the pan aside.
- 4. Whisk dry ingredients: In a medium bowl, whisk together the all-purpose flour, almond flour, baking powder, baking soda, salt, cardamom, and ginger until well combined.
- 5. Cream butter and sugar: In a large bowl using a hand mixer or stand mixer fitted with the paddle attachment, beat the softened butter and granulated sugar on medium-high speed for 3-4 minutes until pale and fluffy.
- 6. Add wet ingredients: Beat in the eggs one at a time, scraping down the bowl after each addition. Mix in the vanilla bean paste.
- 7. Combine: Reduce the mixer speed to low. Add half of the flour mixture, mixing just until combined. Add the sour cream and milk, mixing until incorporated. Finish by adding the remaining flour mixture, mixing only until no dry streaks remain. Do not overmix.
- 8. Assemble: Gently spoon the thick batter over the arranged pears in the pan. Use an offset spatula to spread it evenly, being careful not to disturb the pear design underneath.
- 9. Bake: Bake for 40-50 minutes, or until the top is golden brown and a toothpick inserted into the center comes out clean or with just a few moist crumbs. If the top browns too quickly, tent loosely with foil.
- 10. Cool and Flip: Remove from the oven and let the cake cool in the pan for exactly 10-15 minutes. Run a knife around the edge to loosen. Place a serving platter upside down over the pan, and carefully but quickly invert the cake onto the platter. If any pear slices stick to the pan, gently place them back on the cake.
Expert Cooking Tips
- ✓Choose the right pears: Use Bosc or Anjou pears that are ripe but still firm. Overly soft pears like Bartletts may turn to mush during baking.
- ✓Room temperature ingredients: Ensure your butter, eggs, and sour cream are at room temperature to prevent the batter from curdling.
- ✓Don’t wait too long to flip: You must flip the cake while it’s still warm (about 10-15 minutes after baking). If it cools completely, the caramel will harden and the fruit will stick to the pan.
- ✓Toast the almond flour: If using almond flour, lightly toasting it in a dry pan beforehand adds a deeper nutty flavor.
- ✓Check your baking powder: Ensure your leavening agents are fresh so the heavy batter rises properly around the fruit.
- ✓Tent with foil: If the cake surface is darkening before the center is cooked, cover it loosely with aluminum foil for the last 15 minutes.
Substitutions and Variations
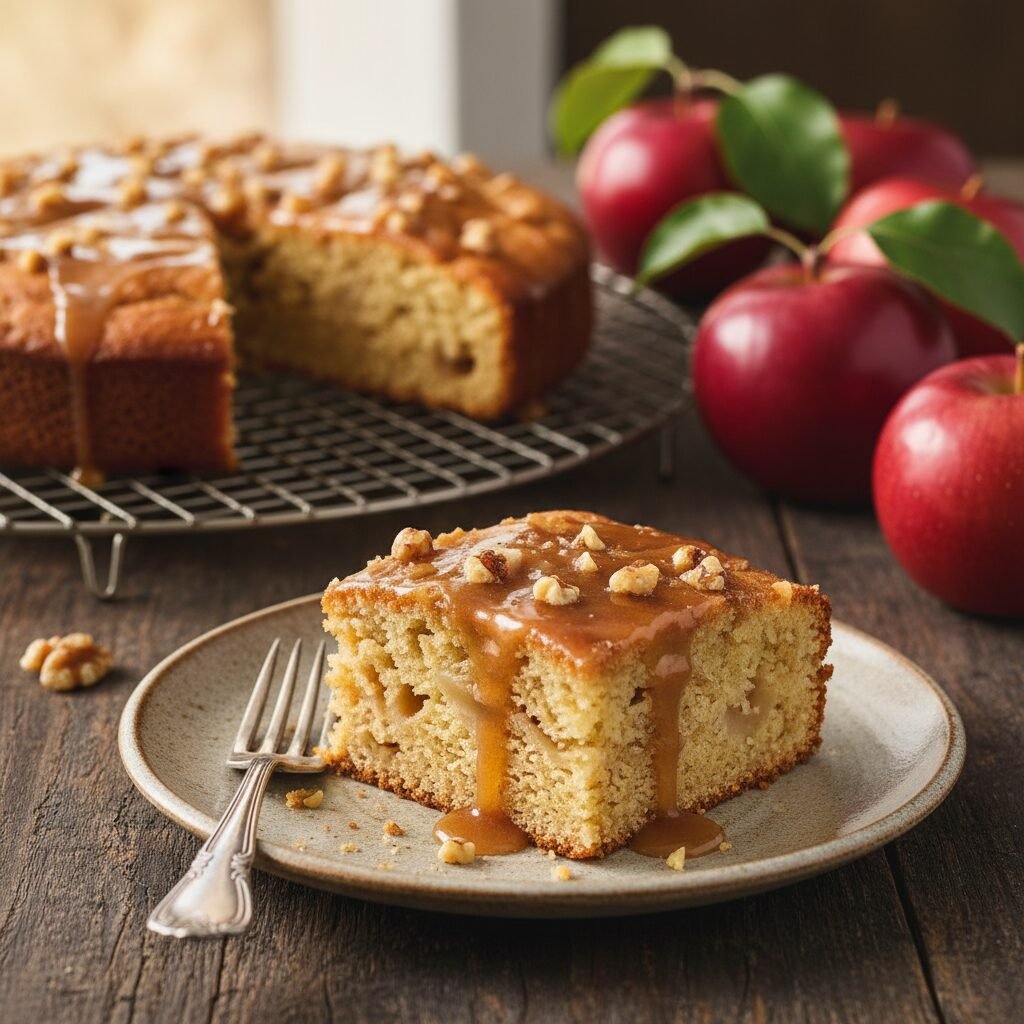
This recipe is quite versatile. If you don’t have sour cream, full-fat Greek yogurt or buttermilk are excellent substitutes that provide the same acidity and moisture. For a nut-free version, simply replace the almond flour with an equal amount of all-purpose flour. If you prefer whole grains, you can substitute up to 50% of the all-purpose flour with white whole wheat flour or spelt flour, though the texture will be slightly denser. In terms of spices, if cardamom isn’t your favorite, nutmeg or allspice work wonderfully with pears. You can also swap the pears for firm apples or even plums if you want to experiment with different seasonal fruits. For the sugar, light brown sugar can replace dark brown sugar, though the caramel flavor will be milder.
Common Mistakes to Avoid
The most common mistake with upside-down cakes is flipping them too early or too late. Flipping immediately out of the oven can cause the hot, delicate cake to break apart and the caramel to run off excessively. Waiting until it’s cold causes the caramel to solidify, gluing the fruit to the pan. Stick to the 10-15 minute window. Another error is using pears that are too soft; they release too much liquid and make the cake soggy. Always choose firm-ripe fruit. Lastly, overmixing the batter after adding the flour will develop gluten, resulting in a rubbery cake rather than a tender one. Stop mixing as soon as the flour disappears.
Serving Suggestions
This cake is best served warm, shortly after flipping. It pairs exceptionally well with a dollop of lightly sweetened whipped cream (crème chantilly) or a scoop of premium vanilla bean ice cream. The cold cream against the warm, spiced cake is heavenly. For an extra touch of elegance, garnish with a dusting of powdered sugar or a sprinkle of toasted sliced almonds. A warm cup of chai tea or a dark roast coffee complements the cardamom and ginger notes in the cake perfectly.
Storage and Reheating Tips
Upside-down cakes are best eaten on the day they are baked. However, leftovers can be stored in an airtight container at room temperature for up to 2 days. Because of the moist fruit topping, if you live in a very humid climate, it is safer to store it in the refrigerator for up to 4 days. To reheat, place a slice in the microwave for 15-20 seconds to soften the crumb and melt the caramel slightly. Freezing is possible but not ideal as the pears may release more moisture upon thawing; if you must freeze, wrap slices tightly in plastic wrap and foil, and consume within 1 month.
Nutrition Facts (Estimated)
| Serving Size | 1 slice |
| Calories | 385 |
| Fat | 18g |
| Saturated Fat | 10g |
| Unsaturated Fat | 7g |
| Trans Fat | 0g |
| Cholesterol | 65mg |
| Sodium | 210mg |
| Carbohydrates | 52g |
| Fiber | 3g |
| Sugar | 28g |
| Protein | 5g |
Frequently Asked Questions
Can I use canned pears instead of fresh?
Yes, you can use canned pear halves, but the texture will be softer. Make sure to drain them very thoroughly and pat them dry with paper towels to avoid adding excess moisture to the caramel.
Why did my cake sink in the middle?
Sinking usually happens if the oven door was opened too early, causing a drop in temperature, or if the cake was underbaked. It can also result from over-leavening (too much baking powder/soda) or over-beating the eggs.
Can I make this gluten-free?
Yes, you can substitute the all-purpose flour with a high-quality 1:1 gluten-free baking flour blend containing xanthan gum. The almond flour is naturally gluten-free and helps with the texture.
My caramel is too runny, what happened?
This usually means the pears released a lot of juice that didn’t cook off. Using firmer pears helps. Also, ensure you measured the butter and sugar for the topping correctly.
Can I bake this in a springform pan?
It is risky because the hot liquid caramel can leak out of the bottom seal, causing a mess in your oven and a dry topping. A solid cake pan or cast-iron skillet is much safer.
Do I need to peel the pears?
It is highly recommended. Pear skin can become tough and chewy when baked, which distracts from the soft texture of the cake. Peeling ensures a consistent, melt-in-your-mouth experience.
Can I use salted butter?
Yes, you can use salted butter. If you do, reduce the added salt in the cake batter to 1/4 teaspoon. The salt in the topping butter actually enhances the caramel flavor.
How do I prevent the cake from sticking to the pan?
Greasing the sides of the pan is crucial. For the bottom, the butter and sugar mixture usually prevents sticking, but ensuring you flip the cake while it is still warm is the most important factor.
Conclusion
There is something deeply satisfying about the reveal of an upside-down cake—the moment you lift the pan to see the mosaic of caramelized fruit is always a little bit magical. This Moist Pear Upside Down Cake offers a sophisticated twist on the classic, bringing warmth and spice to your kitchen. Whether you are an experienced baker or a novice, this recipe is forgiving and rewarding, resulting in a dessert that looks like it came from a professional bakery. We hope this cake becomes a new seasonal tradition in your home, filling your kitchen with the irresistible scents of brown sugar, butter, and cardamom. Happy baking!