Moist Red Velvet Bundt Cake With Whipped Cream Frosting Recipe
This showstopping Red Velvet Bundt Cake is incredibly moist, vibrant, and surprisingly easy to make. Topped with a light-as-air whipped cream frosting, it is the ultimate dessert for Valentine’s Day, Christmas, or any time you need a little slice of heaven.
20 mins
50 mins
1 hr 10 mins
12-14 servings
Dessert
Baking
American
Vegetarian
Hey there, lovely mamas! If there is one dessert that screams "I love you" more than any other, it has to be Red Velvet. There is something just so magical about cutting into that deep, crimson crumb that makes everyone at the table gasp in delight. But let’s be real for a second—layer cakes can be a huge hassle. The leveling, the crumb coating, the piping… who has time for that when the laundry is piling up and the toddlers are running wild? That is exactly why I am completely obsessed with this Moist Red Velvet Bundt Cake.
This recipe is my absolute go-to when I need to bring a dessert that looks like a million bucks but actually took minimal effort. The bundt pan does all the heavy lifting for you, creating those gorgeous curves and ridges that catch our luscious whipped cream frosting perfectly. And the texture? Oh my goodness. We are talking melt-in-your-mouth, velvety softness that stays moist for days. My husband literally begs for this cake, and the kids think the bright red color is just the coolest thing ever.
Whether you are planning a romantic dinner, a festive holiday spread, or you just want to treat yourself after a long week of mom-ing, this cake is the answer. It pairs that classic, subtle chocolate flavor with a tangy, sweet, fluffy topping that balances everything out. Grab your apron, pour yourself a cup of coffee (or wine!), and let’s get baking!
History & Origins
Have you ever wondered where Red Velvet actually comes from? It feels like such a modern classic, but its roots actually go way back to the Victorian era! Back then, "velvet" cakes were a fancy way of describing cakes with a super soft and fine crumb, usually achieved by using almond flour or cornstarch. The "red" part is where the science gets really cool. Originally, the reddish hue wasn’t from a bottle of food coloring; it was a chemical reaction between raw cocoa powder (which contains anthocyanin) and acidic ingredients like vinegar and buttermilk. This reaction revealed a rusty, mahogany red color.
Fast forward to the Great Depression and World War II, when food rationing made baking luxuries scarce. The Adams Extract company in Texas is often credited with popularizing the modern, vibrant red version we know today to sell more food coloring and extracts. It became a huge hit in the South and eventually spread across the country. By converting this classic layer cake into a bundt form, we are paying homage to the mid-century baking boom when bundt pans became a staple in every American kitchen. It is a beautiful blend of Southern charm and retro convenience!
Why This Recipe Works
You might be asking, "What makes this recipe so much better than a box mix?" The secret lies in the chemistry of the ingredients. First and foremost, we use oil instead of butter for the cake base. While I love the flavor of butter, oil is 100% liquid at room temperature (and fridge temperature), which guarantees that your cake stays incredibly moist and soft, even if you make it a day ahead.
Secondly, the combination of buttermilk and vinegar is non-negotiable. This acidity does two things: it tenderizes the gluten in the flour for that "velvet" texture, and it activates the baking soda to give the heavy batter a nice lift. Finally, we use a touch of cocoa powder—just enough for that signature mystery flavor—but not so much that it becomes a chocolate cake. The whipped cream frosting works because it cuts through the density of the cake with a light, airy sweetness that isn’t as heavy or cloying as a traditional brick of cream cheese frosting.
Why You’ll Love This Recipe
- ✓Incredibly moist texture thanks to buttermilk and oil
- ✓Vibrant red color without affecting the flavor
- ✓No fancy decorating skills required—the pan does the work!
- ✓Light and fluffy whipped cream frosting
- ✓Perfect make-ahead dessert for parties
Equipment You’ll Need
- ✓10-12 cup Bundt Pan
- ✓Stand mixer or electric hand mixer
- ✓Large mixing bowls
- ✓Whisk
- ✓Rubber spatula
- ✓Cooling rack
- ✓Measuring cups and spoons
Ingredients
- ✓For the Cake:
- ✓2 1/2 cups all-purpose flour (or cake flour for extra softness)
- ✓1 1/2 cups granulated sugar
- ✓1 teaspoon baking soda
- ✓1 teaspoon salt
- ✓1/4 cup unsweetened cocoa powder
- ✓1 1/2 cups vegetable oil (or canola oil)
- ✓1 cup buttermilk, room temperature
- ✓2 large eggs, room temperature
- ✓2 tablespoons red food coloring (liquid or gel)
- ✓1 teaspoon white distilled vinegar
- ✓1 teaspoon vanilla extract
- ✓For the Whipped Cream Frosting:
- ✓1 1/2 cups heavy whipping cream, very cold
- ✓4 oz cream cheese, softened (optional, for stability)
- ✓1/2 cup powdered sugar
- ✓1 teaspoon vanilla extract
Instructions
- Prep the Oven and Pan: Preheat your oven to 350°F (175°C). This is the most critical step: grease your bundt pan thoroughly! Use a baking spray with flour included, or grease with shortening and dust with cocoa powder. Ensure every nook and cranny is covered so your beautiful cake doesn’t stick.
- Whisk Dry Ingredients: In a medium bowl, sift together the flour, sugar, baking soda, salt, and cocoa powder. Sifting is key here to prevent little lumps of cocoa in your batter.
- Mix Wet Ingredients: In a large bowl (or your stand mixer bowl), combine the vegetable oil, buttermilk, eggs, food coloring, vinegar, and vanilla extract. Whisk vigorously until everything is fully combined and the mixture is a bright, shocking red.
- Combine: Slowly add the dry ingredients to the wet ingredients. Mix on low speed just until the flour disappears. Do not overmix! Stop as soon as you see no more white streaks. Use a spatula to scrape the bottom of the bowl to ensure everything is incorporated.
- Bake: Pour the batter evenly into your prepared bundt pan. Tap the pan gently on the counter a few times to release any trapped air bubbles. Bake for 45-55 minutes, or until a toothpick inserted into the center comes out clean or with just a few moist crumbs.
- Cool: Let the cake cool in the pan for exactly 10 minutes. Then, place a wire rack over the top of the pan and flip it over to release the cake. Let it cool completely to room temperature before frosting. If you frost a warm cake, your whipped cream will melt!
- Make the Frosting: While the cake cools, prepare the frosting. In a chilled bowl, beat the softened cream cheese (if using) and powdered sugar until smooth. Slowly stream in the cold heavy cream and vanilla while beating on low. Increase speed to high and whip until stiff peaks form. Do not overbeat or it will turn to butter!
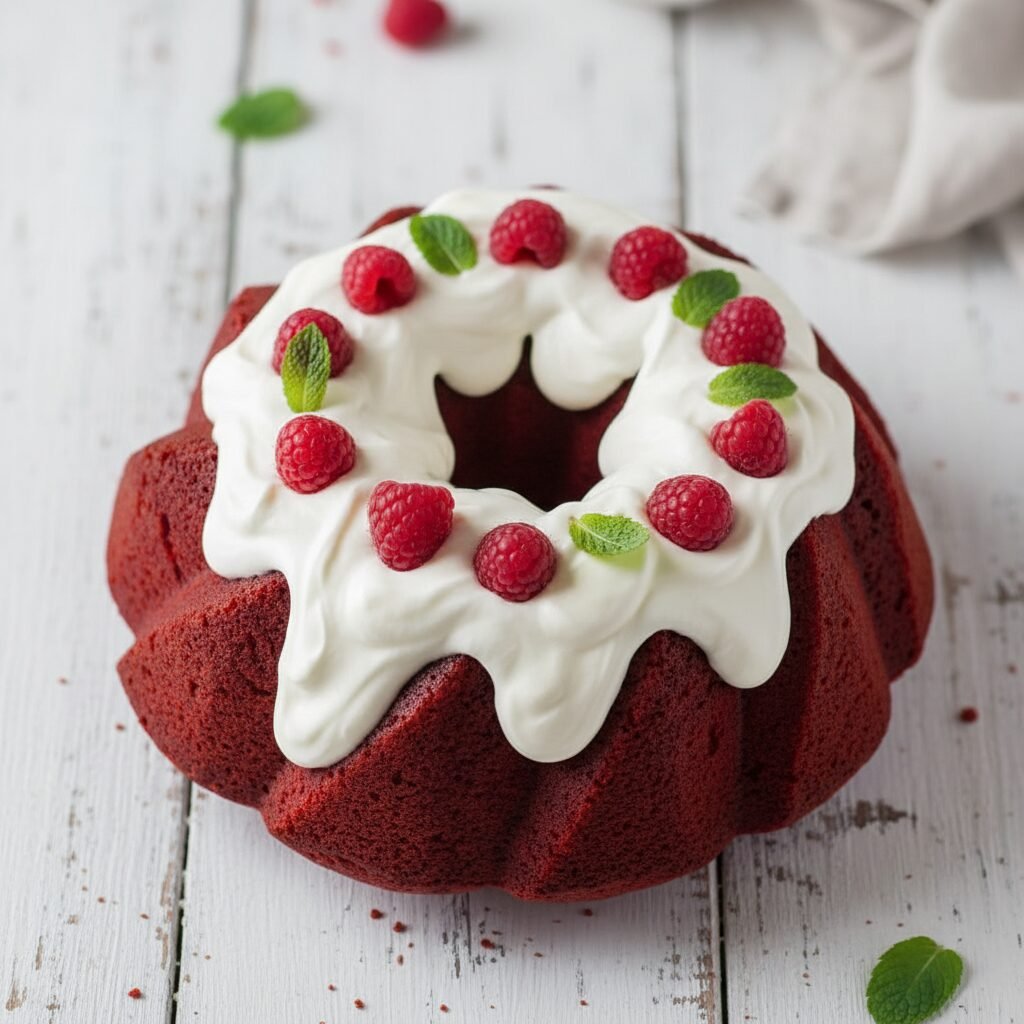
- Decorate: Spoon or pipe the fluffy whipped cream over the top of the cooled bundt cake. Garnish with fresh berries, mint leaves, or chocolate shavings for that Pinterest-perfect look.
Expert Cooking Tips
- ✓Room Temperature Ingredients: Ensure your eggs and buttermilk are at room temperature. This helps them emulsify better with the oil, creating a more uniform crumb.
- ✓Don’t Skimp on the Dye: If you want that iconic bright red color, you really need the full amount of food coloring. If you prefer a natural look, you can use beet powder, but the color will be more brownish-red.
- ✓Greasing the Pan: I cannot stress this enough—bundt pans are notorious for sticking. I prefer using a baking spray that contains flour (like Baker’s Joy) over butter and flour.
- ✓Checking Doneness: Because bundt cakes are deep, start checking at 45 minutes. If the top is browning too fast but the inside is raw, loosely tent a piece of foil over the top.
Substitutions and Variations
If you find yourself out of an ingredient, don’t panic! Here are some easy swaps:
- Buttermilk: No buttermilk? No problem! Add 1 tablespoon of lemon juice or white vinegar to a measuring cup, then fill it to the 1-cup line with regular milk. Let it sit for 5 minutes until it curdles.
- Cake Flour: I used all-purpose flour for structure, but if you want an even lighter cake, use cake flour. If you don’t have cake flour, remove 2 tablespoons of all-purpose flour per cup and replace it with cornstarch.
- Vegetable Oil: You can use melted coconut oil or grapeseed oil. I don’t recommend olive oil as the flavor is too strong.
- Cream Cheese in Frosting: The cream cheese adds stability, but if you want a pure Chantilly cream, just omit the cream cheese and whip the heavy cream with sugar and vanilla.
Common Mistakes to Avoid
We have all been there—baking fails happen! Here is how to avoid the big ones with this recipe:
- Cake Stuck in Pan: This is the heartbreak of bundt baking. Usually, it happens because the pan wasn’t greased well enough or the cake cooled too long in the pan. Set a timer for 10 minutes cooling time strictly!
- Dry Cake: This usually comes from overbaking or measuring flour incorrectly. Always spoon your flour into the measuring cup and level it off; never scoop directly from the bag, which packs the flour down.
- Deflated Frosting: Whipped cream is delicate. If you whip it too far in advance, it can weep. It is best to whip it right before serving, or use the cream cheese addition to stabilize it so it holds up for days.
Serving Suggestions
This cake is a stunner on its own, but I love dressing it up for company! Serve generous slices with a side of extra fresh raspberries or strawberries to cut through the sweetness. A hot cup of dark roast coffee is the perfect companion to the cocoa notes in the cake. If you are feeling extra fancy for Valentine’s Day, sprinkle some heart-shaped sprinkles or chocolate curls on top of the white frosting!
Storage and Reheating Tips
Because of the whipped cream frosting, this cake needs to be stored in the refrigerator. Place it in a cake carrier or cover it gently with plastic wrap (try to prop the wrap up with toothpicks so it doesn’t squish the pretty frosting). It will stay fresh for up to 4 days. You can also freeze the unfrosted cake for up to 3 months—just wrap it tightly in cling film and foil. Thaw on the counter before frosting.
Nutrition Facts (Estimated)
| Serving Size | 1 slice |
| Calories | 480 |
| Fat | 26g |
| Saturated Fat | 9g |
| Unsaturated Fat | 15g |
| Trans Fat | 0g |
| Cholesterol | 65mg |
| Sodium | 310mg |
| Carbohydrates | 58g |
| Fiber | 1g |
| Sugar | 34g |
| Protein | 5g |
Frequently Asked Questions
Can I make this cake ahead of time?
Yes! Actually, oil-based cakes often taste better the next day as the flavors meld. Bake the cake the day before, wrap it tightly, and store at room temperature. Make the whipped cream frosting just before serving.
Why does my red velvet cake taste metallic?
This can happen if you use too much baking soda or a low-quality red food coloring. Make sure to measure carefully and use a good brand of dye.
Can I use butter instead of oil?
You can, but the texture will change. Butter cakes are delicious but tend to dry out faster in the fridge. Since this cake has perishable frosting and needs refrigeration, oil keeps it much softer cold.
Do I have to use vinegar?
Yes, please don’t skip it! You won’t taste the vinegar, I promise. It reacts with the baking soda to give the cake its lift and fluffy texture.
Can I use this batter for cupcakes?
Absolutely! This recipe will make about 24 standard cupcakes. Bake them for 18-22 minutes at 350°F.
How do I stabilize the whipped cream without cream cheese?
If you don’t want the tang of cream cheese, you can use a teaspoon of unflavored gelatin dissolved in water, or a dedicated product like ‘Whip It’ to keep your whipped cream firm.
Why is my cake brown and not red?
This usually means not enough food coloring was used, or the cocoa powder was very dark (like Dutch-processed). Regular natural cocoa powder works best for the red color.
Can I use a different frosting?
Of course! A traditional Cream Cheese Frosting or a Vanilla Glaze works beautifully too. I just love the lightness of whipped cream against the dense cake.
Conclusion
I truly hope this Moist Red Velvet Bundt Cake becomes a new tradition in your home just like it is in mine. There is nothing quite like seeing the smiles on your family’s faces when you bring out this vibrant, fluffy, delicious dessert. It is proof that you don’t need to be a professional pastry chef to make something spectacular. If you try this recipe, please snap a photo and tag me on Pinterest or Instagram—I love seeing your creations! Happy baking, mamas!

