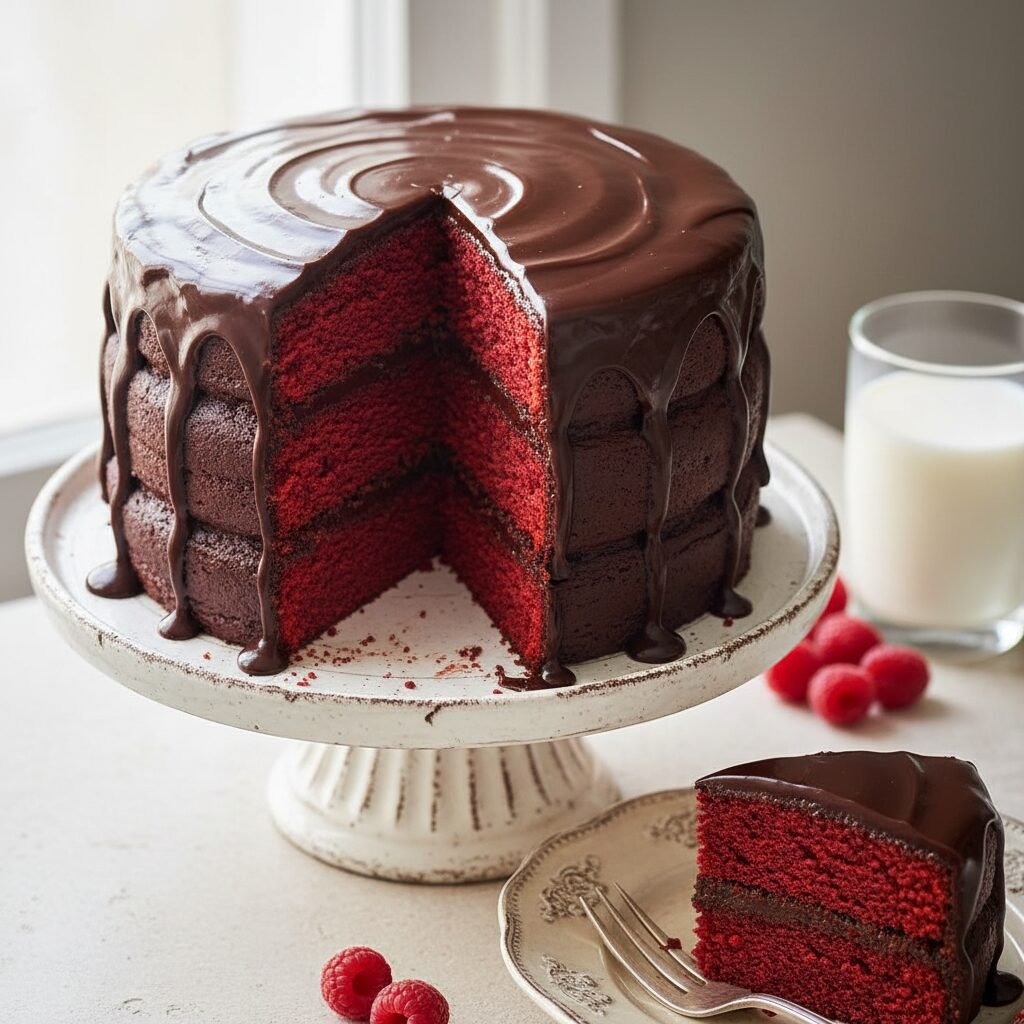
Moist Red Velvet Layer Cake With Chocolate Ganache Recipe
If you have been searching for the holy grail of red velvet cakes, look no further! This recipe delivers an impossibly moist crumb with that signature hint of cocoa, all wrapped up in a luxurious chocolate ganache that takes it to the next level.
30 minutes
35 minutes
1 hour 30 minutes
12-14 Servings
Dessert
Baking
American
Vegetarian
Hey there, lovely mamas and baking enthusiasts! Welcome back to my kitchen. Today, we are tackling a recipe that is very near and dear to my heart. We are talking about Red Velvet Cake. But wait—this isn’t just any red velvet cake. We are skipping the traditional cream cheese frosting (I know, controversial!) and dressing this beauty up in a silky, rich, absolute dream of a Chocolate Ganache.
There is something so incredibly nostalgic about slicing into a bright red cake. It screams celebration, doesn’t it? Whether it is for a little one’s birthday bash, a romantic Valentine’s dessert for you and your hubby, or just a Tuesday night where you need a little pick-me-up, this cake delivers. I have spent years tweaking this recipe to ensure it is not dry. We want moist. We want tender. We want that melt-in-your-mouth texture that makes you close your eyes and go "Mmmm."
The combination of the slightly tangy, vanilla-cocoa cake with the deep, dark intensity of semi-sweet ganache is a match made in heaven. It balances the sweetness perfectly. Plus, pouring that glossy ganache over the layers makes you feel like a professional pastry chef right in your own home. So, grab your aprons, preheat those ovens, and let’s bake something beautiful together!
History & Origins
Let’s take a little trip down memory lane, shall we? The history of Red Velvet Cake is actually quite fascinating and a little bit mysterious! While many people associate it with Southern cuisine, its roots might actually be in the Victorian era. Back then, "Velvet" cakes were a fancy way of describing cakes with a very fine, soft crumb—the opposite of the coarser sponge cakes of the day.
The red color originally wasn’t from a bottle of food dye. It was actually a chemical reaction! In the old days, cocoa powder wasn’t "Dutch-processed" or alkalized like it is today. When that raw cocoa mixed with acidic ingredients like buttermilk and vinegar, the anthocyanins in the cocoa would turn a reddish-brown hue. It wasn’t the neon red we see today, but it was distinct.
Fast forward to the Great Depression. To boost sales, the Adams Extract company (famous for food colorings) started marketing a recipe that used a whole lot of red dye to make the cake pop. It became a sensation! Another claim to fame comes from the Waldorf-Astoria Hotel in New York, which served a famous "Red Waldorf Cake." Regardless of exactly where it started, it has become an American icon. By pairing it with ganache today, we are nodding to its chocolatey roots while keeping that modern, vibrant flair we all love.
Why This Recipe Works
Alright, let’s put on our science goggles for a quick second! I promise to keep it simple. You might be wondering, "Why is this recipe so much moister than others I have tried?" The secret lies in the fat source and the acidity.
First, we are using oil instead of butter. While I love the flavor of butter, oil is 100% fat and liquid at room temperature. This means your cake stays incredibly soft and moist for days, whereas butter-based cakes can firm up when they cool down. We add flavor back in with plenty of vanilla and buttermilk.
Secondly, the Buttermilk and Vinegar combo is crucial. This acidity does two things: it tenderizes the gluten in the flour (hello, soft texture!) and it reacts vigorously with the baking soda. This reaction creates carbon dioxide bubbles that fluff up the cake, giving it that signature "velvety" rise. Finally, the ganache works because red velvet is essentially a very light chocolate cake. Pairing it with a heavy chocolate topping amplifies those cocoa notes that often get lost under sugary cream cheese frosting.
Why You’ll Love This Recipe
- ✓Impossibly moist texture thanks to the oil and buttermilk blend.
- ✓A stunning, glossy chocolate ganache finish that looks professional.
- ✓Perfect balance of tanginess and rich chocolate flavor.
- ✓No mixer required for the cake batter—just a whisk and two bowls!
- ✓Stays fresh and soft for days, making it ideal for making ahead.
Equipment You’ll Need
- ✓Two 8-inch or 9-inch round cake pans
- ✓Large mixing bowl
- ✓Medium mixing bowl
- ✓Whisk
- ✓Rubber spatula
- ✓Wire cooling rack
- ✓Small saucepan (for ganache)
- ✓Offset spatula
Ingredients
- ✓For the Cake:
- ✓2 1/2 cups Cake Flour (sifted)
- ✓1 1/2 cups Granulated Sugar
- ✓1 tsp Baking Soda
- ✓1 tsp Salt
- ✓2 tbsp Unsweetened Cocoa Powder
- ✓1 1/2 cups Vegetable Oil (or Canola)
- ✓1 cup Buttermilk (room temperature)
- ✓2 large Eggs (room temperature)
- ✓1 tsp White Vinegar
- ✓1 tbsp Vanilla Extract
- ✓1 oz Red Food Coloring (approx. 2 tbsp)
- ✓For the Chocolate Ganache:
- ✓12 oz Semi-Sweet Chocolate Chips (or chopped chocolate bar)
- ✓1 cup Heavy Whipping Cream
- ✓1 tbsp Unsalted Butter (optional, for shine)
Instructions
- Preheat and Prep: Preheat your oven to 350°F (175°C). Grease two 8-inch or 9-inch round cake pans with butter or cooking spray. Line the bottoms with parchment paper and flour the sides. This ensures your beautiful layers pop right out!
- Mix Dry Ingredients: In a large bowl, sift together the cake flour, sugar, baking soda, salt, and cocoa powder. Whisk them gently to ensure everything is evenly distributed. No lumps allowed!
- Mix Wet Ingredients: In a separate medium bowl, whisk together the vegetable oil, room temperature buttermilk, eggs, food coloring, vanilla extract, and vinegar. It will look bright red and glossy!
- Combine: Slowly pour the wet red mixture into the dry ingredients. Using your whisk or a rubber spatula, mix until just combined and smooth. Be careful not to overmix—stop as soon as the flour streaks disappear.
- Bake: Divide the batter evenly between the two prepared pans. Tap the pans gently on the counter to release any large air bubbles. Bake for 30-35 minutes, or until a toothpick inserted into the center comes out clean or with just a few moist crumbs.
- Cool: Let the cakes cool in the pans for about 10 minutes, then carefully turn them out onto a wire rack to cool completely before frosting. They must be cool, or the ganache will melt right off!
- Make the Ganache: While the cakes cool, place the chocolate chips in a heat-proof bowl. In a small saucepan, heat the heavy cream until it just begins to simmer (do not let it come to a rolling boil). Pour the hot cream over the chocolate.
- Stir the Ganache: Let the chocolate and cream sit for 5 minutes untouched. Then, gently whisk from the center outward until the mixture is smooth, dark, and glossy. Stir in the tablespoon of butter for extra shine if desired. Let it sit at room temperature until it thickens to a spreadable consistency (about 20-30 minutes).
- Assemble: Place one cake layer on your serving stand. Spread a layer of thickened ganache over the top. Place the second cake layer on top. Pour the remaining ganache over the center and use an offset spatula to spread it to the edges, letting it drip down the sides for that dramatic look.
Expert Cooking Tips
- ✓Room Temperature is Key: Make sure your buttermilk and eggs are at room temperature. This helps them emulsify better with the oil, creating a uniform crumb.
- ✓Don’t Skimp on the Dye: If you want that vibrant, iconic red hue, you really need to use the full amount of food coloring. Gel colors work best for intensity without adding too much liquid.
- ✓Cake Flour Substitute: If you don’t have cake flour, you can make your own! For every cup of all-purpose flour, remove 2 tablespoons of flour and replace it with 2 tablespoons of cornstarch. Sift 3 times.
- ✓Ganache Consistency: If you want a drip cake, use the ganache while it is still slightly warm and pourable. If you want to frost it thickly like a traditional cake, let the ganache cool until it’s the consistency of peanut butter.
Substitutions and Variations
If you are out of buttermilk, don’t panic! You can make a DIY version by adding 1 tablespoon of lemon juice or white vinegar to a cup of regular milk and letting it sit for 5 minutes until it curdles. For a gluten-free version, swap the cake flour for a high-quality 1:1 Gluten-Free Baking Flour blend (make sure it contains xanthan gum). If you aren’t a fan of semi-sweet chocolate, you can use milk chocolate for the ganache, but reduce the cream slightly as milk chocolate is softer.
Common Mistakes to Avoid
The biggest mistake I see is overmixing the batter. Once the wet and dry ingredients touch, the gluten starts to develop. If you mix too vigorously, your cake will be tough instead of velvety. Just mix until the flour disappears! Another common oopsie is frosting warm cake. I know it’s tempting to rush, but if the cake is even slightly warm, your beautiful ganache will slide right off into a puddle on the plate. Patience is a virtue here, mamas!
Serving Suggestions
This cake is rich, so serve it in thin slices. It pairs beautifully with a dollop of freshly whipped cream or some fresh raspberries on the side to cut through the richness of the chocolate. A hot cup of coffee or a cold glass of milk is non-negotiable! For a festive touch, sprinkle some white chocolate shavings or red sprinkles on top of the ganache before it sets.
Storage and Reheating Tips
Because of the ganache (which contains cream), this cake is best stored in the refrigerator, especially if your kitchen is warm. Keep it in an airtight cake carrier or wrap slices in plastic wrap. It will last for up to 5 days in the fridge. Let the slices sit on the counter for 20 minutes before eating to bring the ganache and cake back to room temperature for the best texture. You can also freeze the unfrosted cake layers for up to 3 months.
Nutrition Facts (Estimated)
| Serving Size | 1 Slice |
| Calories | 540 kcal |
| Fat | 28g |
| Saturated Fat | 10g |
| Unsaturated Fat | 16g |
| Trans Fat | 0g |
| Cholesterol | 65mg |
| Sodium | 310mg |
| Carbohydrates | 68g |
| Fiber | 2g |
| Sugar | 38g |
| Protein | 6g |
Frequently Asked Questions
Can I use beet juice instead of food coloring?
Yes, you can! It will give a more earthy flavor and a purpler hue rather than bright red. You would need to roast and puree beets to replace the liquid dye.
Why did my cake turn out brown instead of red?
This usually happens if you use too much baking soda or if your cocoa powder is heavily alkalized (Dutch-process). The high pH neutralizes the red color.
Can I make this into cupcakes?
Absolutely! This recipe will make about 24 standard cupcakes. Bake them for 18-22 minutes at 350°F.
Is the vinegar necessary?
Yes, do not skip it! You won’t taste it, but it activates the baking soda to help the cake rise and keeps the color bright.
Can I use butter instead of oil for the cake?
You can, but the texture will be different. Butter cakes are denser and dry out faster. For that true ‘velvet’ texture, oil is superior.
My ganache is too runny, what do I do?
Place the bowl in the fridge for 10-15 minutes, stirring every 5 minutes. As the chocolate cools, it will thicken up perfectly.
What cocoa powder is best for red velvet?
Natural unsweetened cocoa powder is best. It is acidic and reacts better with the baking soda than Dutch-processed cocoa.
Can I double this recipe?
Yes, this recipe doubles easily for a 3-layer cake or a larger sheet cake. Just keep an eye on baking times.
Conclusion
And there you have it, friends! The most indulgent, moist, and absolutely stunning Red Velvet Cake with Chocolate Ganache. I hope this recipe brings a little extra joy to your kitchen and a lot of smiles to your family’s faces. It really is a labor of love that pays off with every single bite.
If you try this recipe, please, please tag me on Pinterest or Instagram! I love seeing your creations. Don’t forget to pin this recipe to your "Best Desserts" board so you can find it whenever the chocolate craving strikes. Happy baking!

