Moist Red Velvet Sheet Cake For Small Celebration Recipe
Say goodbye to dry, crumbly cakes and hello to the most velvety, melt-in-your-mouth dessert you have ever tasted! This easy sheet cake version of the classic Red Velvet takes all the stress out of baking while keeping that iconic flavor and stunning color center stage.
20 minutes
30 minutes
50 minutes + cooling
12-15 servings
Dessert
Baking
American
Vegetarian
Hey there, lovely mamas and baking enthusiasts! Welcome back to my kitchen. Today, we are tackling a classic that often intimidates home bakers but is absolutely essential for your recipe box: Red Velvet Cake. But not just any red velvet cake—we are making a stress-free, foolproof, incredibly Moist Red Velvet Sheet Cake specifically designed for those smaller, intimate celebrations.
Let’s be real for a second. I love the look of a towering three-layer cake on Pinterest as much as the next gal, but when it comes to actually hosting a family birthday dinner, a baby shower, or a cozy Valentine’s Day gathering, the last thing I want to do is worry about leveling layers, crumb coating, and praying the whole thing doesn’t slide apart in the fridge. That is where the magic of the sheet cake comes in. It is humble, it is nostalgic, and it is so much easier to transport and serve!
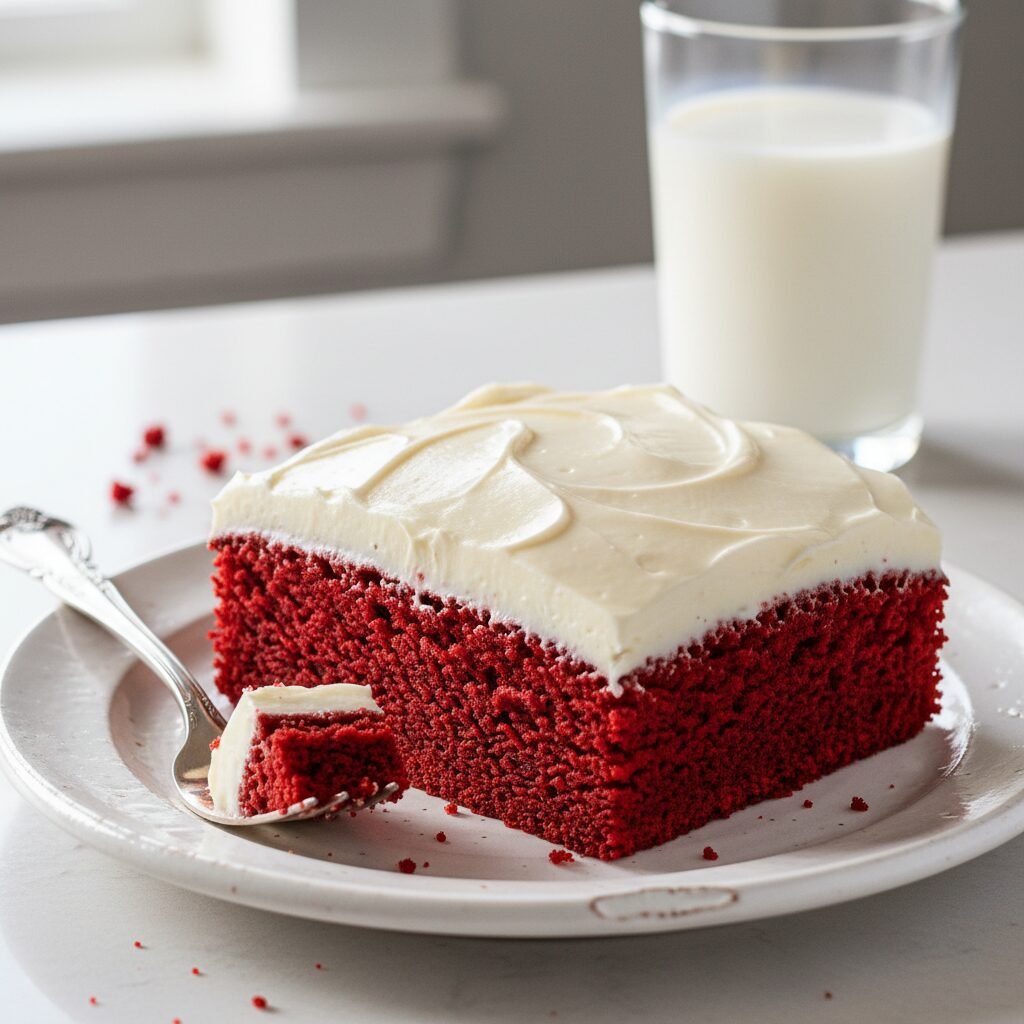
This recipe is my absolute go-to when I need a dessert that screams "celebration" without the architectural degree required for tiered cakes. The texture is impossibly soft (velvety, truly!), with that subtle chocolate flavor that isn’t too overpowering, perfectly balanced by the tang of a lush cream cheese frosting. Plus, because it is a sheet cake, the frosting-to-cake ratio is perfect in every single bite. Whether you are celebrating a milestone or just surviving a Tuesday, this cake is the hug you need.
History & Origins
Have you ever wondered where this vibrant cake actually comes from? It is a bit of a culinary mystery with a dash of drama! While many people associate Red Velvet with Southern cooking, its roots likely go back to the Victorian era with "Velvet Cakes." These were fancy cakes with a finer crumb than the coarser sponge cakes of the day, achieved by using almond flour, cornstarch, or cocoa.
The "Red" part of the story is where science meets history. Originally, the reddish hue wasn’t from a bottle of food coloring. It was a chemical reaction between the raw cocoa powder (which wasn’t Dutch-processed back then) and the acidic ingredients like buttermilk and vinegar. This reaction revealed the natural red anthocyanin in the cocoa. During World War II, when foods were rationed, bakers sometimes used boiled beet juices to enhance the moisture and color of their cakes, cementing the red association.
However, the bright, neon-red version we know and love today really took off thanks to the Adams Extract company in Texas during the Great Depression. To sell more food coloring and flavor extracts, they printed the recipe on cards and tore-off sheets at grocery stores. It became a sensation! Today, we are honoring that tradition but tweaking the method to ensure it is the moistest version you have ever baked.
Why This Recipe Works
So, what makes this specific recipe foolproof? It is all about the chemistry of moisture and lift. First, we use oil instead of butter for the batter. I know, I know—butter tastes amazing. But oil is 100% fat and remains liquid at room temperature, which means your cake stays moist for days longer than a butter-based cake, which can dry out as the butter solidifies.
Secondly, the buttermilk and vinegar are non-negotiable. They provide the acid needed to react with the baking soda, creating carbon dioxide bubbles that give the cake its lift and fluffy texture. This acid also tenderizes the gluten in the flour, ensuring that "velvety" mouthfeel. Finally, we are using a splash of hot coffee (or hot water) at the end. This blooms the cocoa powder, intensifying the chocolate flavor without making the cake taste like a latte, and ensures the batter is fluid enough to bake evenly into a flat sheet.
Why You’ll Love This Recipe
- ✓One-bowl method for easy cleanup
- ✓Stays moist for up to 4 days
- ✓Perfect frosting-to-cake ratio
- ✓No complex decorating skills required
- ✓Ideal for transport to potlucks or parties
Equipment You’ll Need
- ✓9×13 inch baking pan (metal preferred)
- ✓Large mixing bowl
- ✓Medium mixing bowl
- ✓Electric hand mixer or stand mixer
- ✓Whisk
- ✓Rubber spatula
- ✓Offset spatula for frosting
- ✓Measuring cups and spoons
Ingredients
- ✓For the Cake:
- ✓2 1/2 cups All-Purpose Flour (sifted)
- ✓1 1/2 cups Granulated Sugar
- ✓1 tsp Baking Soda
- ✓1 tsp Fine Sea Salt
- ✓1/4 cup Unsweetened Cocoa Powder
- ✓1 1/2 cups Vegetable Oil (or Canola Oil)
- ✓1 cup Buttermilk (room temperature)
- ✓2 Large Eggs (room temperature)
- ✓1-2 tbsp Red Food Coloring (depending on desired intensity)
- ✓1 tsp White Distilled Vinegar
- ✓1 tsp Pure Vanilla Extract
- ✓For the Cream Cheese Frosting:
- ✓16 oz Cream Cheese (full fat, brick style, room temperature)
- ✓1/2 cup Unsalted Butter (softened)
- ✓4 cups Powdered Sugar (sifted)
- ✓1 tsp Pure Vanilla Extract
- ✓1 tbsp Heavy Cream (optional, for texture)
Instructions
- Preheat and Prep: Preheat your oven to 350°F (175°C). Grease a 9×13 inch baking pan generously with butter or cooking spray. For extra security, you can line the bottom with parchment paper, but a good greasing usually does the trick for sheet cakes.
- Mix Dry Ingredients: In a large bowl, whisk together the flour, sugar, baking soda, salt, and cocoa powder. Make sure to break up any clumps of cocoa powder so you don’t get bitter bites later!
- Mix Wet Ingredients: In a separate medium bowl, whisk together the vegetable oil, buttermilk, eggs, food coloring, vinegar, and vanilla extract until the mixture is bright red and fully emulsified.
- Combine: Slowly pour the wet ingredients into the dry ingredients. Use a whisk or electric mixer on low speed to combine. Do not overmix! Stop as soon as the flour streaks disappear. Overmixing leads to a tough cake.
- Bake: Pour the batter into your prepared pan. Tap the pan gently on the counter twice to release any large air bubbles. Bake for 28-32 minutes, or until a toothpick inserted into the center comes out clean or with just a few moist crumbs attached.
- Cool: This is crucial! Let the cake cool completely in the pan on a wire rack. If you try to frost a warm cake, your cream cheese frosting will turn into a soup puddle.
- Make the Frosting: While the cake cools, beat the softened cream cheese and butter together in a large bowl until smooth and creamy (about 2-3 minutes). Gradually add the powdered sugar, one cup at a time, mixing on low speed. Add the vanilla and a splash of heavy cream if needed. Whip on high for 1 minute to make it fluffy.
- Decorate: Once the cake is cool to the touch, spread a thick layer of frosting over the top using an offset spatula. Add sprinkles or cake crumbs for decoration if desired.
- Serve: Slice into squares and serve immediately. Watch it disappear!
Expert Cooking Tips
- ✓Room Temperature is Key: Ensure your buttermilk, eggs, cream cheese, and butter are all at room temperature. This ensures a smooth batter and a lump-free frosting.
- ✓Don’t Skimp on the Dye: If you want that vibrant, bakery-style red, you need to use a significant amount of liquid dye. If using gel paste, you can use less, but dissolve it in the buttermilk first to avoid streaks.
- ✓Sift the Sugar: For the frosting, always sift your powdered sugar. Tiny lumps of sugar are very noticeable in a smooth cream cheese frosting.
- ✓The Vinegar Trick: Don’t skip the vinegar! You won’t taste it, but it reacts with the baking soda to create the fluffy texture red velvet is known for.
- ✓Cocoa Choice: Use regular unsweetened cocoa powder, not Dutch-processed. The regular cocoa is more acidic and works better with the baking soda and buttermilk.
Substitutions and Variations
If you find yourself missing an ingredient, don’t panic! Here are some mom-approved swaps. No buttermilk? Make your own by adding 1 tablespoon of lemon juice or vinegar to a cup of regular milk and letting it sit for 5 minutes. If you want to avoid red food dye, you can use beet powder or simply omit it—the cake will taste exactly the same, just with a brownish hue (we call that "Velvet Chocolate"). For the vegetable oil, melted coconut oil works too, though it adds a slight coconut flavor.
Common Mistakes to Avoid
The biggest mistake people make with sheet cakes is overbaking. Because the surface area is large, it cooks faster than you might think. Check it at the 28-minute mark. Another common pitfall is frosting too soon. I know it smells amazing and you want to dig in, but if the cake is even slightly warm, the butter in the frosting will melt, and you will lose that fluffy texture. Lastly, avoid using tub cream cheese (the spreadable kind) for frosting; it has too much water content and will make a runny mess. Stick to the brick style!
Serving Suggestions
This cake is a star on its own, but if you want to elevate it for a party, serve it with a side of fresh raspberries or strawberries to cut through the richness of the cream cheese. A scoop of vanilla bean ice cream never hurts, either! For a festive holiday look, sprinkle crushed candy canes on top, or use heart-shaped sprinkles for Valentine’s Day. It looks beautiful served right out of the pan or plated on cute vintage china.
Storage and Reheating Tips
Because of the cream cheese frosting, this cake does need to be refrigerated. Cover the pan tightly with plastic wrap or a lid. It will stay fresh in the fridge for up to 5 days. In fact, I think it tastes even better on day two when the flavors have melded! If you want to freeze it, you can freeze the unfrosted cake for up to 3 months. Wrap it in plastic wrap and then foil. Thaw on the counter before frosting.
Nutrition Facts (Estimated)
| Serving Size | 1 slice |
| Calories | 450 kcal |
| Fat | 24g |
| Saturated Fat | 10g |
| Unsaturated Fat | 12g |
| Trans Fat | 0g |
| Cholesterol | 65mg |
| Sodium | 280mg |
| Carbohydrates | 58g |
| Fiber | 1g |
| Sugar | 38g |
| Protein | 4g |
Frequently Asked Questions
Can I make this into cupcakes instead?
Absolutely! This batter makes fantastic cupcakes. Line a muffin tin and bake for 18-22 minutes at 350°F. It should yield about 24 cupcakes.
Why is my red velvet cake brown?
This usually happens if you didn’t use enough food coloring or if you used Dutch-processed cocoa powder, which neutralizes the acids that help keep the red color bright.
Can I use butter instead of oil for the cake?
You can, but I don’t recommend it for this specific recipe. Oil coats the flour proteins better than butter, preventing gluten formation and resulting in a much moister, tender cake.
Is cake flour better than all-purpose flour?
Cake flour will give you a slightly lighter crumb, but this recipe is formulated for all-purpose flour to keep it easy and accessible. If you use cake flour, add an extra 2 tablespoons to the measurement.
How do I get my frosting super white?
Butter adds a yellow tint. To get stark white frosting, beat the butter for a full 5 minutes until it is very pale before adding the cheese, or use half butter and half vegetable shortening (though this changes the flavor).
Can I leave this cake out on the counter?
Technically, sugar acts as a preservative, but because of the dairy in the cream cheese frosting, it is safest to refrigerate it if you aren’t eating it within 2-4 hours.
What size pan is best?
A standard 9×13 inch rectangular pan is perfect. You can use a glass or metal pan. If using glass, reduce the oven temperature by 25°F as glass retains heat longer.
Can I halve the recipe?
Yes! You can halve the ingredients and bake it in an 8×8 or 9×9 square pan. The baking time will be roughly the same, perhaps 5 minutes less.
Conclusion
And there you have it, friends! The ultimate Moist Red Velvet Sheet Cake that is going to save your sanity during the busy holiday season or the next birthday bash. It is simple, honest baking that delivers big on flavor and presentation. I promise that once you try this method, you will never go back to dry box mixes again.
If you make this recipe, please snap a photo and tag me! I love seeing your creations and how you decorate them for your families. Now, go preheat that oven and get ready to be the hero of dessert time. Happy baking!

