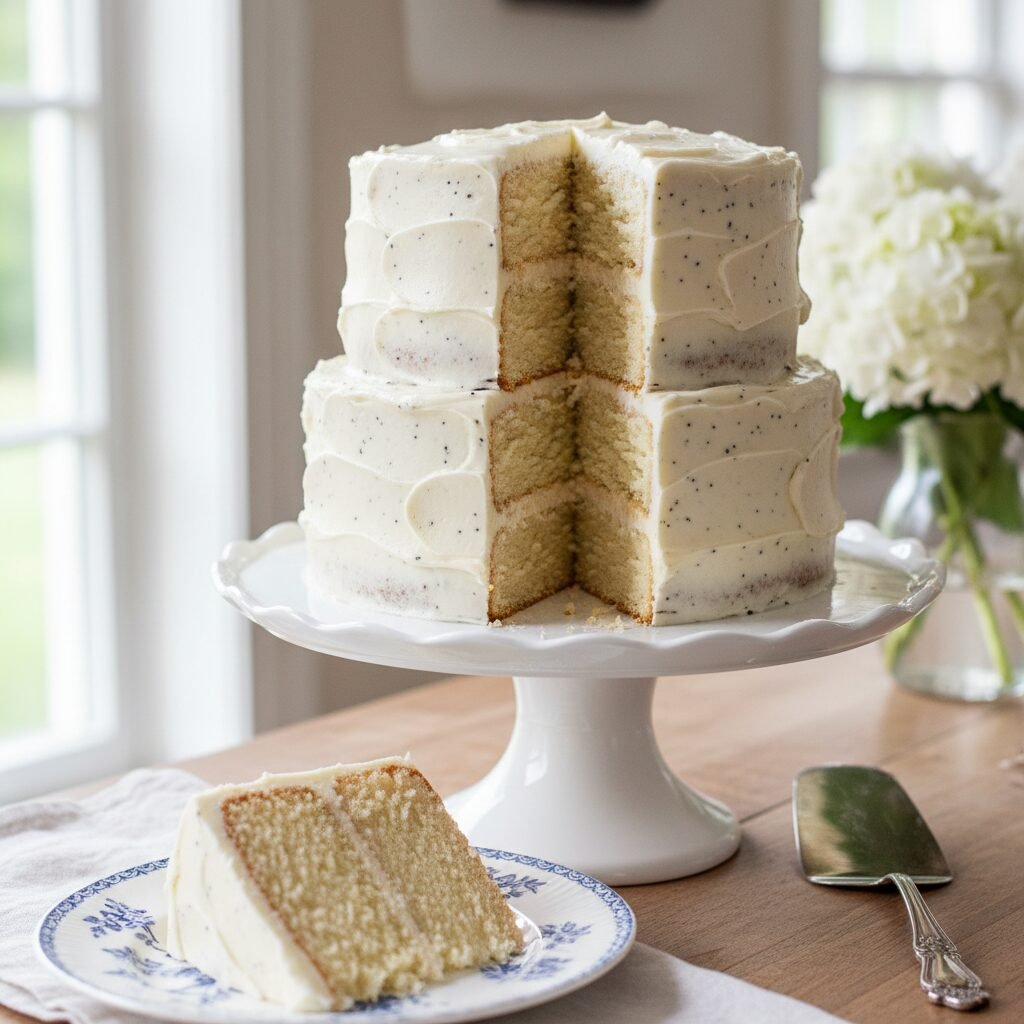
Moist Vanilla Layer Cake For Beginners Recipe
Discover the secret to the perfect vanilla cake that is tender, fluffy, and incredibly moist. This beginner-friendly recipe uses a unique blend of butter and oil to guarantee a bakery-style texture that stays fresh for days, making it the ultimate base for any celebration.
30 minutes
35 minutes
1 hour 5 minutes
12-14 servings (makes three 8-inch cakes)
Dessert
Baking
American
Vegetarian
If you have ever found yourself disappointed by a homemade vanilla cake that turned out dry, dense, or lacking in flavor, you are certainly not alone. The quest for the perfect vanilla cake is a journey almost every baker undertakes, often fraught with recipes that promise the moon but deliver a crumbly, lackluster result. But today, that search ends. Welcome to what I confidently call the best moist vanilla layer cake recipe for beginners. This isn’t just another basic cake; it is a meticulously tested formula designed to bridge the gap between the convenience of a box mix and the rich, authentic flavor of scratch baking.
What makes a vanilla cake truly exceptional? It is the delicate balance of a tender crumb that is sturdy enough to hold layers of buttercream yet soft enough to melt in your mouth. Many recipes rely solely on butter, which provides flavor but can dry out the crumb if overbaked. Others rely on oil, which ensures moisture but often results in a greasy texture and a lack of depth. This recipe marries the best of both worlds, utilizing a precise ratio of high-quality unsalted butter for that classic, creamy taste, and neutral vegetable oil to lock in moisture for days.
Furthermore, we incorporate buttermilk, a magical ingredient in the world of baking. Its acidity interacts with the leavening agents to create a lift that is airy and light, while simultaneously tenderizing the gluten strands to prevent toughness. Whether you are baking for a birthday, a wedding, or simply a Tuesday afternoon craving, this cake serves as the perfect canvas. It pairs beautifully with everything from rich chocolate ganache to a tart berry coulis or a classic Swiss meringue buttercream. Prepare to impress your friends, family, and most importantly, yourself, with a cake that looks and tastes like it came straight from a high-end patisserie.
History & Origins
The history of the cake is a fascinating evolution of culinary science and cultural tradition. While the concept of sweet baked goods dates back to ancient civilizations, the ‘cake’ as we know it today is a relatively modern invention. In ancient Egypt and Greece, cakes were essentially heavy, yeast-leavened breads sweetened with honey and filled with nuts and dried fruits. It wasn’t until the mid-17th century in Europe that baking molds and hoops were introduced, allowing for more uniform shapes, though yeast was still the primary leavening agent.
The true turning point for the vanilla layer cake occurred in the 19th century with two major innovations: the discovery of chemical leavening agents and the mass production of refined white flour and sugar. The introduction of baking powder and baking soda revolutionized home baking, allowing cakes to rise reliably without the long fermentation times required by yeast. This era saw the birth of the ‘pound cake’ and eventually the lighter, fluffier butter cakes we adore today.
Vanilla itself has a storied past. Indigenous to Mexico and cultivated by the Totonac people (and later the Aztecs), vanilla was introduced to Europe by Spanish conquistadors in the 16th century. For a long time, it was an exclusive luxury used primarily in chocolate drinks for aristocracy. It wasn’t until the mid-19th century, when hand-pollination techniques were developed, that vanilla became more accessible. By the 20th century, with the advent of vanilla extract, the ‘vanilla cake’ became a household staple in America. It became the standard for birthday celebrations, symbolizing joy, purity, and comfort. Today, the vanilla layer cake stands as an icon of American baking, representing a timeless tradition of celebrating life’s milestones with sweetness.
Why This Recipe Works
This recipe succeeds where many others fail due to a few key scientific principles regarding fat emulsification and gluten development. First and foremost is the ‘reverse creaming’ method (or a modified version thereof) combined with a dual-fat strategy. By using both butter and oil, we achieve a synergy of flavor and texture. Butter is roughly 80% fat and 20% water; as the water evaporates during baking, it can dry out the cake. Oil, being 100% fat, remains liquid at room temperature, coating the flour proteins and preventing them from bonding too strongly with the liquid ingredients. This inhibits excessive gluten formation, ensuring the cake remains tender rather than chewy.
Secondly, the inclusion of buttermilk is non-negotiable. The acidity in buttermilk reacts with the baking soda to produce carbon dioxide gas, which helps the cake rise and creates a fine, velvety crumb structure. It also breaks down long gluten strands, adding to the tenderness.
Finally, we use cake flour instead of all-purpose flour. Cake flour has a lower protein content (usually around 7-8%) compared to all-purpose flour (10-12%). Less protein means less gluten development, which directly translates to a softer, lighter texture. We also bake at a slightly lower temperature of 325°F (163°C) rather than the standard 350°F. This gentle heat allows the cake to rise evenly and flat, preventing the dreaded ‘dome’ shape and ensuring the edges don’t dry out before the center is cooked.
Why You’ll Love This Recipe
- ✓Uses a mix of butter and oil for maximum flavor and moisture.
- ✓Beginner-friendly method with no complicated techniques.
- ✓Stays soft and fresh for up to 4 days.
- ✓Perfect flat tops for easy stacking and decorating.
- ✓Versatile base that pairs with any frosting flavor.
- ✓Uses buttermilk for a tender, velvety crumb.
Equipment You’ll Need
- ✓Three 8-inch round cake pans
- ✓Stand mixer or electric hand mixer
- ✓Large mixing bowls
- ✓Whisk
- ✓Rubber spatula
- ✓Measuring cups and spoons
- ✓Kitchen scale (highly recommended)
- ✓Wire cooling rack
- ✓Parchment paper
Ingredients
- ✓3 cups (345g) cake flour, sifted
- ✓1 tbsp baking powder
- ✓1/2 tsp baking soda
- ✓1 tsp salt
- ✓1 cup (226g) unsalted butter, softened to room temperature
- ✓2 cups (400g) granulated sugar
- ✓1/3 cup (80ml) vegetable oil or canola oil
- ✓5 large eggs, room temperature
- ✓1 tbsp pure vanilla extract
- ✓1 1/2 cups (360ml) buttermilk, room temperature
Instructions
- Preheat your oven to 325°F (165°C). Grease three 8-inch round cake pans with butter or baking spray, line the bottoms with parchment paper rounds, and grease the parchment. Dust with a little flour and tap out the excess.
- In a medium bowl, whisk together the sifted cake flour, baking powder, baking soda, and salt. Set this dry mixture aside.
- In the bowl of a stand mixer fitted with the paddle attachment (or a large bowl using a hand mixer), beat the softened butter and granulated sugar on medium-high speed for about 3-4 minutes. The mixture should look pale, fluffy, and aerated. Scrape down the sides of the bowl as needed.
- Reduce the mixer speed to medium and slowly drizzle in the vegetable oil. Beat for another minute until fully incorporated.
- Add the eggs one at a time, mixing well after each addition. Wait until the yellow yolk disappears before adding the next egg. Stir in the vanilla extract.
- Reduce the mixer speed to low. Add the dry ingredients in three parts, alternating with the buttermilk in two parts, starting and ending with the dry ingredients (Dry – Wet – Dry – Wet – Dry). Mix only until just combined and no streaks of flour remain. Do not overmix.
- Give the batter a final stir by hand with a rubber spatula to ensure everything at the bottom of the bowl is incorporated.
- Divide the batter evenly among the three prepared cake pans. You can use a kitchen scale to ensure equal layers (approx. 500-550g per pan).
- Bake for 30-35 minutes, or until a toothpick inserted into the center comes out clean or with just a few moist crumbs. The cakes should be lightly golden and spring back when gently pressed.
- Remove the cakes from the oven and let them cool in the pans for 10-15 minutes. Then, carefully run a knife around the edges and invert them onto a wire rack to cool completely before frosting.
Expert Cooking Tips
- ✓Ensure all ingredients, especially eggs, butter, and buttermilk, are at room temperature to prevent the batter from curdling.
- ✓Do not skip the parchment paper; it guarantees your cakes will release perfectly from the pans.
- ✓Weigh your flour using a kitchen scale for precision; scooping with a cup often leads to packing too much flour and a dry cake.
- ✓Avoid overmixing the batter once the flour is added to keep the gluten development minimal.
- ✓Tap the cake pans on the counter 2-3 times before baking to release any large air bubbles.
- ✓If you don’t have cake flour, make a substitute: remove 2 tablespoons of all-purpose flour from 1 cup and replace with 2 tablespoons of cornstarch.
- ✓Cool the cakes completely before frosting, otherwise, the buttercream will melt and slide off.
Substitutions and Variations
Baking is a science, so substitutions should be made with care, but there is some flexibility. If you do not have cake flour, you can make a DIY version by measuring one cup of all-purpose flour, removing two tablespoons, and replacing them with two tablespoons of cornstarch. Sift this mixture twice to aerate it. For the buttermilk, you can make a ‘sour milk’ substitute by adding one tablespoon of white vinegar or lemon juice to a measuring cup and filling it to the 1-cup line with whole milk; let it sit for 5-10 minutes until curdled. While this recipe calls for unsalted butter to control sodium, you can use salted butter; just reduce the added salt in the recipe to 1/4 teaspoon. Vegetable oil can be swapped for canola oil, grapeseed oil, or melted coconut oil, though coconut oil may impart a slight flavor. For a gluten-free version, use a high-quality 1:1 gluten-free baking flour blend that contains xanthan gum.
Common Mistakes to Avoid
The most common mistake beginners make is measuring flour incorrectly. If you scoop the measuring cup directly into the flour bag, you compress the flour and can end up with 20-30% more than the recipe calls for, resulting in a dry, dense brick. Always use the ‘spoon and level’ method or, ideally, a digital scale. Another frequent error is using cold ingredients. Cold eggs and buttermilk shock the creamed butter, causing the batter to separate or curdle, which affects the final rise and texture. Lastly, opening the oven door too early to check on the cakes can cause a sudden drop in temperature, leading the cakes to collapse in the center. Rely on the oven light and only open the door when the minimum baking time has passed.
Serving Suggestions
This versatile vanilla cake is a blank canvas for flavor. For a classic birthday cake, fill and frost with a rich chocolate buttercream or a vanilla bean Swiss meringue buttercream. For a lighter summer dessert, fill the layers with fresh whipped cream and sliced strawberries or a lemon curd. If you are feeling adventurous, try a salted caramel drizzle between layers or incorporate crushed cookies for a cookies-and-cream variation. Serve slices at room temperature to ensure the butter in the cake is soft, providing the best mouthfeel and flavor release. A side of fresh berries or a scoop of vanilla ice cream makes for an indulgent plating presentation.
Storage and Reheating Tips
To keep your cake tasting fresh, storage is key. Unfrosted cake layers can be wrapped tightly in plastic wrap and stored at room temperature for up to 2 days. For longer storage, wrap the cooled layers in plastic wrap and then aluminum foil, and freeze for up to 3 months. Thaw frozen layers in the refrigerator overnight before decorating. Once the cake is frosted, it acts as a barrier to air. A frosted cake can sit at room temperature (covered with a cake dome) for 3-4 days. If you live in a very hot or humid climate, or if your filling is perishable (like custard or whipped cream), store the cake in the refrigerator. However, always bring refrigerated cake to room temperature for at least an hour before serving to restore the soft texture.
Nutrition Facts (Estimated)
| Serving Size | 1 slice |
| Calories | 450 |
| Fat | 22g |
| Saturated Fat | 10g |
| Unsaturated Fat | 11g |
| Trans Fat | 0g |
| Cholesterol | 65mg |
| Sodium | 320mg |
| Carbohydrates | 58g |
| Fiber | 1g |
| Sugar | 35g |
| Protein | 5g |
Frequently Asked Questions
Can I make this recipe into cupcakes?
Yes, absolutely! This batter makes excellent cupcakes. Line standard muffin tins with paper liners and fill them about 2/3 full. Bake at 350°F (175°C) for 15-18 minutes. The recipe yields approximately 24-30 cupcakes.
Why did my cake sink in the middle?
Cakes usually sink because they were underbaked, the oven door was opened too early, or there was too much leavening (baking powder/soda). Ensure your oven temperature is accurate using an oven thermometer.
Can I use all-purpose flour instead of cake flour?
You can, but the texture will be slightly denser and more bread-like. Cake flour has less protein, which yields a finer, softer crumb. If using AP flour, use the cornstarch substitution method mentioned in the tips.
Why are my ingredients required to be at room temperature?
Room temperature ingredients emulsify (mix together) much better than cold ones. This creates a smooth, uniform batter that traps air effectively, leading to a fluffier cake.
Can I reduce the sugar in this recipe?
I do not recommend reducing the sugar significantly. Sugar is not just for sweetness; it provides moisture, tenderness, and helps with browning. Reducing it too much will result in a dry, pale, and tough cake.
How do I know when the cake is done?
The cake is done when the edges pull away slightly from the pan, the top springs back when gently pressed, and a toothpick inserted into the center comes out clean or with a few moist crumbs (not wet batter).
Can I make this cake ahead of time?
Yes. In fact, the flavor often develops and improves slightly the next day. You can bake the layers, let them cool, wrap them tightly, and store them at room temperature for a day before frosting.
My batter looks curdled after adding the eggs. Is it ruined?
Not at all! This often happens if the eggs were too cold or added too quickly. The batter will smooth out once you add the flour. Just continue with the recipe.
Conclusion
Mastering the art of the perfect vanilla layer cake is a milestone for any home baker, and with this recipe, you are well on your way to baking stardom. By understanding the science behind the ingredients—like the magic of buttermilk and the power of room temperature emulsification—you can say goodbye to dry, lackluster cakes forever. This Moist Vanilla Layer Cake is more than just a dessert; it is a reliable, crowd-pleasing centerpiece for your most cherished celebrations. Whether you cover it in sprinkles for a child’s birthday or adorn it with fresh flowers for an elegant dinner party, the result will always be a delicious, tender slice of happiness. Happy baking!

