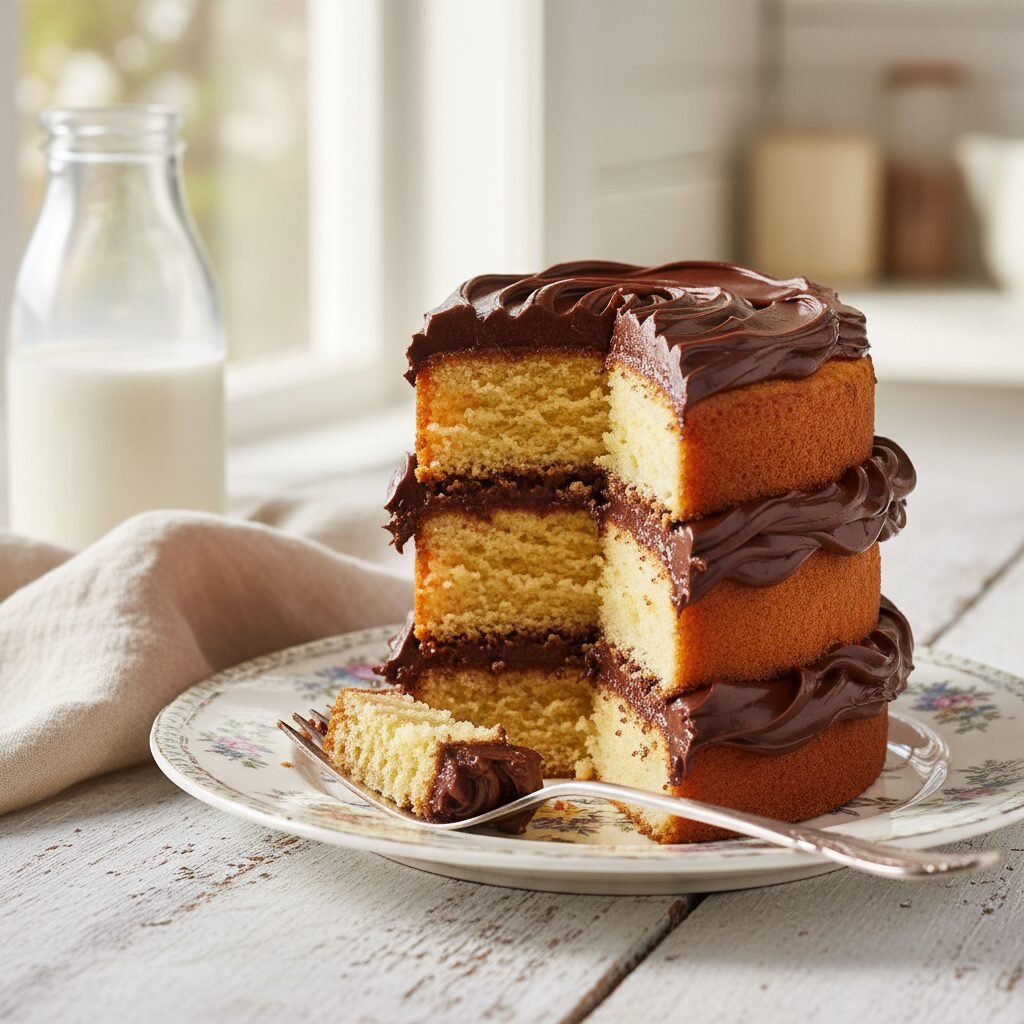
Moist Yellow Layer Cake With Chocolate Frosting Recipe
This is the quintessential birthday cake you have been dreaming of: a tender, buttery, melt-in-your-mouth yellow crumb paired with a deeply luscious chocolate fudge frosting. It is far superior to any boxed mix and surprisingly easy to make from scratch.
45 minutes
30 minutes
1 hour 15 minutes
12-14 servings
Dessert
Baking
American
Vegetarian
There is something undeniably nostalgic and comforting about a classic slice of yellow cake with chocolate frosting. For many of us, this combination is the definition of a celebration, evoking memories of childhood birthdays, backyard parties, and family gatherings. However, finding the perfect recipe that balances a buttery flavor with a moist texture can be elusive. Too often, homemade yellow cakes turn out dry, dense, or lacking that distinct vanilla-custard flavor we crave. This recipe is the result of years of testing to achieve the ‘Holy Grail’ of layer cakes. We have engineered a batter that uses a specific combination of butter and oil to ensure the cake stays soft for days, while buttermilk provides a tender crumb and a subtle tang that cuts through the sweetness. The result is a cake that is sturdy enough to stack but delicate enough to melt on your tongue. And then, there is the frosting. We are not talking about a sugary, gritty American buttercream here. This is a rich, glossy chocolate fudge frosting that tastes like a truffle. It is silky, smooth, and intensely chocolatey, providing the perfect counterpoint to the mellow, vanilla-forward cake layers. Whether you are a seasoned baker or a novice in the kitchen, this recipe is designed to be foolproof. It is time to ditch the chemical-laden boxed mixes and treat yourself and your loved ones to the real deal. This is not just a cake; it is a centerpiece, a conversation starter, and a slice of pure happiness.
History & Origins
The concept of ‘yellow cake’ as a distinct category emerged in the 19th century in the United States, largely defined by the ingredients available to home bakers. Historically, cakes were categorized by the color of their crumb, which was dictated by the type of eggs used. ‘Silver’ or ‘white’ cakes utilized only egg whites, creating a pristine, airy appearance often reserved for weddings. ‘Gold’ or ‘yellow’ cakes, on the other hand, utilized the rich yolks, resulting in a golden hue and a denser, more custard-like flavor profile. These were the cakes of the everyday household, celebrated for their richness and flavor. The evolution of baking powder in the mid-1800s revolutionized these recipes, allowing for higher-rising, lighter cakes that didn’t rely solely on the mechanical aeration of eggs. By the mid-20th century, with the industrial boom following World War II, boxed cake mixes became a staple in American pantries. General Mills and Pillsbury marketed ‘Yellow Cake Mix’ heavily, cementing the flavor profile—often enhanced with artificial vanilla and yellow food coloring—into the American palate. This specific combination of yellow cake with chocolate frosting became the archetypal ‘birthday cake’ in American pop culture, appearing in cookbooks, magazines, and television advertisements throughout the 1950s and 60s. While boxed mixes offered convenience, they sacrificed the depth of flavor found in scratch baking. Today, we are seeing a renaissance of heritage baking, where the focus returns to high-quality ingredients like real butter, pure vanilla extract, and farm-fresh eggs, reclaiming the history of the yellow cake from the industrial aisle and returning it to the home kitchen.
Why This Recipe Works
This recipe succeeds where many others fail due to a carefully calculated balance of fat, liquid, and flour protein content. First, we use a blend of unsalted butter and neutral vegetable oil. Butter is essential for that classic flavor and distinct mouthfeel, but butter is about 18-20% water. Oil is 100% fat and remains liquid at room temperature, which coats the flour proteins more effectively and ensures the cake remains moist for days after baking. Using only butter can lead to a dry cake once it cools, while using only oil results in a greasy texture with no flavor complexity; the combination offers the best of both worlds. Secondly, we strictly recommend cake flour over all-purpose flour. Cake flour has a lower protein content (around 7-8%), which inhibits gluten formation. Less gluten means a softer, more velvety crumb that is less likely to become tough or chewy. Thirdly, the inclusion of buttermilk is scientifically crucial. The acidity in buttermilk reacts with the baking soda to create carbon dioxide, giving the cake a superior lift, while also tenderizing the gluten strands. Finally, we use both whole eggs and additional egg yolks. The extra yolks add emulsifying lecithin and fat, contributing to the cake’s signature golden color and rich, custard-like structure without making it heavy.
Why You’ll Love This Recipe
- ✓Uses a mix of butter and oil for superior moisture and flavor retention.
- ✓Cake flour ensures a velvety, tender crumb that is never dense.
- ✓Extra egg yolks provide a rich, custard-like texture and golden color.
- ✓The chocolate frosting is a fudge-style hybrid, less sweet than buttercream.
- ✓Stays moist for up to 4 days, making it perfect for making ahead.
Equipment You’ll Need
- ✓Three 8-inch round cake pans
- ✓Stand mixer with paddle attachment
- ✓Large mixing bowls
- ✓Sifter or fine-mesh sieve
- ✓Wire cooling racks
- ✓Offset spatula
- ✓Parchment paper
- ✓Measuring cups and spoons
Ingredients
- ✓2 1/2 cups (300g) cake flour, spooned and leveled
- ✓2 teaspoons baking powder
- ✓1/2 teaspoon baking soda
- ✓1 teaspoon fine sea salt
- ✓3/4 cup (170g) unsalted butter, softened to room temperature
- ✓1/4 cup (60ml) neutral vegetable oil (canola or grapeseed)
- ✓1 3/4 cups (350g) granulated sugar
- ✓3 large eggs, room temperature
- ✓2 large egg yolks, room temperature
- ✓1 tablespoon pure vanilla extract
- ✓1 cup (240ml) buttermilk, room temperature
- ✓1 cup (225g) unsalted butter (for frosting), softened
- ✓3 cups (360g) confectioners’ sugar
- ✓3/4 cup (65g) unsweetened cocoa powder (Dutch-processed preferred)
- ✓1/2 cup (120ml) heavy cream
- ✓1 teaspoon vanilla extract (for frosting)
- ✓1/4 teaspoon salt (for frosting)
Instructions
- 1. Preheat your oven to 350°F (175°C). Grease three 8-inch round cake pans with butter or baking spray, line the bottoms with parchment paper, and grease the paper. Dust with a little flour and tap out the excess.
- 2. In a medium bowl, sift together the cake flour, baking powder, baking soda, and salt. Set this dry mixture aside.
- 3. In the bowl of a stand mixer fitted with the paddle attachment, beat the softened butter, vegetable oil, and granulated sugar on medium-high speed for about 4-5 minutes. The mixture should look pale, fluffy, and aerated.
- 4. Reduce the mixer speed to low and add the eggs and egg yolks one at a time, mixing just until the yellow yolk disappears before adding the next. Scrape down the sides and bottom of the bowl with a rubber spatula.
- 5. Mix in the vanilla extract.
- 6. With the mixer on low speed, add the flour mixture in three parts, alternating with the buttermilk in two parts, starting and ending with the flour (Flour, Buttermilk, Flour, Buttermilk, Flour). Mix only until just combined to avoid over-developing the gluten.
- 7. Give the batter a final stir by hand with a spatula to ensure no pockets of flour remain at the bottom. Divide the batter evenly among the three prepared pans (use a kitchen scale for precision).
- 8. Bake for 25-30 minutes, or until a toothpick inserted into the center comes out clean or with just a few moist crumbs. Avoid overbaking.
- 9. Allow the cakes to cool in the pans for 10 minutes, then run a knife around the edges and invert them onto wire racks to cool completely before frosting.
- 10. To make the frosting: Beat the softened butter on medium speed until creamy (about 2 minutes). Add the confectioners’ sugar and cocoa powder alternately with the heavy cream, mixing on low speed initially to prevent a dust cloud.
- 11. Once incorporated, increase speed to high and whip for 3 minutes until fluffy and glossy. Add vanilla and salt.
- 12. Assemble the cake by placing one layer on a stand, spreading frosting on top, adding the second layer, repeating, and then frosting the top and sides of the entire cake.
Expert Cooking Tips
- ✓All ingredients must be at room temperature. Cold eggs or buttermilk can curdle the batter and prevent proper emulsion.
- ✓Do not overmix the batter once the flour is added. Overmixing activates gluten and leads to a tough, bread-like texture.
- ✓Use a kitchen scale to weigh your flour. Scooping directly with a cup often packs the flour down, leading to a dry cake.
- ✓Tap the cake pans on the counter before baking to release large air bubbles.
- ✓For ultra-smooth frosting, sift your powdered sugar and cocoa powder to remove any hard lumps.
Substitutions and Variations
If you do not have cake flour, you can make a substitute by measuring 1 cup of all-purpose flour, removing 2 tablespoons, and replacing them with 2 tablespoons of cornstarch. Sift this mixture 3-4 times to aerate it. If you are out of buttermilk, make a ‘sour milk’ substitute by adding 1 tablespoon of white vinegar or lemon juice to a measuring cup and filling it to the 1-cup line with whole milk; let it sit for 5 minutes until thickened. For the oil, you can use melted coconut oil, though it may impart a slight coconut flavor; avocado oil is a great neutral alternative. For the frosting, if you prefer a darker chocolate flavor, use black cocoa or dark cocoa powder. If you need to make this dairy-free, use high-quality plant-based butter sticks and almond milk mixed with vinegar for the buttermilk, though the texture may vary slightly.
Common Mistakes to Avoid
The most common mistake is overbaking the cake. Yellow cake dries out very quickly if left in the oven too long; start checking at the 25-minute mark. Another error is not properly creaming the butter and sugar. This step is mechanical leavening; you are punching air holes into the fat which baking powder later expands. If you rush this, your cake will be dense. Frosting a warm cake is a disaster waiting to happen; the butter in the frosting will melt, causing the layers to slide. Ensure the cakes are cool to the touch. Lastly, using cold ingredients prevents them from emulsifying, resulting in a batter that looks curdled and bakes unevenly.
Serving Suggestions
This cake is a showstopper on its own, but it pairs beautifully with a scoop of vanilla bean ice cream or a dollop of lightly sweetened whipped cream to cut the richness of the chocolate. Serve it with a cold glass of milk for a nostalgic treat, or a hot cup of dark roast coffee to complement the chocolate frosting. For a birthday celebration, garnish with colorful sprinkles or fresh berries like raspberries or strawberries, which add a tart contrast to the sweet frosting. Slice with a long, sharp knife dipped in hot water and wiped dry for clean, professional-looking cuts.
Storage and Reheating Tips
This cake can be stored at room temperature in an airtight cake carrier for up to 3 days. The oil in the batter helps keep it moist. If you are in a very hot or humid climate, it is safer to store it in the refrigerator for up to 5 days, but always let it come to room temperature before serving, as cold butter-based cakes can taste firm and dry. For long-term storage, you can freeze individual slices wrapped tightly in plastic wrap and then foil for up to 3 months. To freeze the whole cake, place it in the freezer unwrapped for an hour to set the frosting, then wrap tightly in plastic wrap and foil.
Nutrition Facts (Estimated)
| Serving Size | 1 slice |
| Calories | 650 |
| Fat | 34g |
| Saturated Fat | 18g |
| Unsaturated Fat | 14g |
| Trans Fat | 0g |
| Cholesterol | 110mg |
| Sodium | 320mg |
| Carbohydrates | 82g |
| Fiber | 3g |
| Sugar | 45g |
| Protein | 6g |
Frequently Asked Questions
Can I bake this in a 9×13 pan instead?
Yes, you can bake this in a 9×13 rectangular pan. You will likely need to increase the baking time to 35-40 minutes. Check for doneness with a toothpick.
Why did my cake sink in the middle?
Sinking usually happens if the oven door was opened too early, causing a temperature drop, or if there was too much leavening (baking powder/soda) used. Ensure your oven temperature is accurate using an oven thermometer.
Can I make the cake layers ahead of time?
Absolutely. Wrap the cooled cake layers tightly in plastic wrap and store them in the fridge for up to 2 days or freeze them for up to a month before assembling.
Why is my frosting grainy?
Grainy frosting is usually caused by powdered sugar that wasn’t sifted or butter that was too cold or too melted. Ensure your sugar is lump-free and butter is perfectly softened.
Can I use salted butter instead of unsalted?
Yes, but you should reduce the added salt in the recipe by half to ensure the cake doesn’t taste savory.
How do I get flat cake layers?
You can use ‘cake strips’ wrapped around the outside of the pan to insulate the edges, preventing them from cooking faster than the center. Alternatively, trim the domed tops with a serrated knife after cooling.
Is Dutch-processed cocoa necessary?
Dutch-processed cocoa is less acidic and has a darker color and smoother flavor. While natural cocoa powder works, the frosting will be lighter in color and slightly tangier.
Can I use gluten-free flour?
You can use a high-quality 1:1 gluten-free baking flour blend (like King Arthur or Bob’s Red Mill). The texture may be slightly different, but it generally works well.
Why do I need room temperature eggs?
Room temperature eggs mix more easily into the batter and allow for a smoother emulsion with the butter and oil, trapping more air for a lighter cake.
My cake tastes like cornbread, why?
This often happens if too much baking powder is used or if the baking powder is not aluminum-free. It can also occur if the flour-to-fat ratio is off, usually from measuring flour incorrectly.
Conclusion
Mastering the classic Yellow Layer Cake with Chocolate Frosting is a rite of passage for any home baker, and with this recipe, you are guaranteed a result that rivals any high-end bakery. The combination of the plush, golden interior and the decadent, truffle-like exterior creates a dessert that satisfies on every level. It is a labor of love that pays off in smiles and empty plates. So, preheat your oven, gather your ingredients, and get ready to bake the best birthday cake of your life. We hope this recipe becomes a cherished tradition in your family just as it is in ours.

