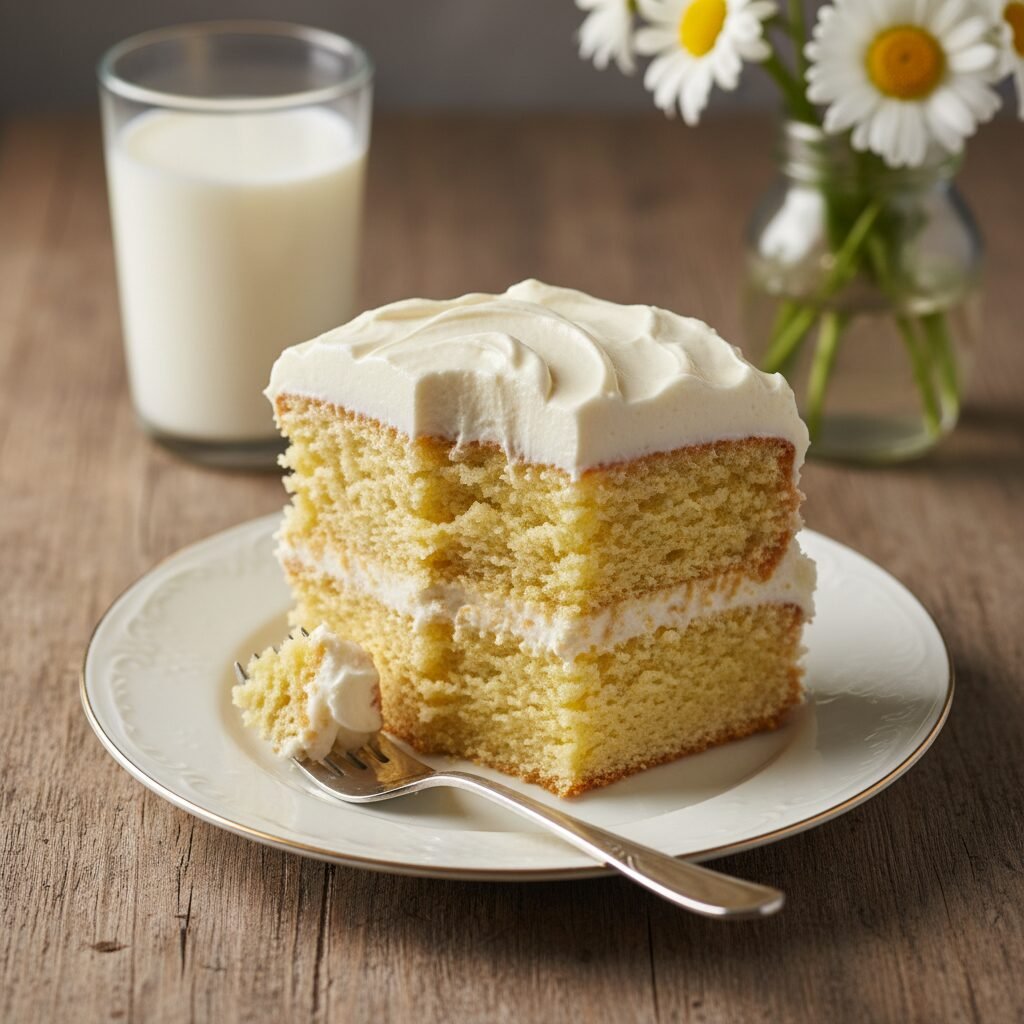
Moist Yellow Layer Cake With Vanilla Buttercream Recipe
Discover the secret to the perfect birthday cake with this incredibly moist yellow layer cake recipe. Featuring a tender, buttery crumb and paired with a silky, whipped vanilla buttercream, this scratch-made delight puts boxed mixes to shame and is guaranteed to become your new family tradition.
45 minutes
30 minutes
1 hour 15 minutes
12-14 servings
Dessert
Baking
American
Vegetarian
There is something profoundly nostalgic about a classic yellow cake. For many of us, it is the flavor of childhood birthdays, school celebrations, and Sunday afternoons at grandma’s house. However, the quest for the perfect yellow cake made from scratch—one that rivals the impossibly moist texture of those convenient boxed mixes while delivering the superior flavor of real butter and vanilla—is often fraught with dry, dense, or cornbread-like results. This recipe is the culmination of years of testing to bridge that gap. We are looking for a crumb that is tight yet tender, a flavor that is distinctly buttery without being heavy, and a structure that can hold up to generous swoops of frosting. This Moist Yellow Layer Cake is the answer. It uses a specific combination of fat sources and mixing methods to ensure that every bite melts in your mouth. Unlike a white cake, which relies on egg whites for a pristine color and delicate texture, this yellow cake embraces the richness of egg yolks, giving it that signature golden hue and a custard-like depth of flavor. Paired with a classic American Vanilla Buttercream that is whipped to an airy cloud-like consistency, this cake is a celebration of simple ingredients done right. Whether you are celebrating a milestone or just need a slice of comfort, this recipe delivers on every level, proving that the extra effort of baking from scratch is entirely worth it.
History & Origins
The history of the ‘yellow cake’ is deeply intertwined with the evolution of American baking and the availability of leavening agents. In the early 19th century, cakes were primarily leavened with yeast or by the laborious beating of egg whites, resulting in sponge cakes or pound cakes. As chemical leaveners like pearlash and eventually baking powder became commercially available in the mid-to-late 1800s, the modern ‘butter cake’ was born. The distinction between white, yellow, and gold cakes became prominent in American cookbooks during this era. White cakes utilized only egg whites and were often considered more refined, reserved for weddings and formal tea parties. Yellow cakes, utilizing whole eggs or extra yolks, were the practical, flavorful everyday cakes of the American household, ensuring no part of the egg went to waste. The mid-20th century brought the industrial revolution of food with the introduction of boxed cake mixes in the late 1940s and 1950s. Brands like Betty Crocker and Duncan Hines standardized the texture of yellow cake, creating a cultural expectation for an ultra-soft, chemically emulsified crumb. For decades, home bakers struggled to replicate that specific texture using pantry ingredients. This recipe honors that history by returning to the roots of 19th-century butter cakes but employs modern understanding of food chemistry to achieve the texture that the post-war era popularized, effectively reclaiming the yellow cake from the industrial aisle back to the home kitchen.
Why This Recipe Works
This recipe succeeds where many others fail due to a carefully calibrated balance of fats and the specific mixing method employed. First, we use a combination of butter and oil. Butter is non-negotiable for that classic flavor and structure, but butter is about 18-20% water. Oil is 100% fat and remains liquid at room temperature, which coats the flour proteins more effectively and ensures the cake stays moist for days, not just hours. Second, we utilize buttermilk rather than regular milk. The acidity in buttermilk breaks down the gluten strands in the flour, resulting in a much more tender crumb, and it also reacts with the baking soda to create a superior lift. Third, we use cake flour instead of all-purpose flour. Cake flour has a lower protein content (usually around 7-8%), which prevents the development of tough gluten networks, ensuring the cake is soft and velvety. Finally, the inclusion of extra egg yolks adds fat and emulsifiers (lecithin), which contributes to the richness and the signature golden color without making the cake heavy. The result is a cake that has the sturdiness to be stacked in layers but the melt-in-your-mouth quality of a high-end bakery creation.
Why You’ll Love This Recipe
- ✓Uses a blend of butter and oil for maximum flavor and lasting moisture.
- ✓Cake flour ensures a bakery-style, tender, and fine crumb.
- ✓Extra egg yolks provide a rich, custard-like depth and golden color.
- ✓Sturdy enough for stacking but soft enough to melt in your mouth.
- ✓The buttercream is whipped for 5 minutes to remove grit and increase fluffiness.
Equipment You’ll Need
- ✓Stand mixer with paddle attachment or electric hand mixer
- ✓Two 8-inch or 9-inch round cake pans
- ✓Kitchen scale
- ✓Sifter or fine-mesh sieve
- ✓Wire cooling rack
- ✓Offset spatula
- ✓Parchment paper
- ✓Mixing bowls
Ingredients
- ✓2 1/2 cups (285g) cake flour, sifted
- ✓2 teaspoons baking powder
- ✓1/2 teaspoon baking soda
- ✓1 teaspoon salt
- ✓3/4 cup (170g) unsalted butter, softened to room temperature
- ✓1/4 cup (60ml) vegetable oil or canola oil
- ✓1 2/3 cups (335g) granulated sugar
- ✓3 large eggs, room temperature
- ✓2 large egg yolks, room temperature
- ✓1 tablespoon pure vanilla extract
- ✓1 cup (240ml) buttermilk, room temperature
- ✓FOR THE BUTTERCREAM:
- ✓1 1/2 cups (340g) unsalted butter, slightly softened
- ✓5-6 cups (600-720g) powdered sugar, sifted
- ✓1/4 cup (60ml) heavy cream
- ✓2 teaspoons vanilla bean paste or extract
- ✓1/4 teaspoon salt
Instructions
- 1. Preheat oven to 350°F (175°C). Grease two 8-inch or 9-inch round cake pans generously. Line the bottoms with parchment paper circles and grease the parchment. Dust with flour and tap out the excess.
- 2. In a medium bowl, sift together the cake flour, baking powder, baking soda, and salt. Whisk to combine and set aside.
- 3. In the bowl of a stand mixer fitted with the paddle attachment, beat the softened butter, oil, and granulated sugar on medium-high speed for 4-5 minutes. The mixture should look pale, fluffy, and aerated. Scrape down the sides of the bowl.
- 4. Add the eggs and egg yolks one at a time, mixing well after each addition. Scrape the bowl down again. Stir in the vanilla extract.
- 5. Reduce the mixer speed to low. Add the dry ingredients in three parts, alternating with the buttermilk in two parts, starting and ending with the flour mixture (Flour, Buttermilk, Flour, Buttermilk, Flour). Mix only until just combined and no streaks of flour remain. Do not overmix.
- 6. Divide the batter evenly between the prepared cake pans. Use a kitchen scale for precision if available.
- 7. Bake for 28-32 minutes, or until a toothpick inserted into the center comes out clean or with a few moist crumbs. The cakes should spring back lightly when touched.
- 8. Remove from the oven and allow the cakes to cool in the pans for 10-15 minutes. Then, invert them onto a wire rack to cool completely before frosting.
- 9. To make the buttercream: Beat the butter on medium-high speed for 5 minutes until it is very pale and creamy. Reduce speed to low and gradually add the powdered sugar, one cup at a time.
- 10. Add the heavy cream, vanilla, and salt. Increase speed to high and whip for another 3-4 minutes until the frosting is light, airy, and fluffy.
- 11. Assemble the cake: Place one layer on your serving plate. Spread a generous layer of frosting on top. Place the second layer on top (bottom side up for a flat top). Cover the top and sides with the remaining buttercream.
Expert Cooking Tips
- ✓Ensure all ingredients, especially eggs, butter, and buttermilk, are at room temperature to prevent the batter from curdling.
- ✓Weigh your flour using a kitchen scale for the most accurate results; too much flour causes a dry cake.
- ✓Do not overmix the batter once the flour is added; stop mixing as soon as the white streaks disappear to keep the cake tender.
- ✓Tap the cake pans on the counter 2-3 times before baking to release any large air bubbles.
- ✓Chill the cake layers for 20 minutes before frosting to make them easier to handle and reduce crumbs.
- ✓If the buttercream is too stiff, add more cream one teaspoon at a time; if too soft, add more powdered sugar.
Substitutions and Variations
Baking is a science, so substitutions should be made with care. If you do not have cake flour, you can make a DIY version by measuring 1 cup of all-purpose flour, removing 2 tablespoons, and replacing them with 2 tablespoons of cornstarch; sift 3 times before using. If buttermilk is unavailable, you can create a sour milk substitute by adding 1 tablespoon of white vinegar or lemon juice to a measuring cup and filling it to the 1-cup line with whole milk; let it sit for 5 minutes before using. You can substitute the vegetable oil with melted coconut oil, though this may impart a slight coconut flavor. For the frosting, half-and-half or whole milk can be used instead of heavy cream, though the texture will be slightly less rich.
Common Mistakes to Avoid
The most common mistake is using cold ingredients, which prevents the batter from emulsifying properly and leads to a dense cake. Another frequent error is measuring flour by scooping the measuring cup directly into the bag, which packs the flour down and can result in up to 50% more flour than the recipe calls for; always spoon and level or weigh your flour. Opening the oven door too early during baking can cause the center of the cake to sink due to a sudden drop in temperature. Finally, frosting the cake before it is completely cool will cause the butter in the frosting to melt, leading to sliding layers and a greasy finish.
Serving Suggestions
This classic yellow cake is versatile and pairs beautifully with fresh berries like strawberries or raspberries to cut through the sweetness. For a festive touch, add rainbow sprinkles to the batter for a ‘funfetti’ version or coat the outside of the frosted cake with them. It is best served at room temperature, as cold butter in the cake can make it feel firm. A scoop of vanilla bean ice cream or a cup of dark roast coffee makes for the perfect accompaniment.
Storage and Reheating Tips
Store the frosted cake at room temperature in an airtight cake carrier for up to 3 days; the sugar and fat act as preservatives. If you live in a very hot or humid climate, you may need to refrigerate it, but let it come to room temperature before serving for the best texture. Unfrosted cake layers can be wrapped tightly in plastic wrap and aluminum foil and frozen for up to 3 months. Thaw frozen layers in the refrigerator overnight before frosting. Leftover slices can also be frozen in airtight containers.
Nutrition Facts (Estimated)
| Serving Size | 1 slice |
| Calories | 650 |
| Fat | 34g |
| Saturated Fat | 18g |
| Unsaturated Fat | 14g |
| Trans Fat | 0.5g |
| Cholesterol | 110mg |
| Sodium | 320mg |
| Carbohydrates | 82g |
| Fiber | 0.5g |
| Sugar | 45g |
| Protein | 5g |
Frequently Asked Questions
Can I make this recipe into cupcakes?
Yes, this batter works perfectly for cupcakes. It will yield approximately 24 cupcakes. Bake them at 350°F for 18-22 minutes.
Why did my cake sink in the middle?
Sinking usually happens if the oven door was opened too early, the cake was underbaked, or there was too much leavening agent (baking powder/soda). Ensure your oven temperature is accurate using an oven thermometer.
Can I use salted butter instead of unsalted?
Yes, you can. If you use salted butter, reduce the added salt in the recipe to 1/4 teaspoon to avoid an overly salty cake.
How do I get my buttercream perfectly smooth?
Make sure your butter is properly softened but not melted. After whipping, use a spatula to mash the frosting against the side of the bowl by hand for a minute to push out large air bubbles.
Can I use all-purpose flour instead of cake flour?
Technically yes, but the texture will be more like a muffin or cornbread—heavier and less tender. Cake flour is highly recommended for that soft, bakery-style crumb.
Can I bake this in a 9×13 inch pan?
Absolutely. Grease a 9×13 pan and bake for 35-40 minutes. Watch the center to ensure it is fully cooked.
Why is my cake dry?
Dry cake usually results from over-measuring flour or over-baking. Check the cake a few minutes before the timer goes off.
Can I make the cake layers ahead of time?
Yes, baking the layers a day in advance actually makes them easier to frost. Wrap them tightly in plastic wrap once cooled and store at room temperature overnight.
Conclusion
Mastering the classic yellow layer cake is a rite of passage for any home baker, and this recipe provides the reliable, delicious foundation you need. With its golden, buttery interior and sweet, creamy exterior, it is a dessert that brings joy to any occasion. Whether you are baking for a birthday, a holiday, or just a Tuesday night treat, this cake is sure to impress. Don’t forget to share your creations and tag us on social media—we love seeing how you decorate your masterpieces!

